
How to Set Up Restrictions for Design Tool Using Custy
This setting lets you control what shoppers can do in the Design Lab on one product. You can turn off Add text, Add clipart, Upload, or Add to cart.
Unchecked tools stay disabled in the Design Lab for that product. Other products keep their own settings. Changing this does not delete your Shopify products.
What Design Tool restrictions do
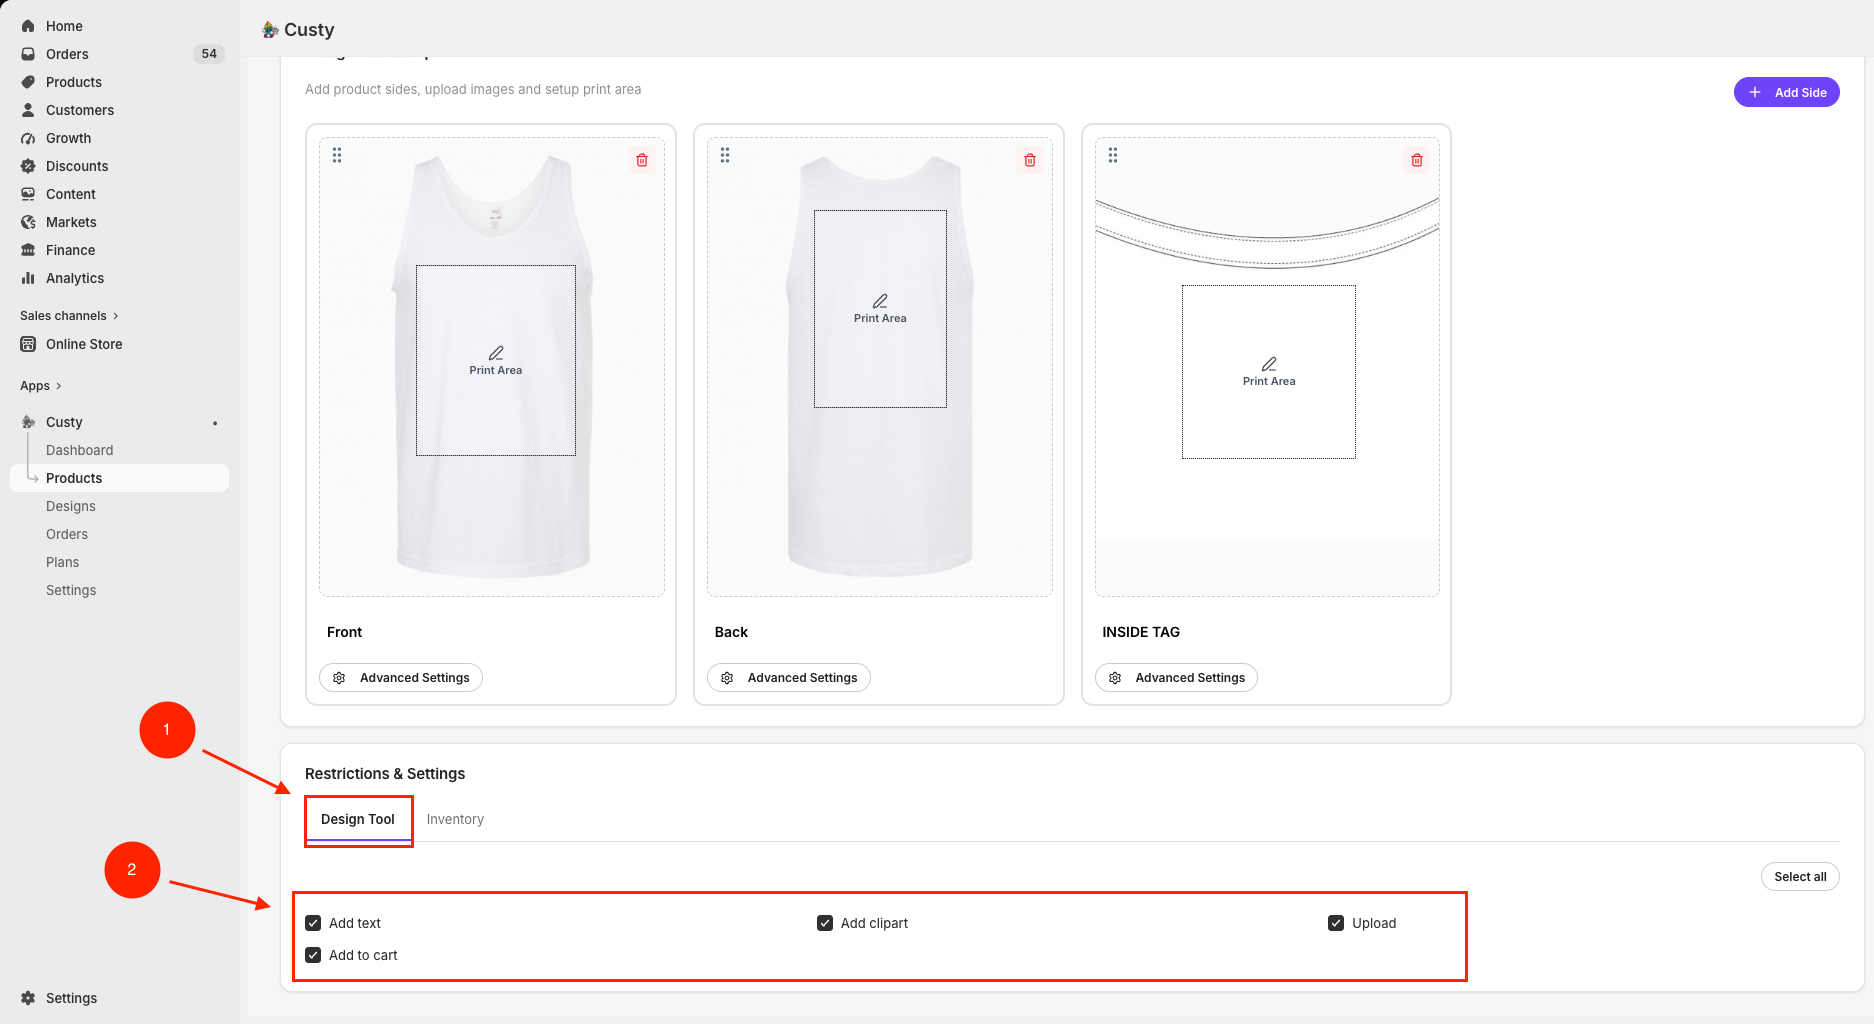
On Customize Product, the Restrictions & Settings section has a Design Tool tab. Each checkbox is a shopper tool. Checked means the tool is on. Unchecked means it is off for this product.
- 1Add text: shoppers can add words (Design Lab: Add Text).
- 2Add clipart: shoppers can add library graphics (Design Lab: Add Graphic).
- 3Upload: shoppers can upload their own pictures.
- 4Add to cart: shoppers can add the finished design to the cart.
Step 1: Open the Design Tool tab
In Custy, click Products on the left. Find the customizable product and click Edit. If it is still a standard Shopify product, click Make it customizable first.
On Customize Product, scroll to Restrictions & Settings. Stay on the Design Tool tab (it is the default).
- Open Products and click Edit on the product.
- Scroll to Restrictions & Settings.
- Click Design Tool if you are on Inventory instead.
Inventory and printing type limits are separate
The Inventory tab tracks stock (Starter or higher). Order size limits and upload filters live on each printing type under Restrictions. This article covers Design Tool only.
 Full size
- 1
Design Tool
The tab for shopper tools. Inventory is a separate tab for stock (Starter or higher).
- 2
Add text / Add clipart / Upload / Add to cart
Uncheck a box to disable that tool in the Design Lab. Use Select all to turn every tool on.
Step 2: Select or deselect the tools
Click the checkbox next to each tool to enable or disable it. Leave a tool checked if shoppers should use it. Uncheck it if they should not.
- Uncheck Add text if shoppers should not type on this product.
- Uncheck Add clipart if they should not use your clipart library.
- Uncheck Upload if they should not upload their own files.
- Uncheck Add to cart if they should not add this design to the cart (for example a preview-only product).
- Click Select all if you want every tool on again.
Step 3: Save the product
Restrictions save with the product. There is no separate Save button on the Design Tool tab.
- Click Save at the top of Customize Product.
- You should see a short Product saved message.
- Optional: open Design Panel or the live Customize It button and confirm the disabled tools cannot be used.
What to do next
Finish print areas and printing fees if you have not already. Then check the Design Lab so shoppers only see the tools you left on. Use Inventory if you also need stock limits.