
How to Add Quantity Discounts on Product Page Using Custy
After you create quantity discount sets, you can show a discount table on the product page so shoppers see Buy more, Save more before they customize.
Display Settings are global for your store. They apply to every discount set. This needs Starter or Pro.
Step 1: Open Display Settings
In Custy, click Products on the left, then open the Quantity Discount tab. Click Display Settings to open the global product-page options.
- Open Products → Quantity Discount.
- Click Display Settings.
- Under Display on product page, click Yes to show the table (or No to hide it).
- When you finish the fields below, click Save Settings.
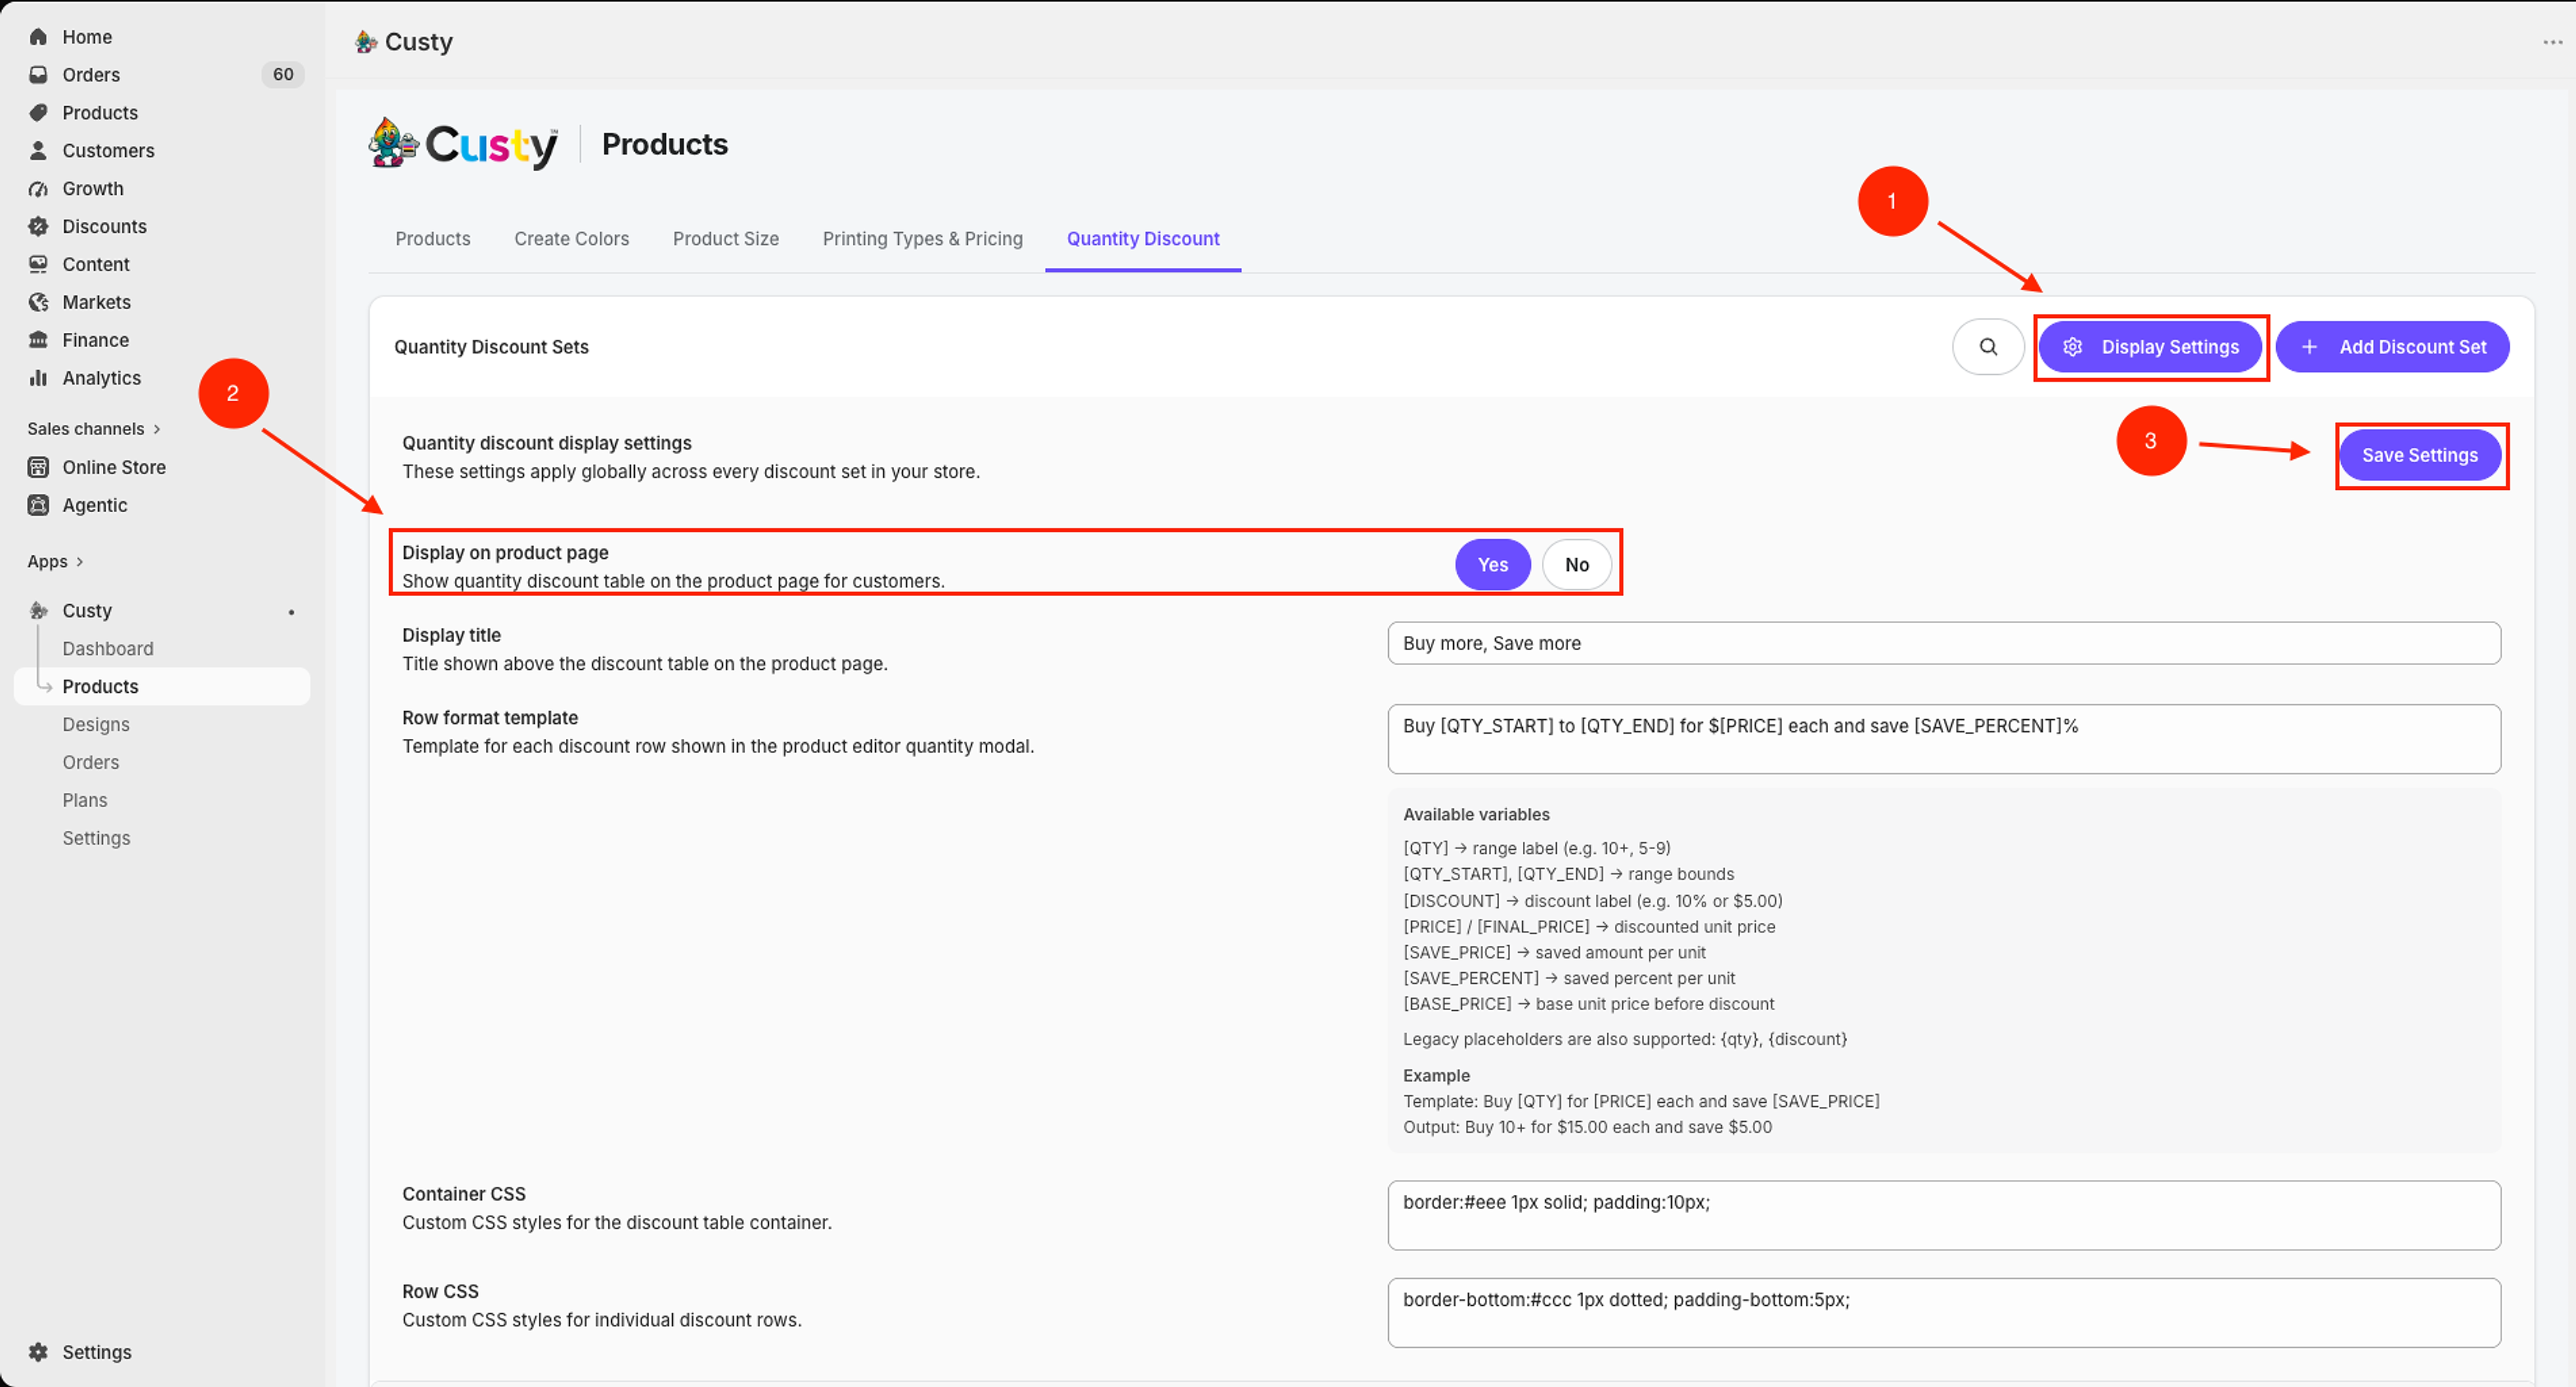 Full size
- 1
Display Settings
Opens the global product-page display options for quantity discounts.
- 2
Display on product page
Click Yes to show the table for customers, or No to hide it.
- 3
Save Settings
Saves these display options for the whole store.
Step 2: Show or hide the table
Under Display on product page, click Yes to show the quantity discount table for customers. Click No if you do not want the table on the product page.
- Click Yes to show the table, or No to hide it.
Step 3: Set the display title
In Display title, enter the heading above the discount table (for example Buy more, Save more).
- Type the title shoppers should see above the table.
Step 4: Set the row format template
In Row format template, control the text for each discount row. Use the variables Custy lists under Available variables.
- 1[QTY] → range label (for example 10+ or 5-9)
- 2[QTY_START] / [QTY_END] → range bounds
- 3[PRICE] / [FINAL_PRICE] → discounted unit price
- 4[SAVE_PRICE] → amount saved per unit
- 5[SAVE_PERCENT] → percent saved per unit
- 6[DISCOUNT] → discount label (for example 10% or $5.00)
- 7[BASE_PRICE] → unit price before discount
- Enter a template such as: Buy [QTY_START] to [QTY_END] for $[PRICE] each and save [SAVE_PERCENT]%
- Check the example output under Available variables if you need a starting point.
Legacy placeholders
Older tags like {qty} and {discount} still work if you already used them.
Step 5: Optional Container CSS and Row CSS
Use Container CSS for the discount table wrapper. Use Row CSS for each row. Leave them blank to keep the default look.
- Optional: add CSS in Container CSS (for example padding or background).
- Optional: add CSS in Row CSS (for example a bottom border).
Step 6: Save Settings
Click Save Settings. You should see Settings saved successfully when the save works.
- Click Save Settings.
- Optional: open a live product page and confirm the table shows (or stays hidden) as you chose.
What to do next
Attach the discount set on every custom product that should use it. Then test a bulk quantity in the Design Lab size and quantity picker.