
How to Set Quantity Discounts Using Custy
Quantity discounts reward shoppers who buy more pieces. Custy applies the discount to customized products using your price rules (base product, sizes, colors, and printing), not only Shopify’s native discount tools.
You create shared discount sets once, then attach one set per product. Changing a set updates every product that uses it. This needs Starter or Pro.
Who can use Quantity Discount?
Quantity discounts need Starter or Pro. On Free, the Quantity Discount tab on Customize Product stays locked, and you see: Quantity discounts require the Starter plan or higher.
Step 1: Open the Quantity Discount tab
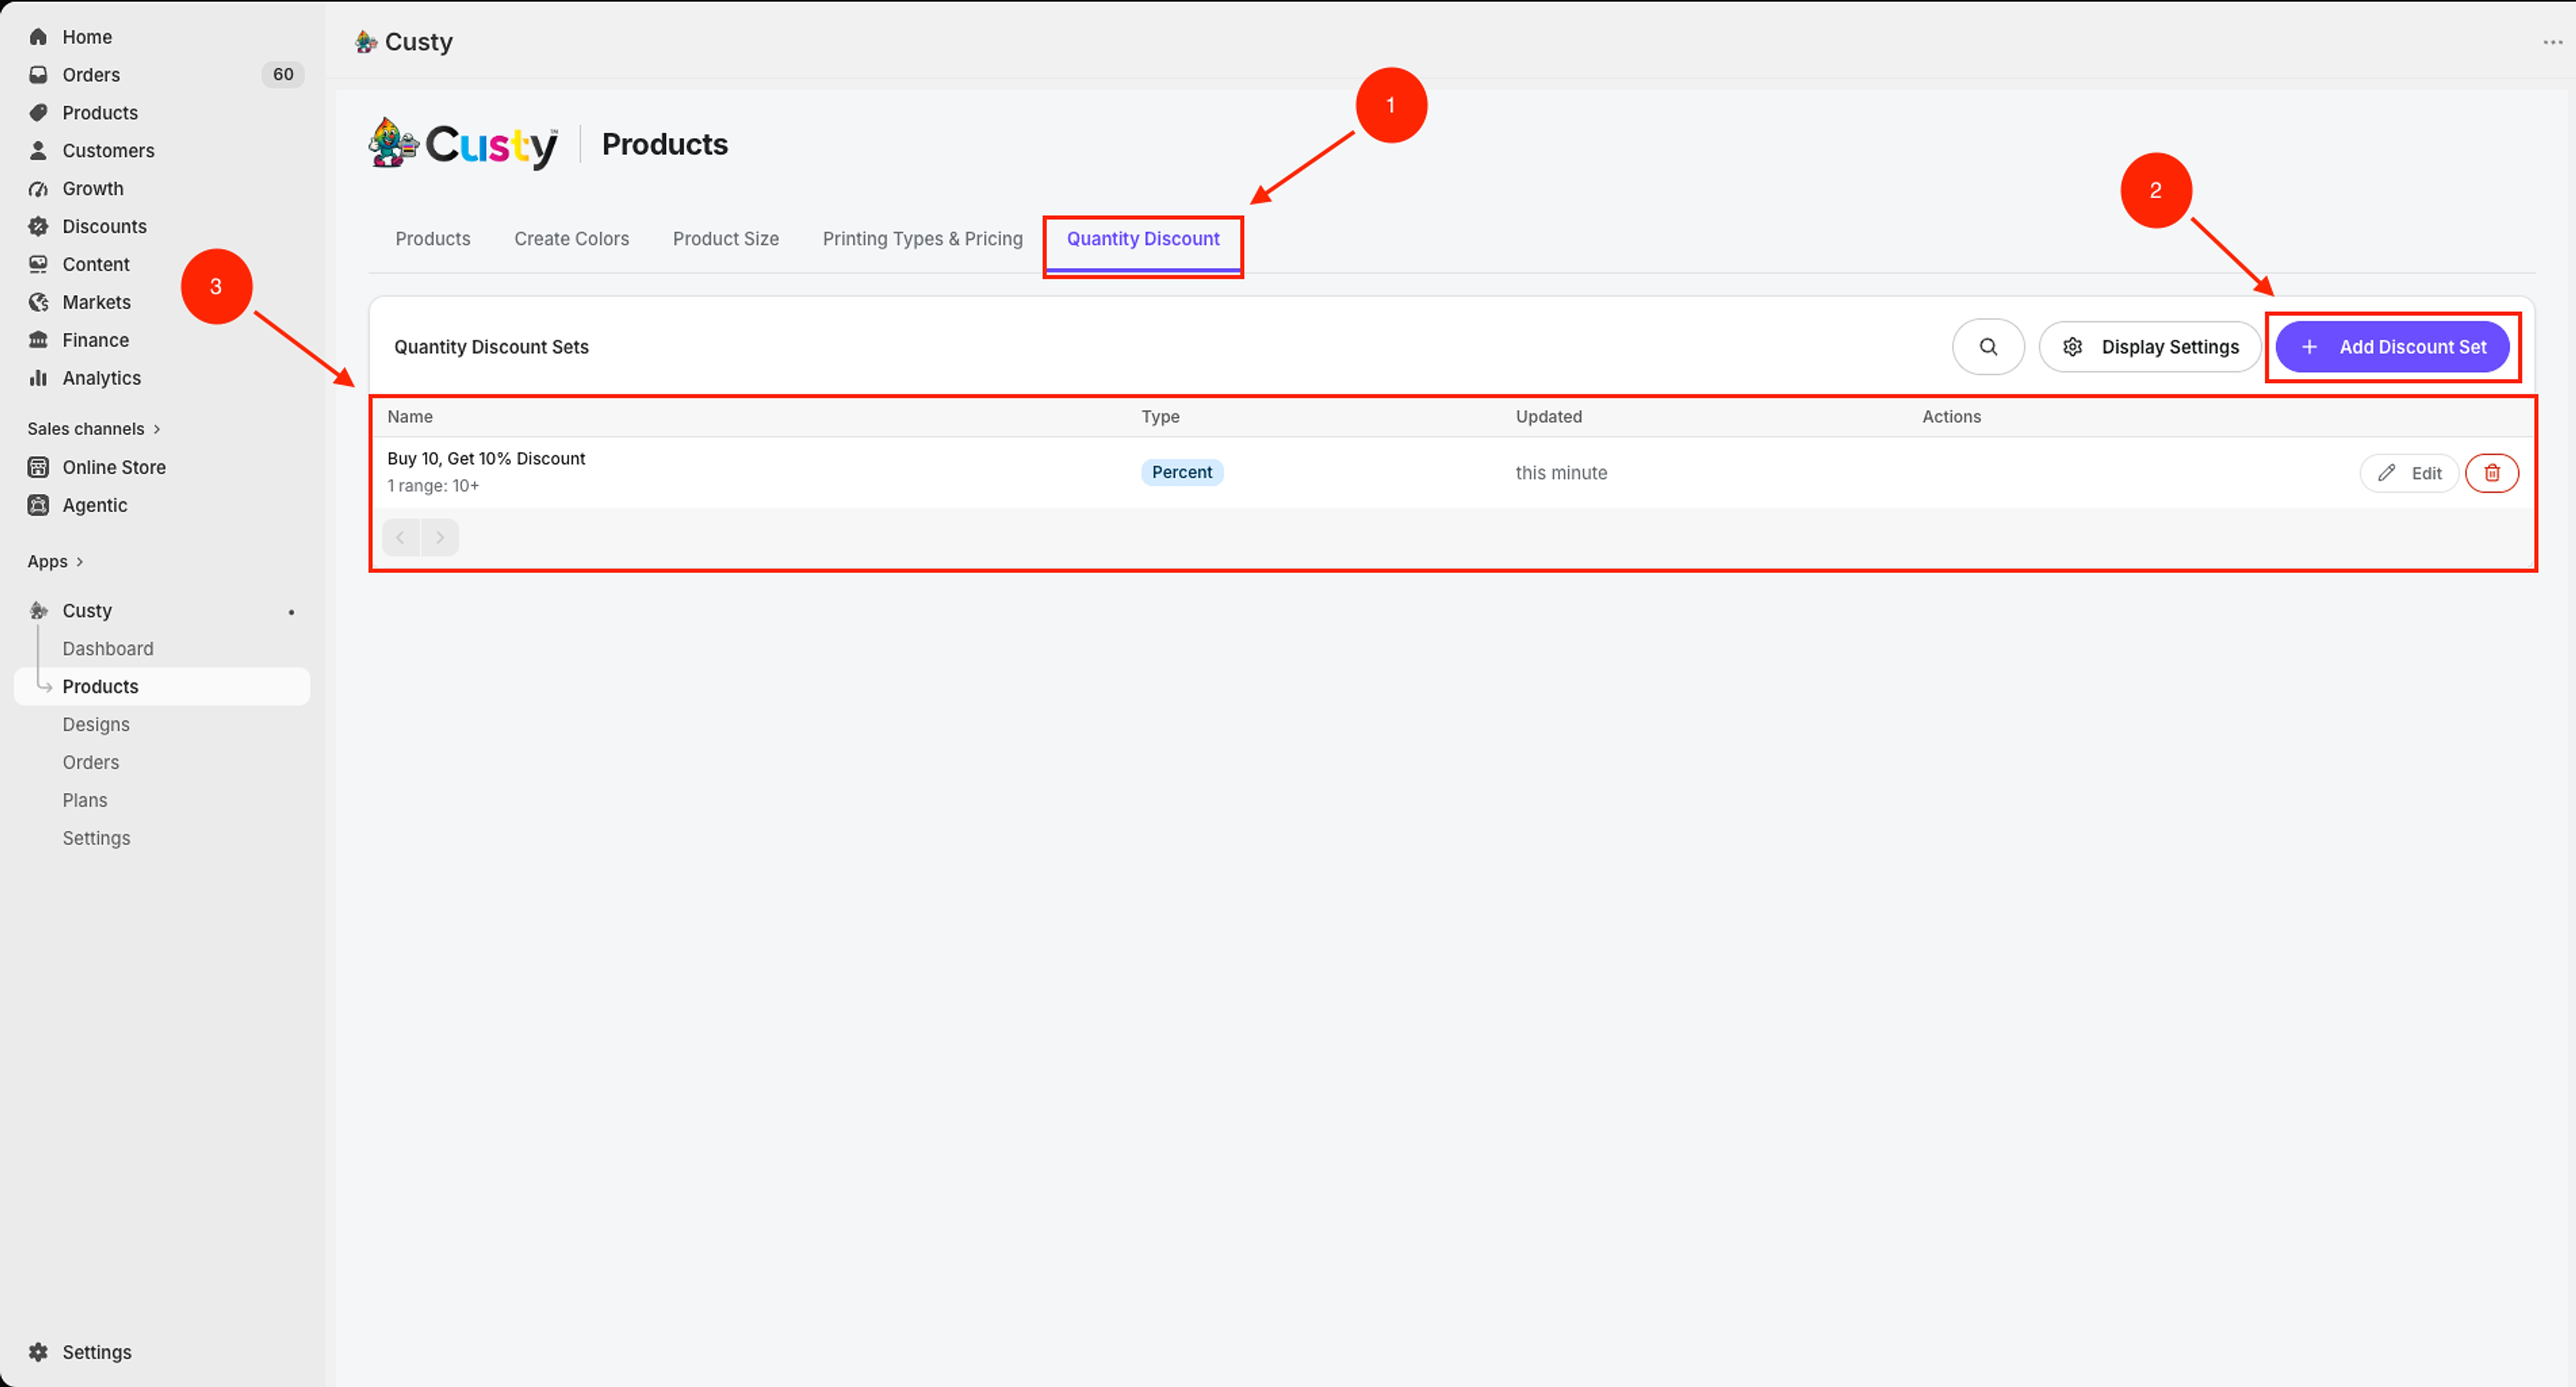
In Custy, click Products on the left. At the top, click the Quantity Discount tab (next to Printing Types & Pricing).
- Open Products.
- Click Quantity Discount.
Display Settings
The Display Settings button on this tab controls how the discount table looks on the product page. See the product-page display guide for that.
 Full size
- 1
Quantity Discount
Top tab for store-wide discount sets (next to Printing Types & Pricing).
- 2
Add Discount Set
Create a new set. Needs Starter or higher.
- 3
Discount sets list
Each row shows the set name, Percent or Fixed type, ranges, and Edit / delete.
Step 2: Add or edit a discount set
Click Add Discount Set to create a new set. Or click Edit on a row to change an existing set. Delete removes the set (products using it lose that discount).
- Click Add Discount Set, or Edit on a set you already have.
- Optional: use search to find a set by name.
Step 3: Configure the discount set
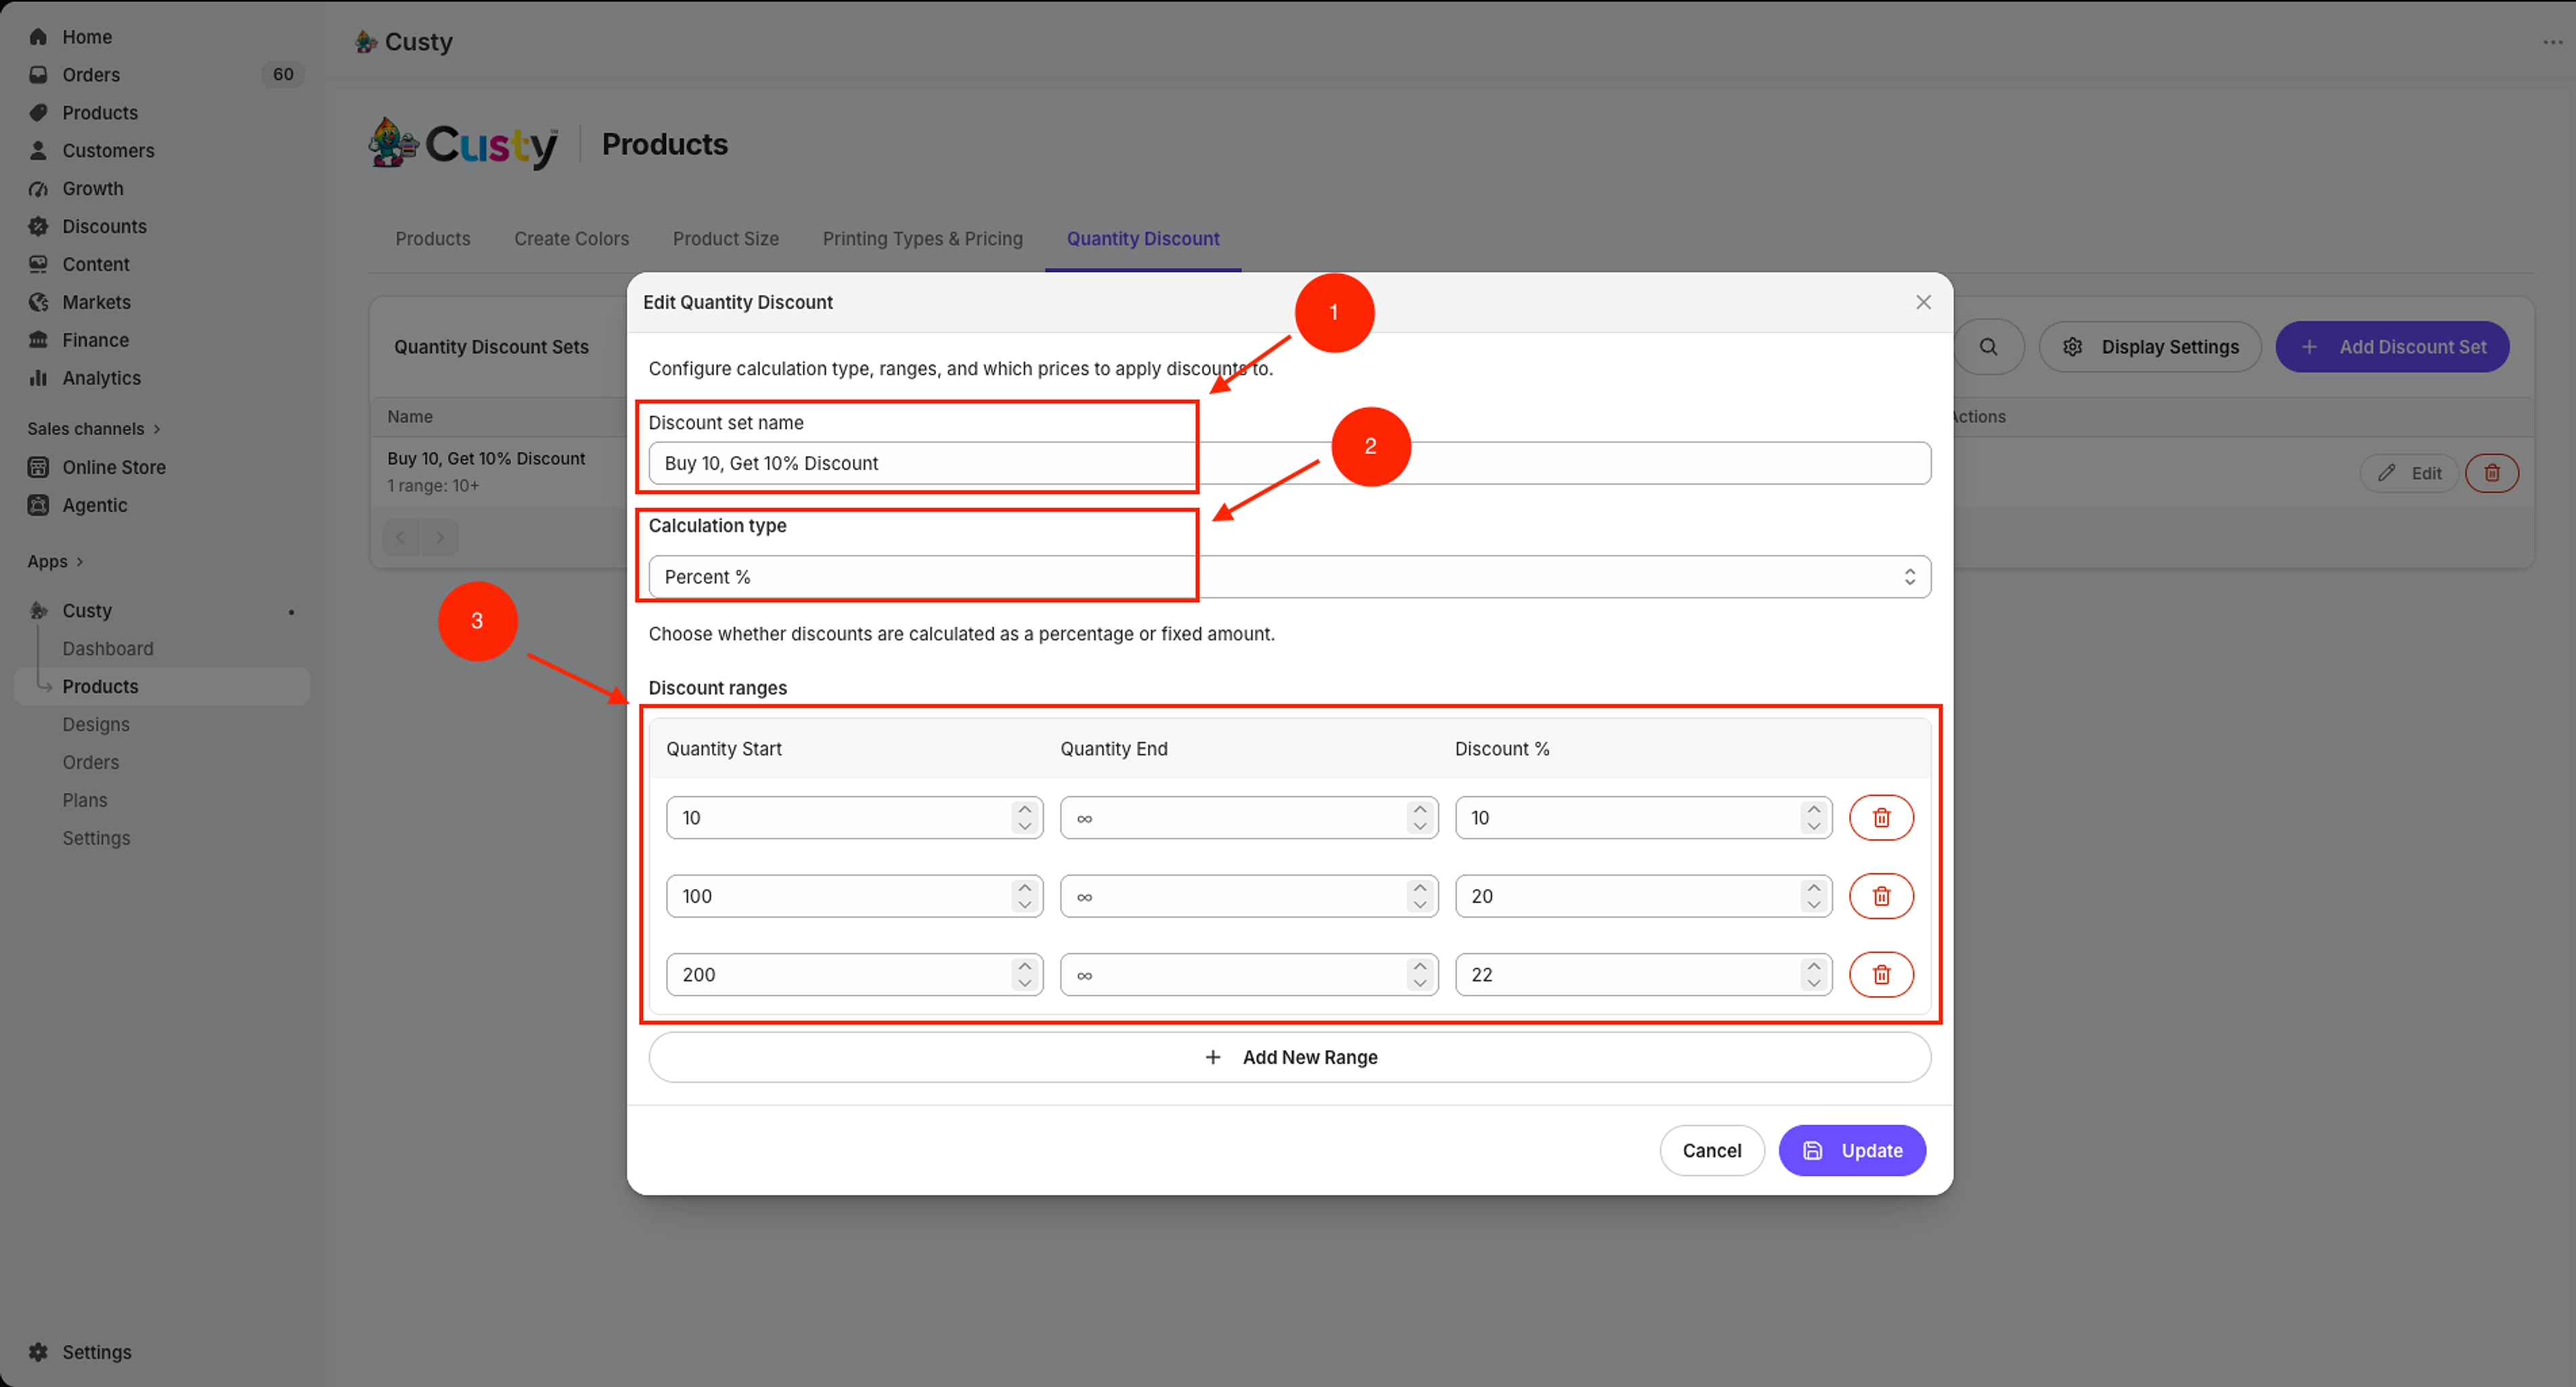
In Add Quantity Discount (or Edit Quantity Discount), fill in the set name, calculation type, and quantity ranges.
- 1Discount set name: for example Bulk print or Team orders.
- 2Calculation type: Percent % (for example 5% off) or Fixed $ (for example $2.00 off per piece).
- 3Quantity Start / Quantity End: the piece count for that tier. Leave Quantity End empty for “and higher” (shown as unlimited).
- 4Discount % or Discount $: only the amount off, not the shopper’s final unit price.
- Enter a Discount set name.
- Choose Percent % or Fixed $.
- Fill at least one range. Click Add New Range if you need more tiers.
- Click Save on a new set, or Update when editing.
 Full size
- 1
Discount set name
A clear name you will recognize when attaching the set to products.
- 2
Calculation type
Percent % or Fixed $. Enter the discount amount, not the final price after discount.
- 3
Discount ranges
Quantity Start, optional Quantity End (blank means no upper limit), and Discount % or Discount $. Click Add New Range for more tiers.
Step 4: Attach the set to a product
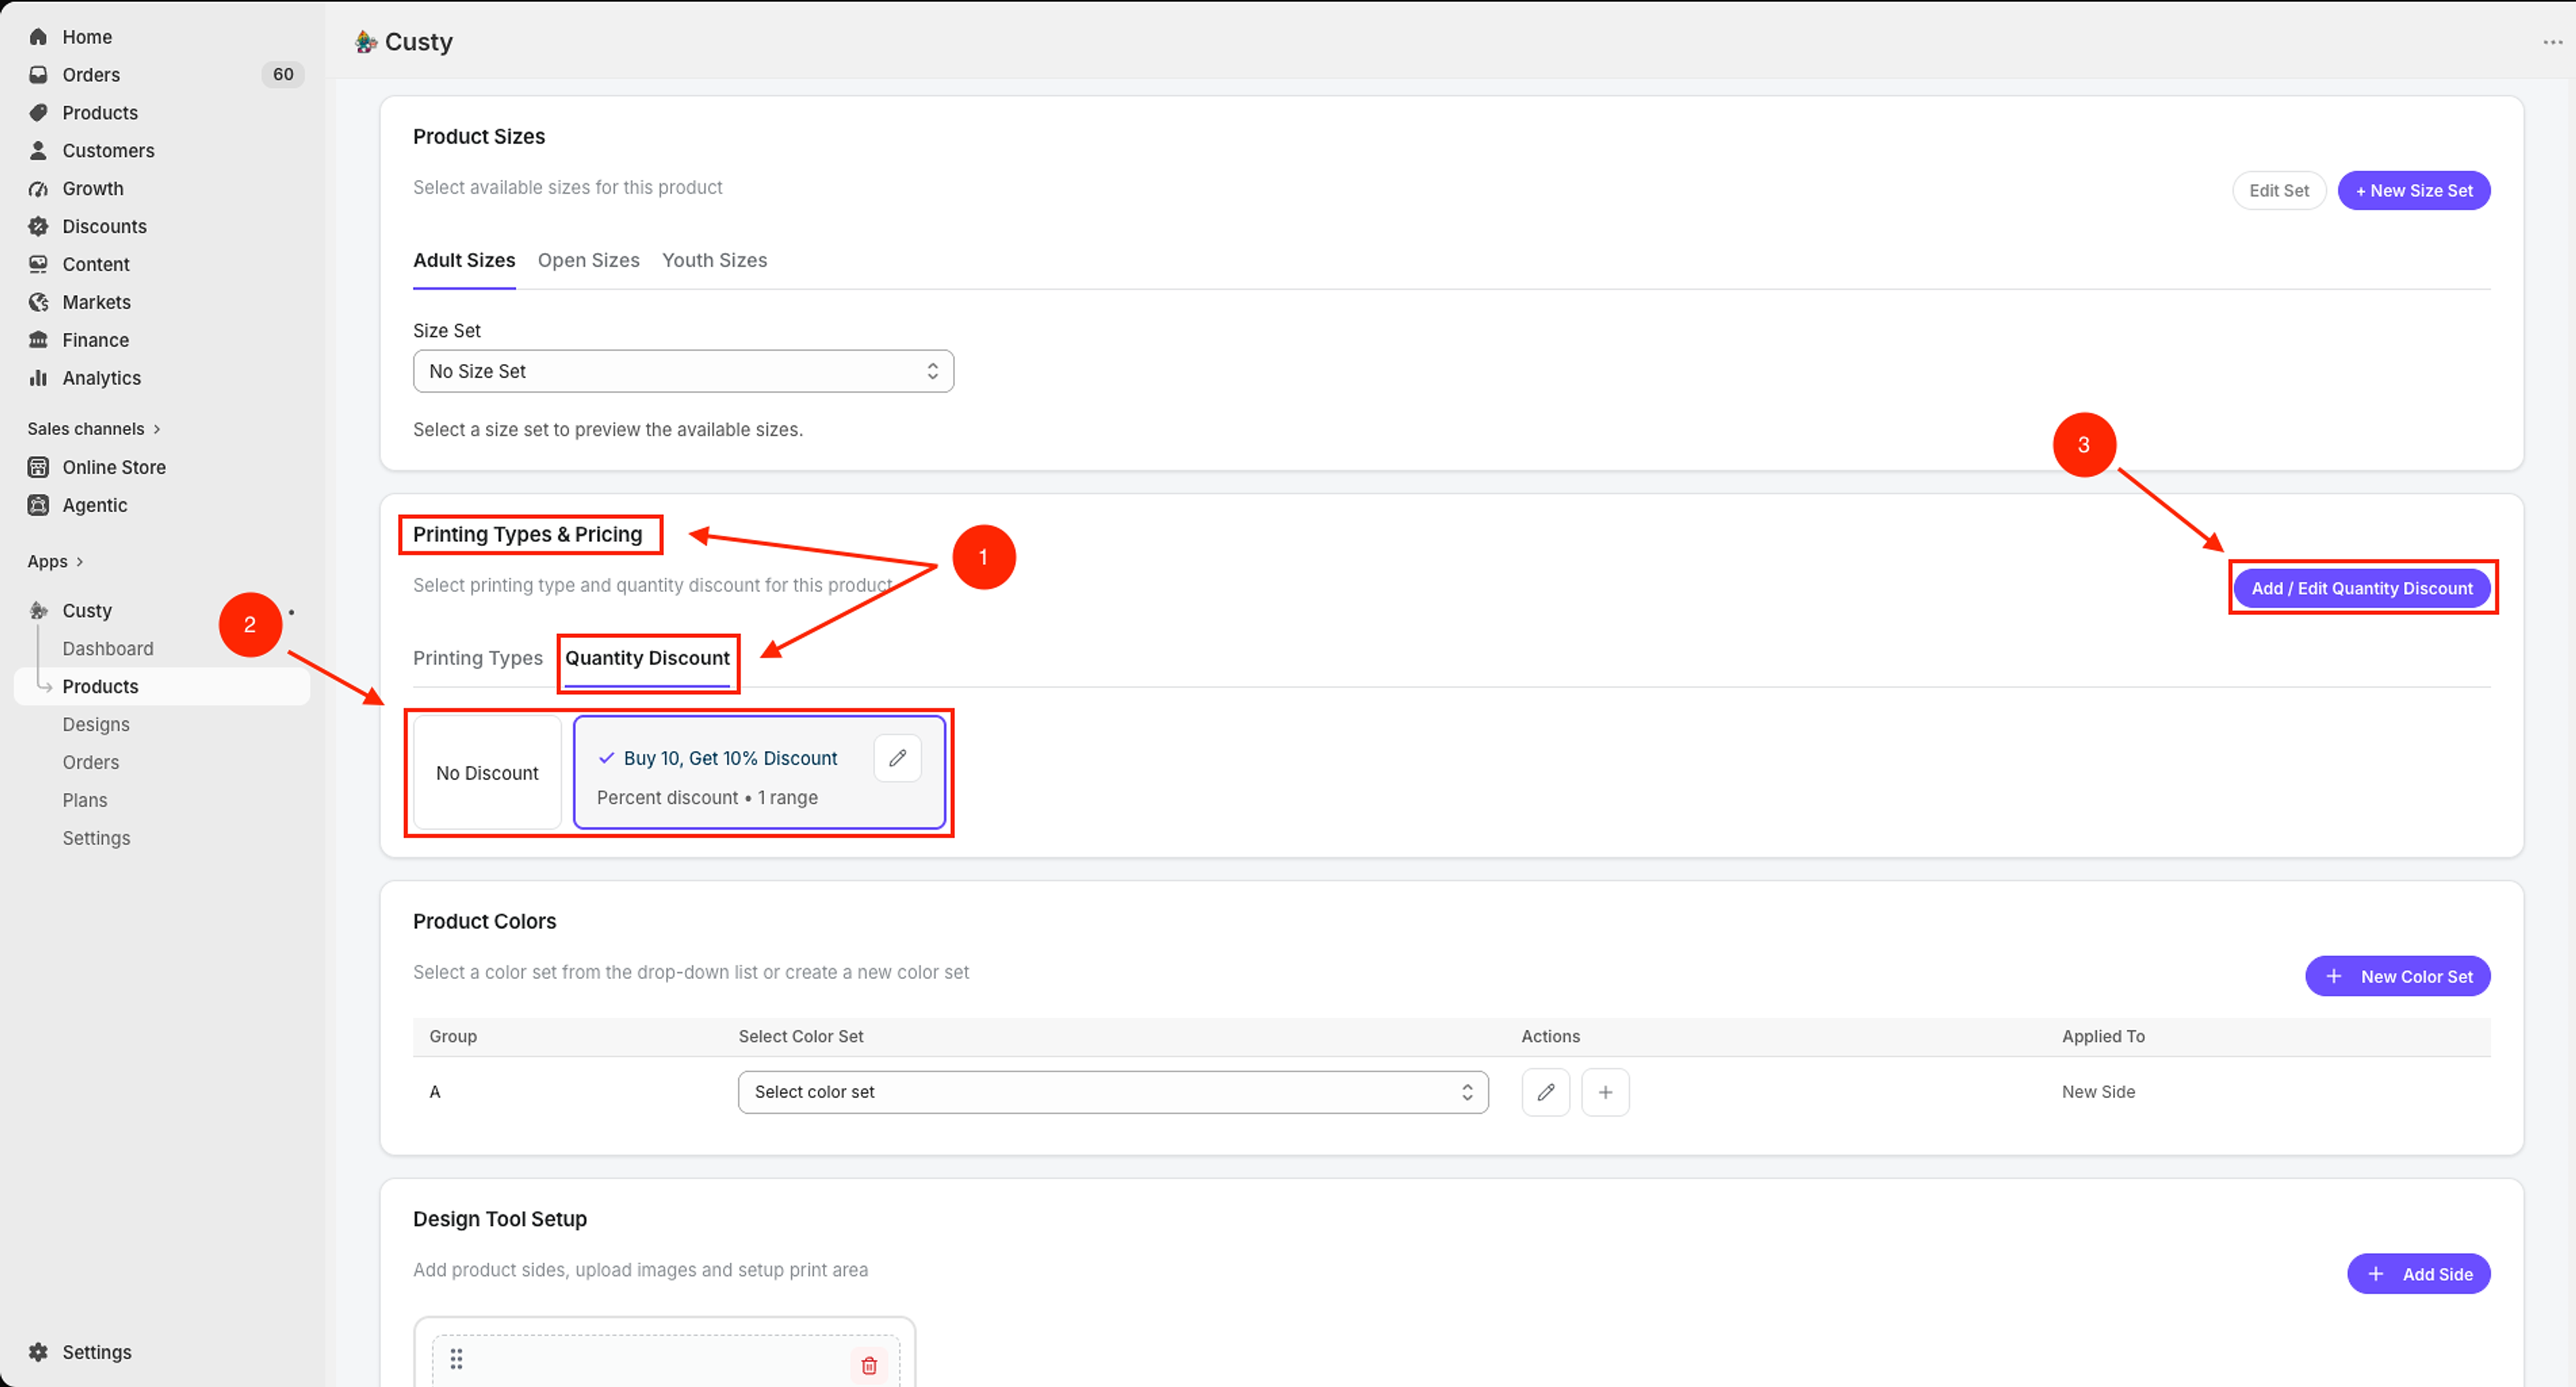
Open the product with Edit. Scroll to Printing Types & Pricing. Click the Quantity Discount tab. Pick your set, or leave No Discount.
- Click Edit on the product.
- Open Printing Types & Pricing → Quantity Discount.
- Click the discount set you want (or No Discount).
- Optional: click Add / Edit Quantity Discount to create or change a set without leaving the product.
- Click Save at the top of Customize Product.
Autosave note
Choosing a discount set on the product can save with the product flow. Still click Save after other Customize Product changes so everything stays in sync.
 Full size
- 1
Printing Types & Pricing / Quantity Discount
On Customize Product, open this section, then click the Quantity Discount tab.
- 2
Discount set
Click the set you want (for example Buy 10, Get 10% Discount), or leave No Discount.
- 3
Add / Edit Quantity Discount
Create or edit a discount set without leaving the product screen.
What to do next
If you want shoppers to see a Buy more, Save more table on the product page, turn that on in Display Settings. Then check the Design Lab quantity picker with a bulk order.