
How to Set Up Print and Mark Area?
In Custy, each product side has a Print Area (where shoppers may place designs) and optional Mark Areas (guides that help shoppers see the space without changing what gets printed).
Upload a product photo first, then set these boxes in Advanced Settings. Changing them does not delete your Shopify products.
Print Area vs Mark Areas
Custy uses two related tools on each side. They look similar on the canvas, but they do different jobs.
- 1Print Area: the fixed printable window. Shoppers can only place text and pictures inside this box. Printing follows this boundary.
- 2Mark Areas: optional indication shapes (rectangle or circle) that guide placement in the Design Lab. They do not replace the print area for production.
1. Print Area
The Print Area feature lets you define the exact region on a product where shoppers can place and customize their designs. That keeps placement accurate and helps maintain print quality by keeping artwork inside a clear boundary.
Step 1: Open Advanced Settings
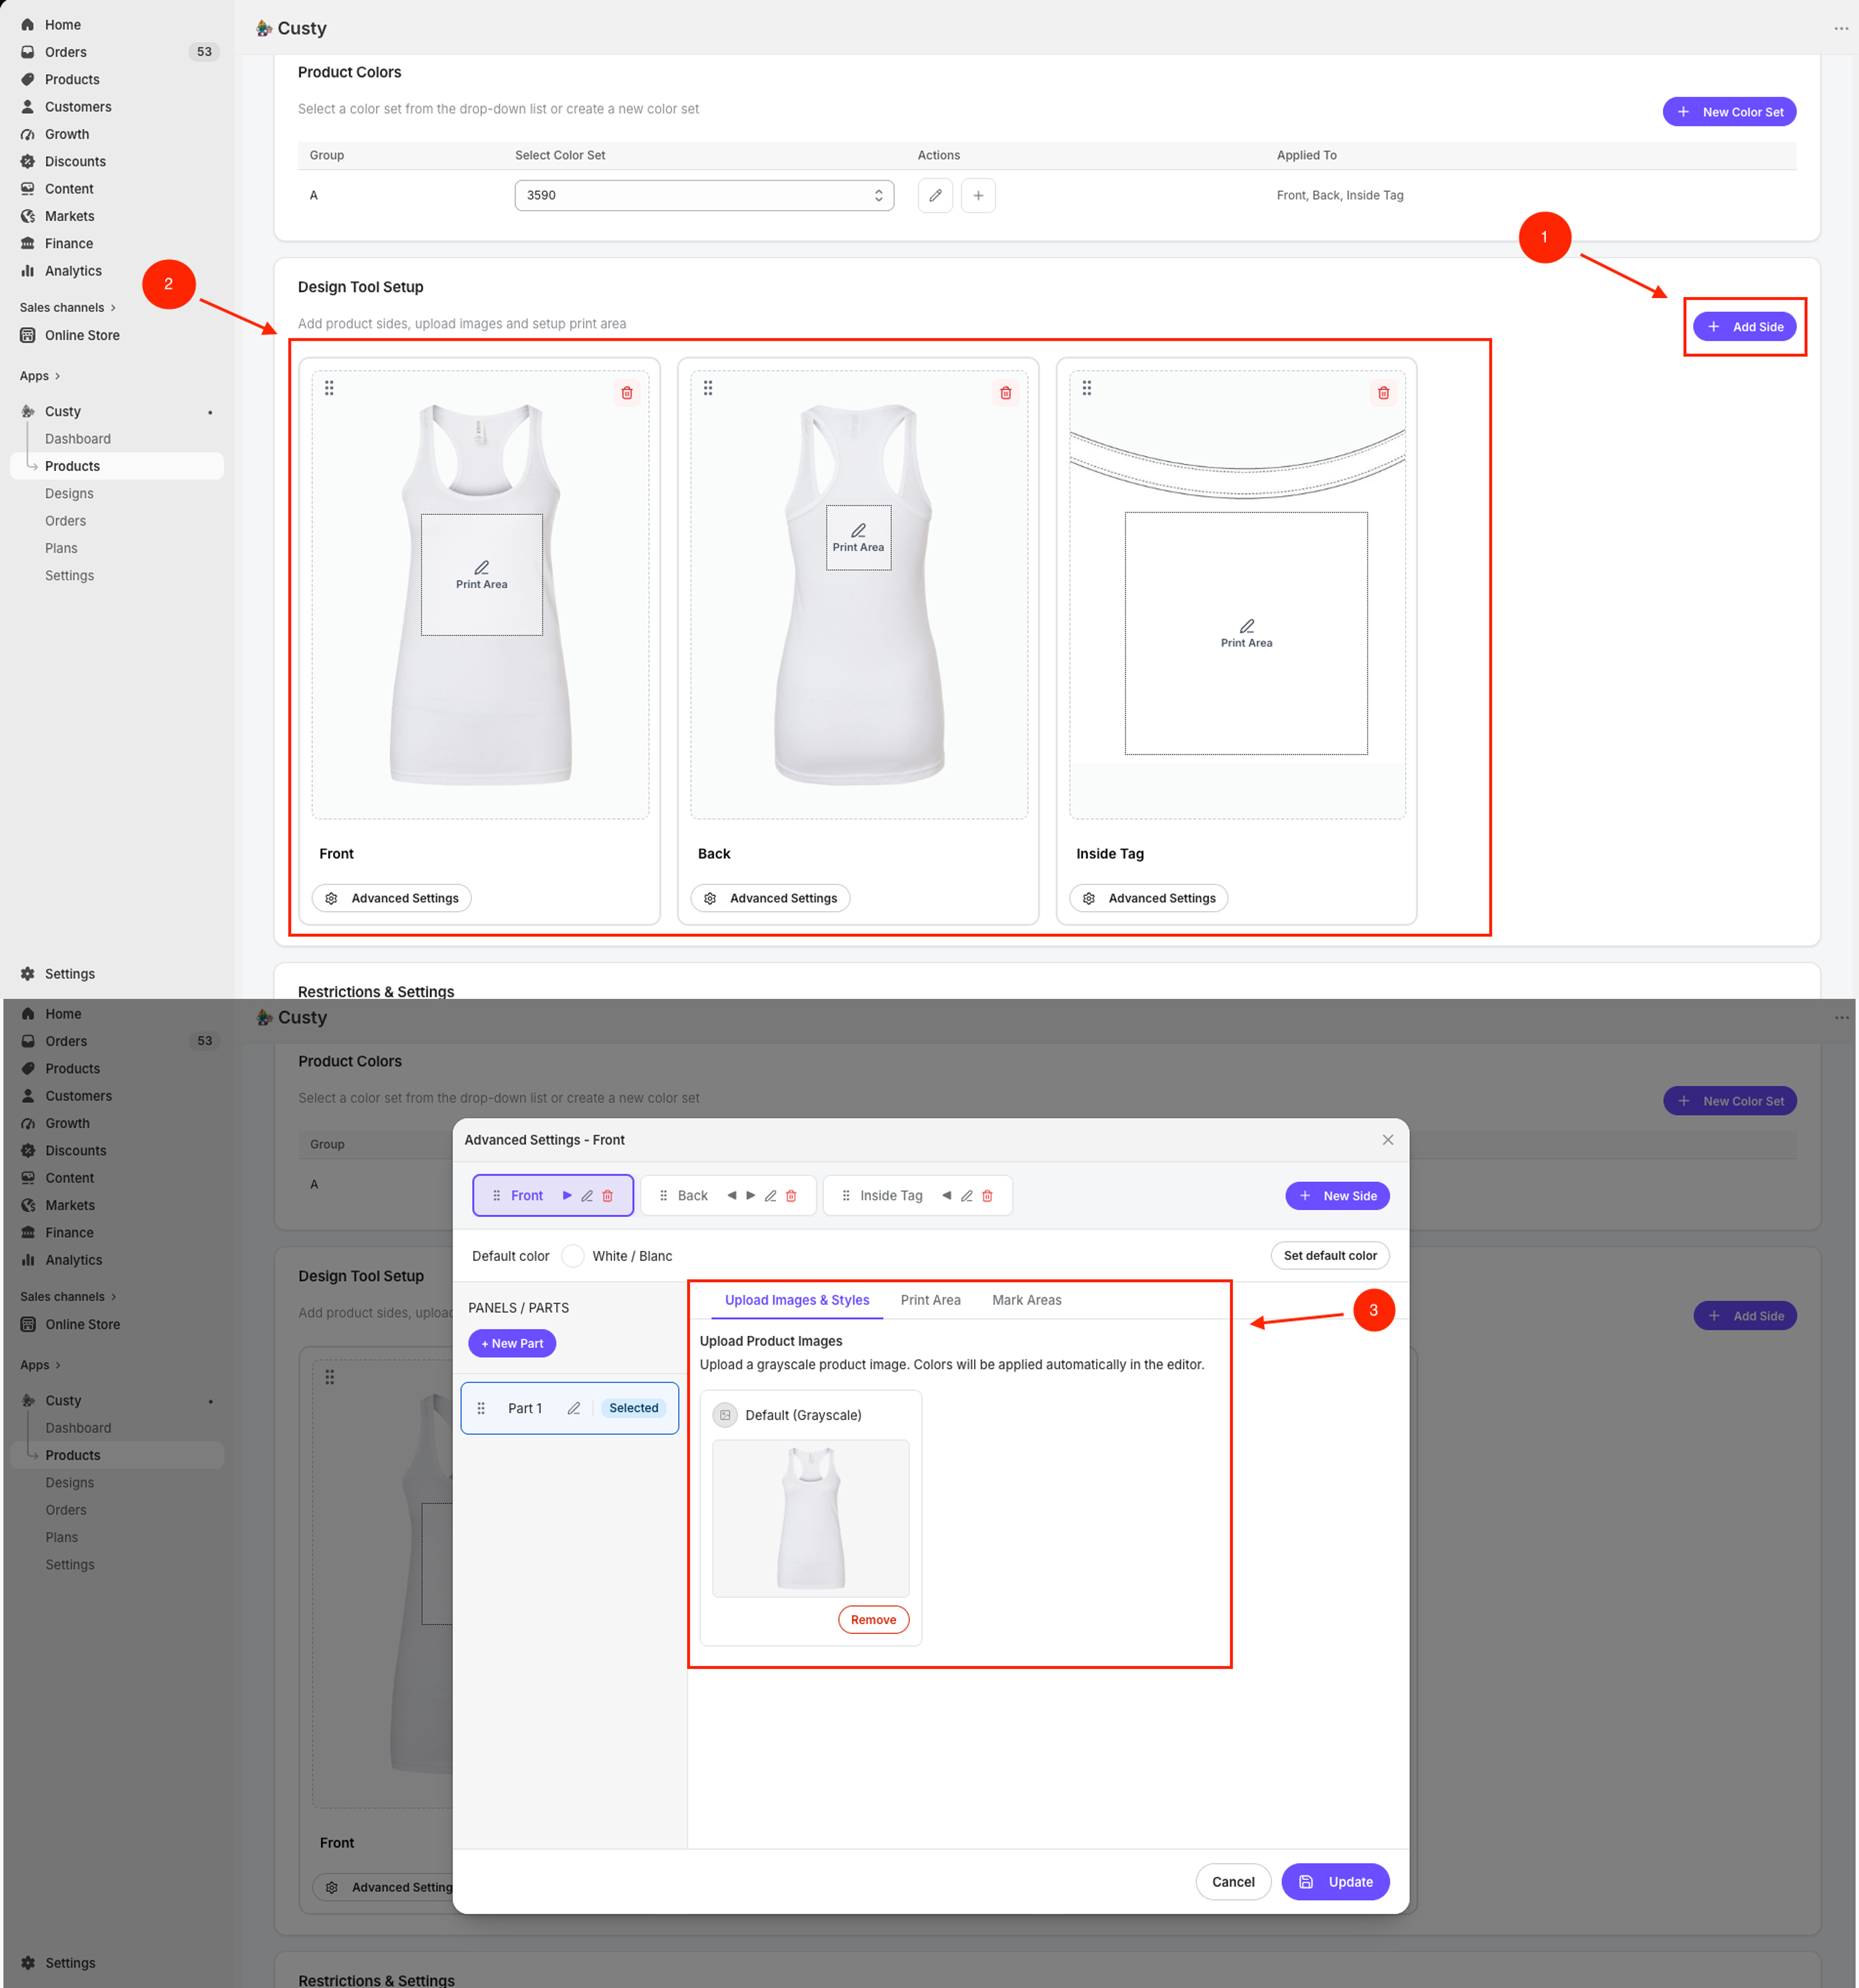
In Custy, open the product with Edit (or Make it customizable first). Scroll to Design Tool Setup, then click Advanced Settings on the side you want (Front, Back, and so on).
Need a photo first?
If Advanced Settings says there is no image, open Upload Images & Styles, upload Default (Grayscale) or a per-color photo, then come back to Print Area.
 Full size
- 1
Add Side
Add every printable face first if you need more than one.
- 2
Side list
Rename, reorder, or delete sides. The preview shows the print box.
- 3
Advanced Settings
Opens the modal where Print Area and Mark Areas live.
Step 2: Go to Print Area
In Advanced Settings, click the Print Area tab (next to Upload Images & Styles and Mark Areas).
Step 3: Place and size the Print Area
You will see a dashed box on the product photo. That box is the printable window.
- Choose Unit: INCH or CM (use the units you measure for print).
- Set Actual Width and Height to the real printable size.
- Drag the dashed box (or adjust Left and Top) until it sits on the printable part of the garment.
- Resize with the corner handles until the box matches where you can print.
Why this matters
Shoppers can only place designs inside the Print Area you set. Match it to how you really print so artwork does not shift or get cut off.
 Full size
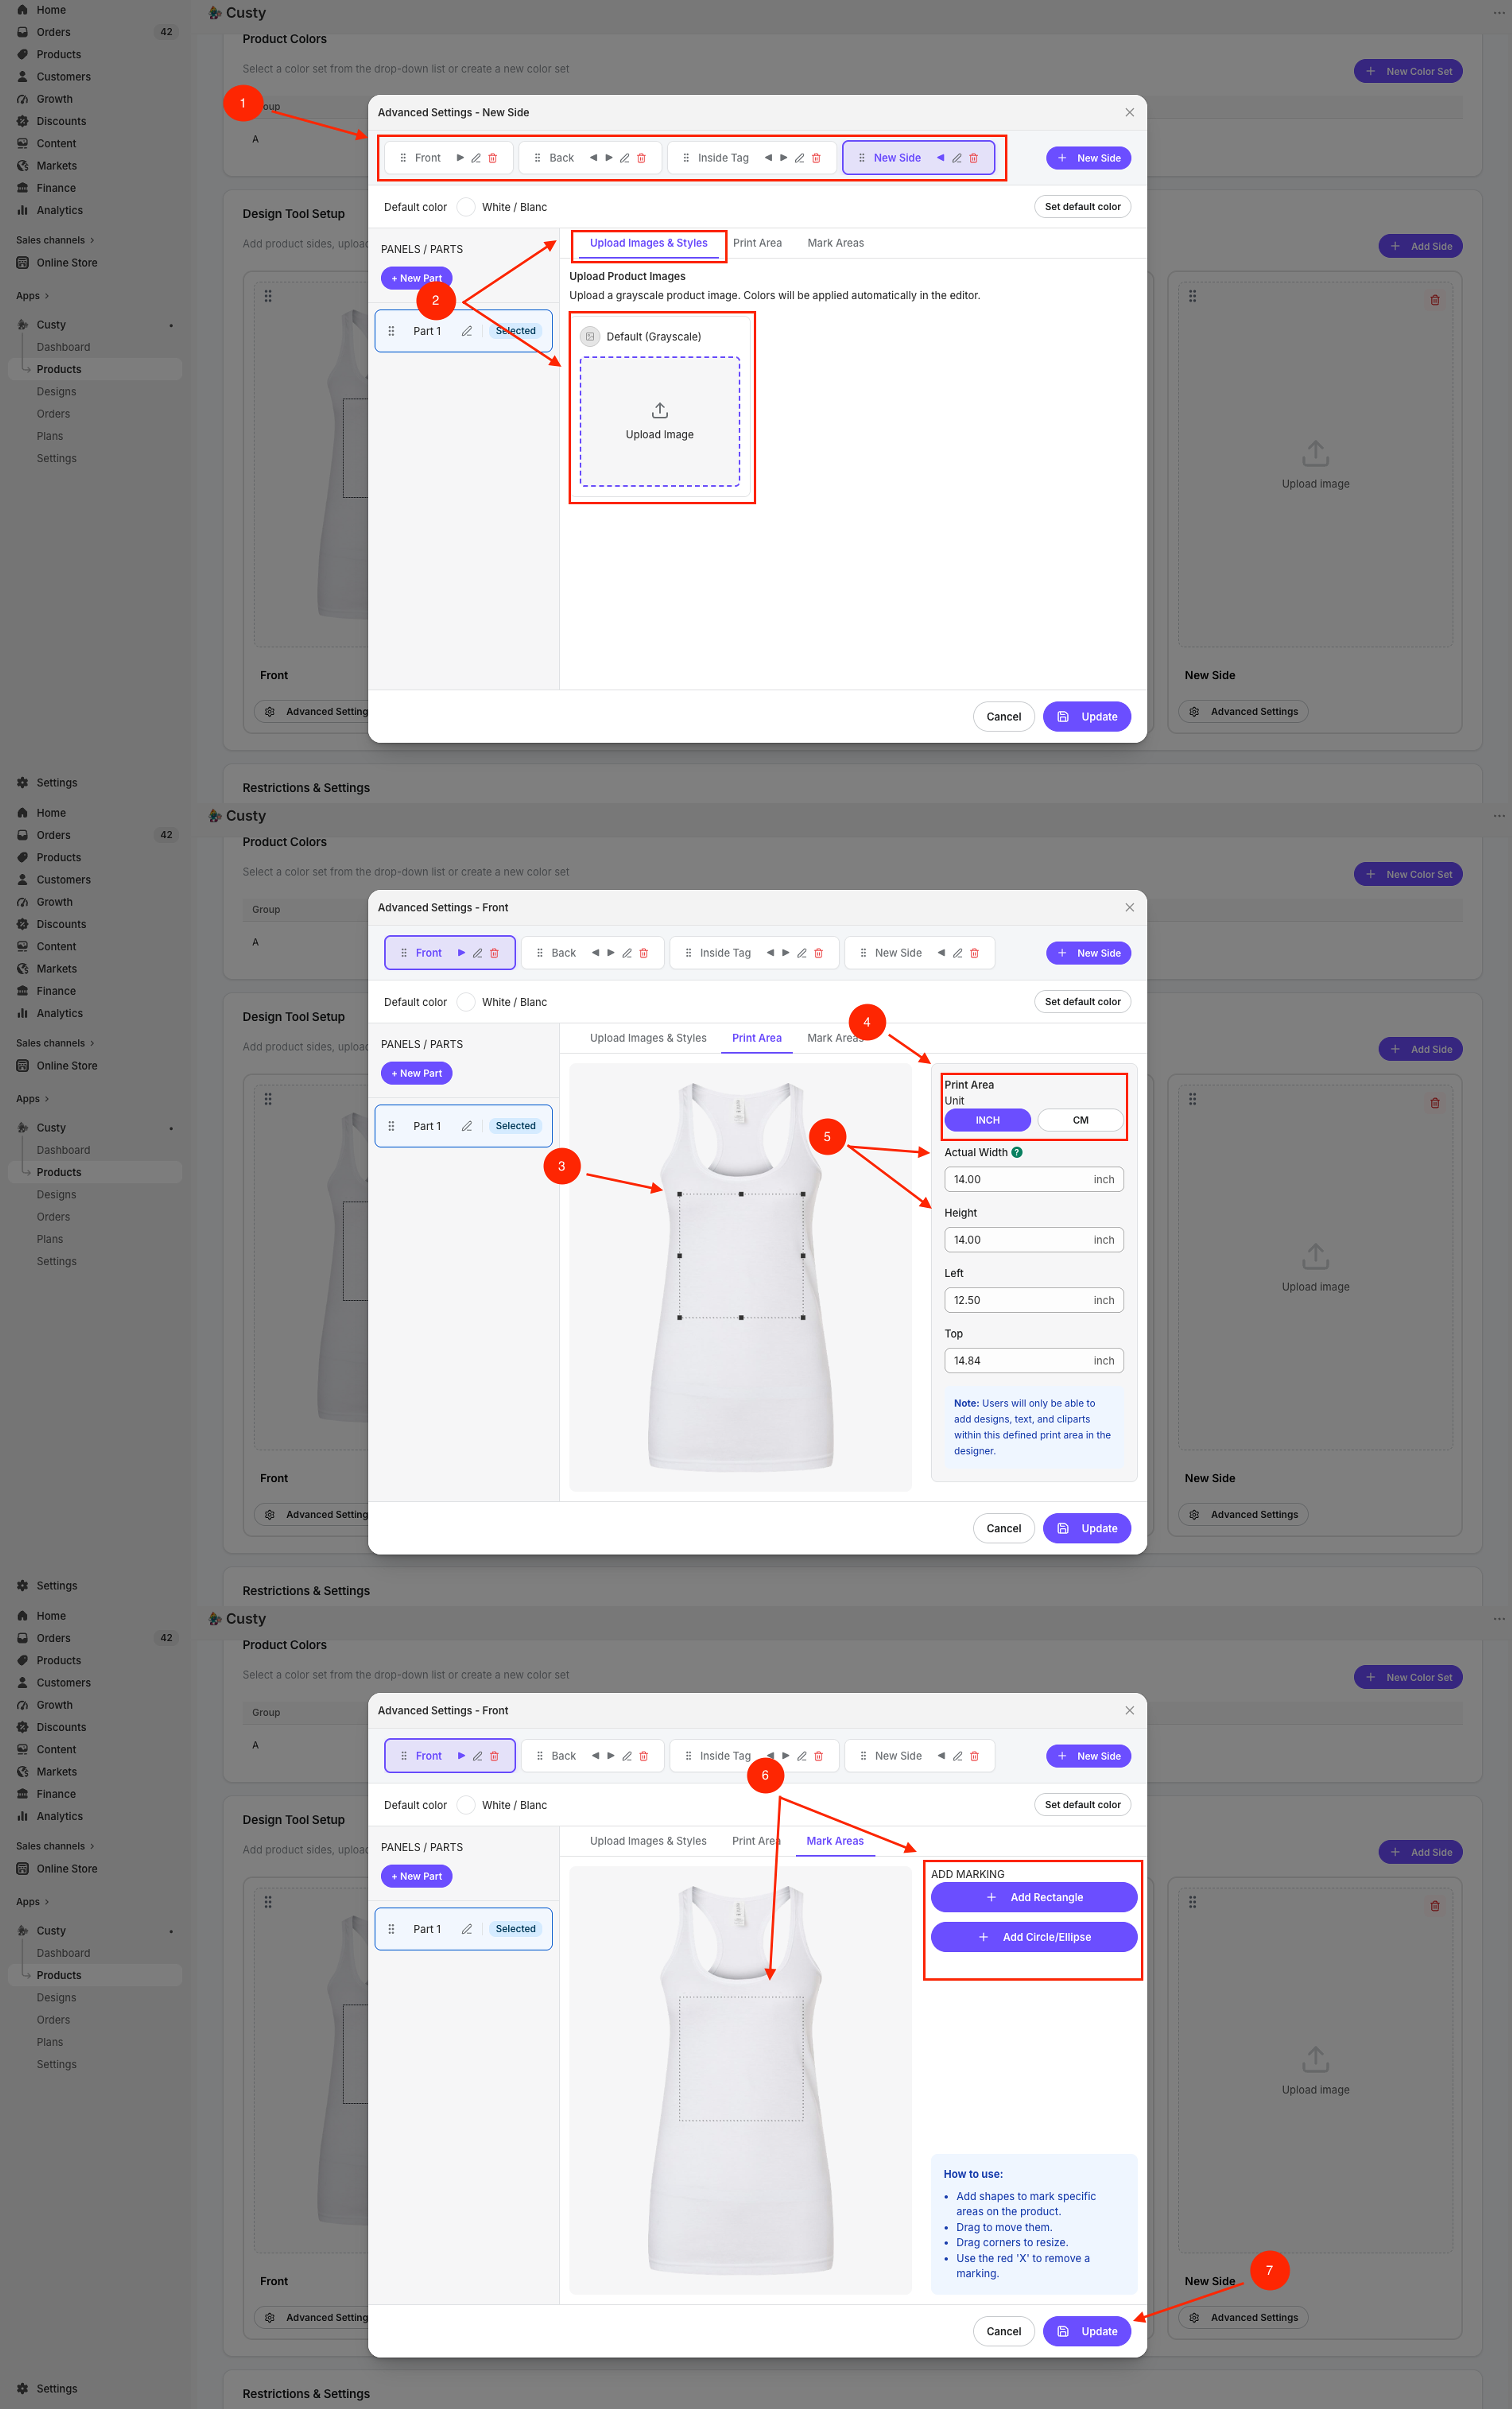
- 1
Side tabs
Switch between Front, Back, and other sides you added.
- 2
Upload Images & Styles
Upload the product photo shoppers see while designing.
- 3
Print Area
Drag and resize the dashed box over the printable surface.
- 4
Unit (INCH / CM)
Use the same units you use when you measure for print.
- 5
Actual Width / Height
Real print size for the output file. Left and Top help fine-tune placement.
- 6
Mark Areas
Optional guides inside the print area. Printing still follows the print area.
- 7
Update
Save these Advanced Settings for this side.
Step 4: Save your changes
Click Update at the bottom of Advanced Settings. Repeat for every side that accepts artwork. Then click Save on Customize Product.
2. Mark Areas (indication guides)
Mark Areas help shoppers understand how much space is available for text and graphics. For example, on a t-shirt, mug, or bag, you can mark where a logo should sit. Guides show in the Design Lab. Production still follows the Print Area.
Step 5: Add Mark Areas (optional)
Still in Advanced Settings, open the Mark Areas tab. You can skip this step if you do not need guides.
- Under ADD MARKING, click Add Rectangle or Add Circle/Ellipse.
- Drag the shape to move it. Drag the corners to resize.
- Use the red X on a shape to remove it.
- Click Update when the guides look right.
 Full size
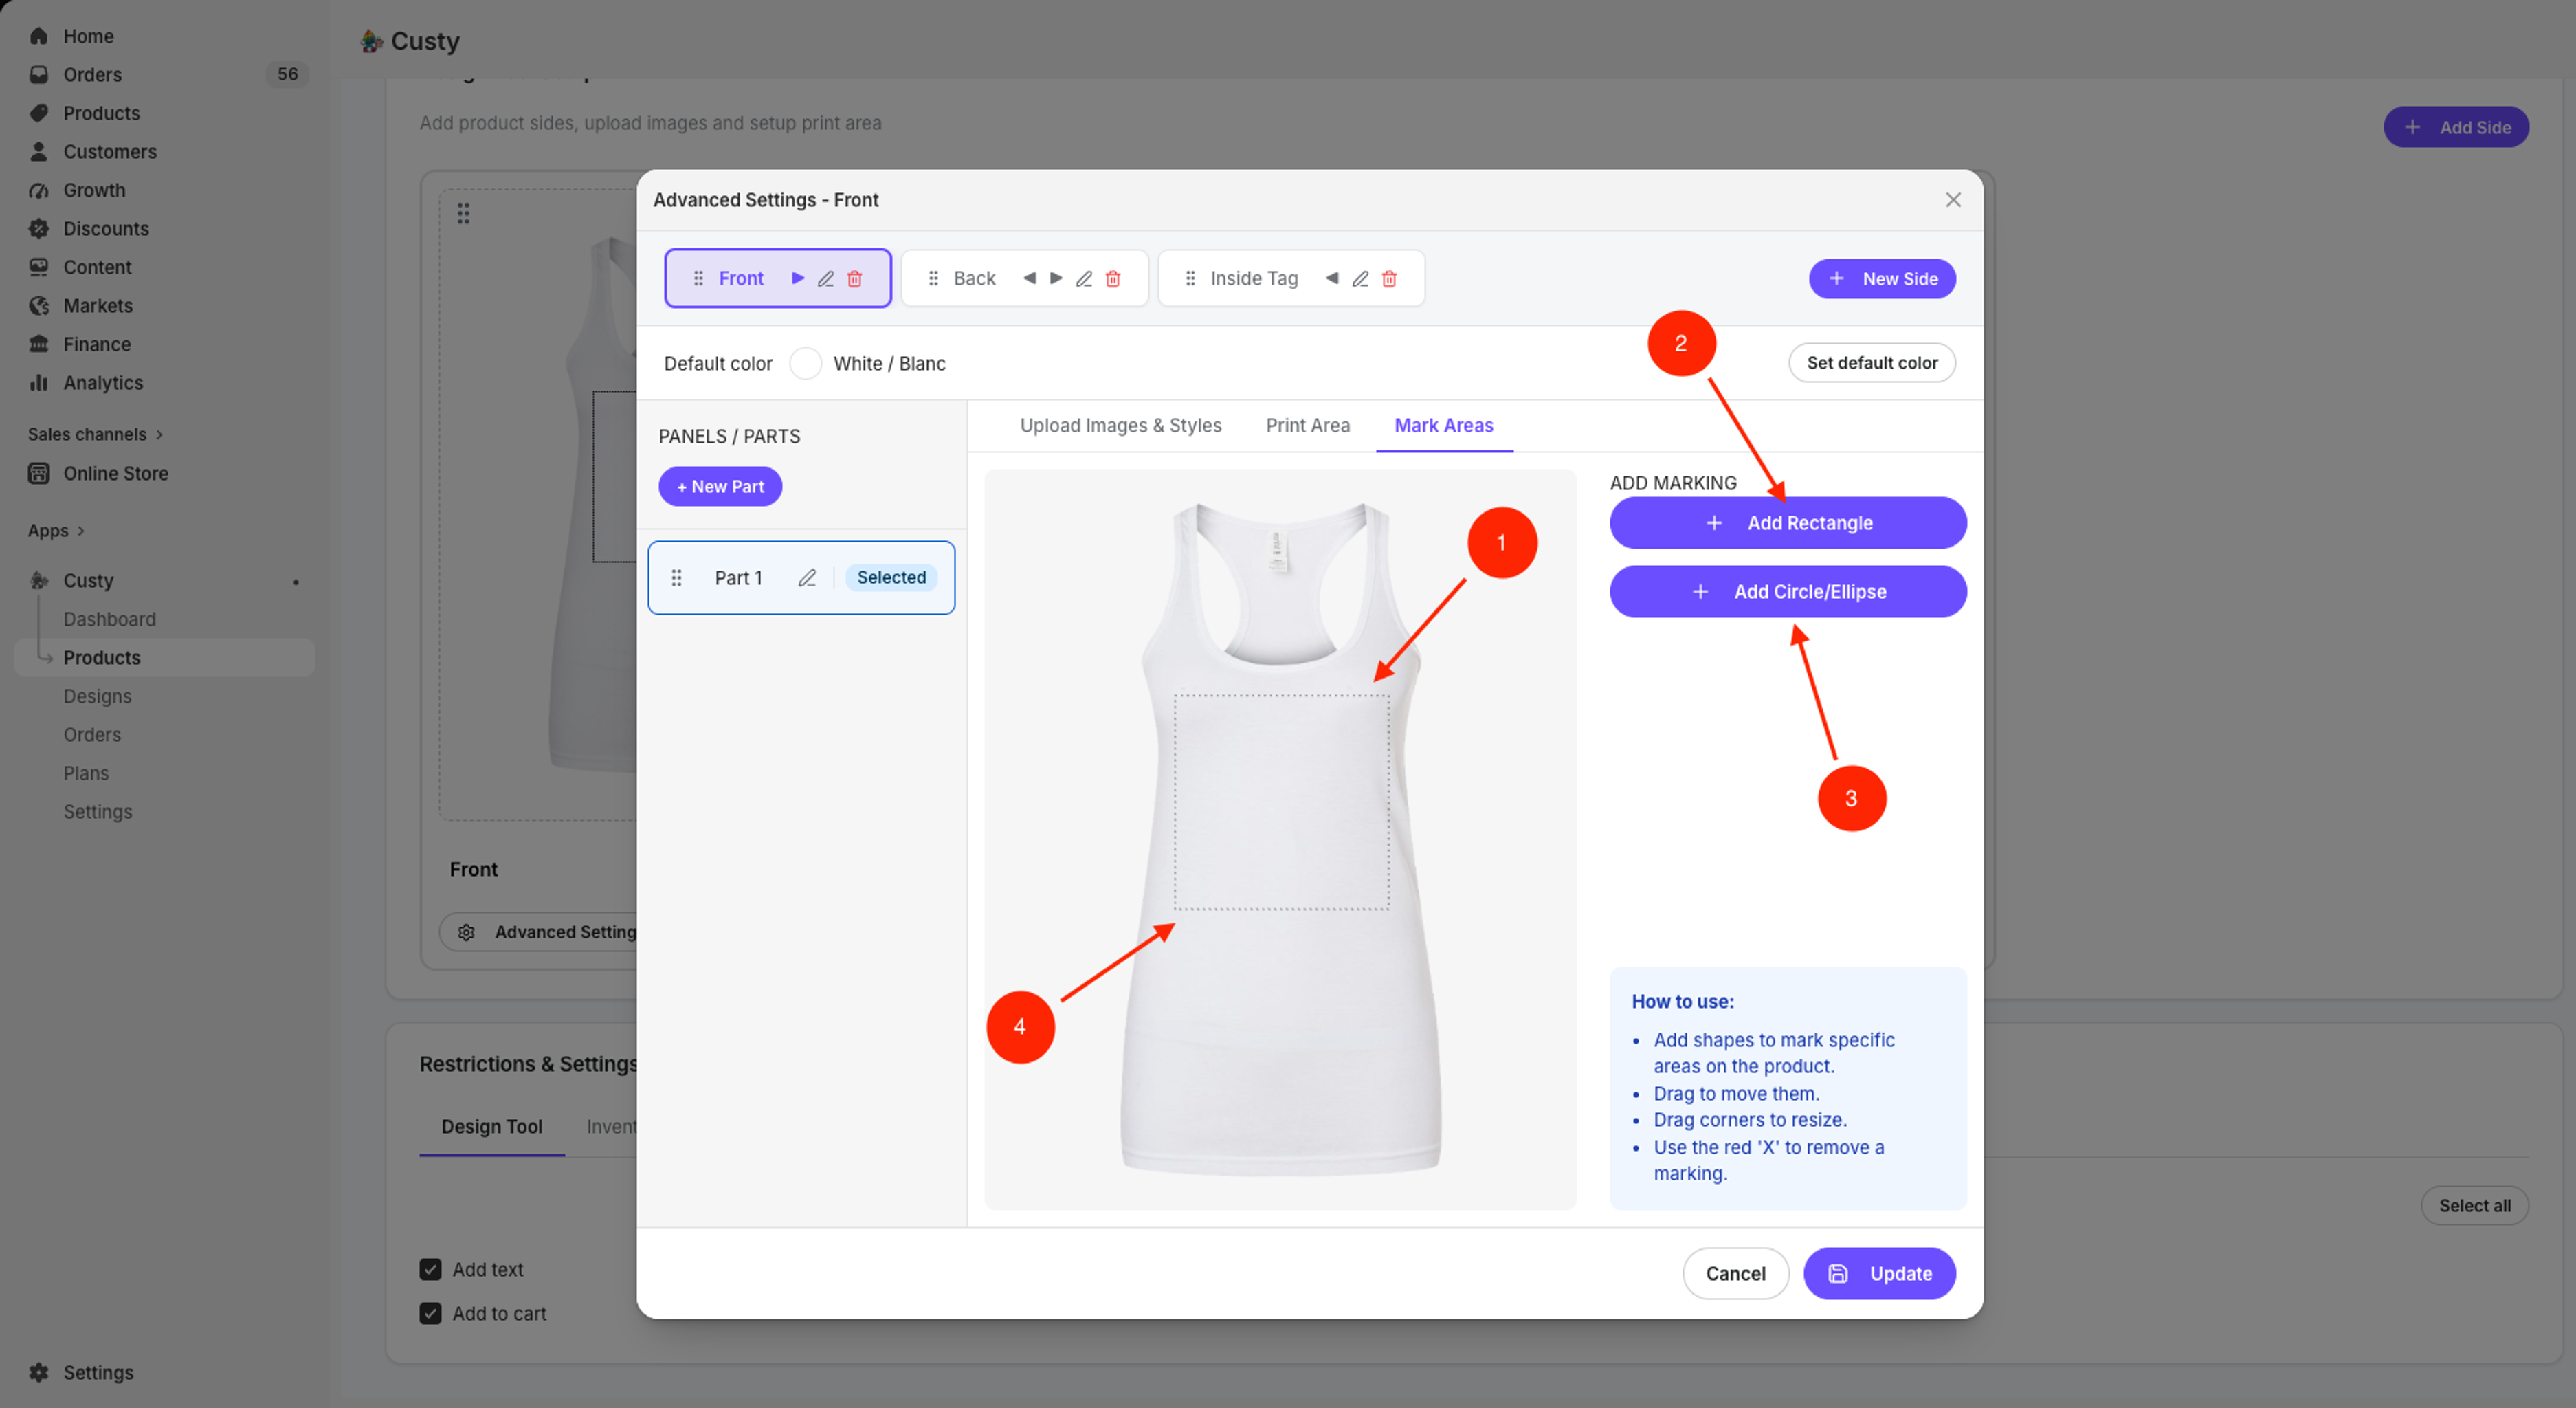
- 1
Mark area on the photo
The dashed shape shoppers will see as a placement guide.
- 2
Add Rectangle
Add a square or rectangle guide.
- 3
Add Circle/Ellipse
Add a round guide.
- 4
Resize handles
Drag corners to move and resize the guide.
What to do next
Finish every side the same way. Set Active on designer to Yes and click Save. Then open the Design Lab and confirm designs stay inside the print box.