
How to Add Multiple Sides For a Product?
In Custy you can add and customize multiple sides of a product (Front, Back, sleeves, inside tag, and so on) so shoppers get a complete design experience in the Design Lab.
Why use multiple sides?
Use multiple sides when shoppers should decorate more than one face of the product.
- 1T-shirts: Front, Back, Left Sleeve, Right Sleeve
- 2Hoodies: Front, Back, sleeves
- 3Business cards or tags: Front and Back
Step 1: Open Design Tool Setup
Open the product (Edit or Make it customizable). Scroll to Design Tool Setup. This is where every printable side lives.
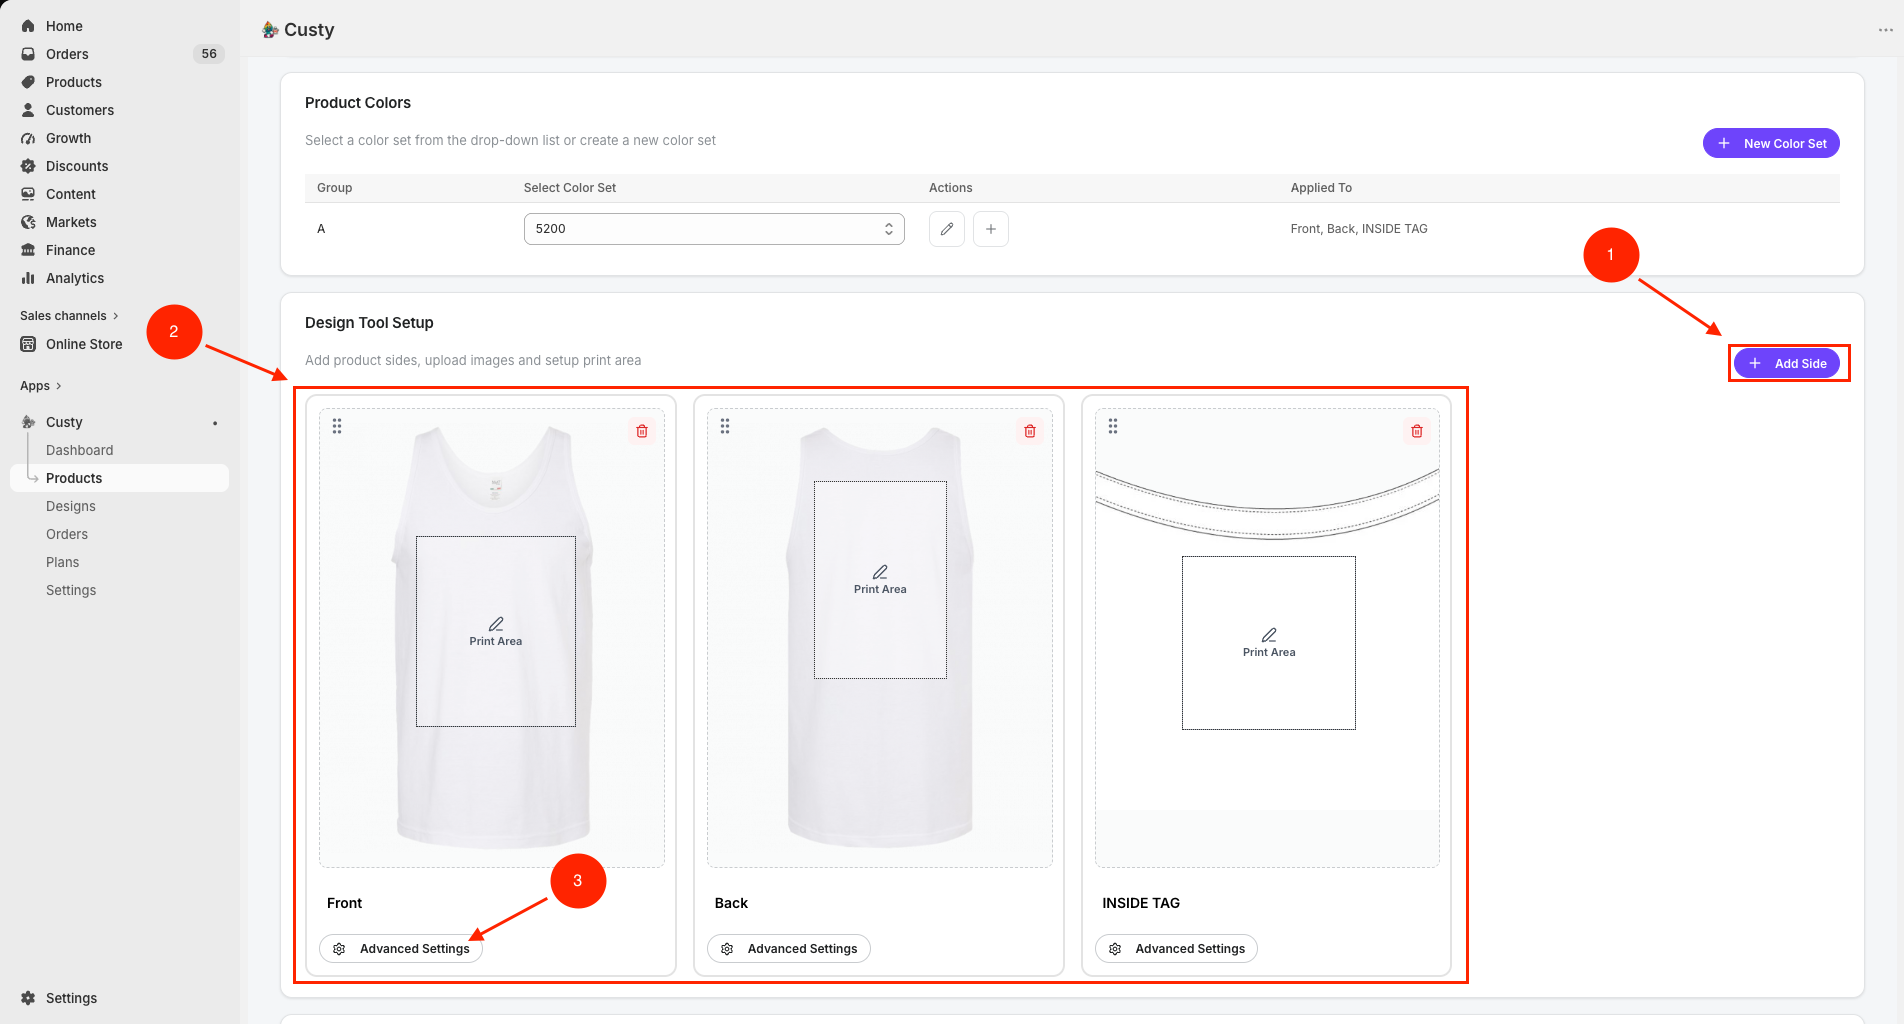 Full size
- 1
Add Side
Creates a new side card. New sides start named New Side.
- 2
Side list
Each card is one side (Front, Back, and so on). Drag to reorder.
- 3
Advanced Settings
Open this on a side to upload photos, set the print area, and manage sides from the modal.
Step 2: Click Add Side
Click Add Side in the top right of Design Tool Setup. Custy adds a new side card. By default you start with at least one side on a customizable product.
- Click Add Side for each printable face you offer.
- Repeat until every side shoppers can design is listed.
At least one side
You cannot delete the last side. Every customizable product needs at least one.
Step 3: Rename the side
Click the side name on the card (for example New Side). Type a clear name such as Front, Back, Left Sleeve, or Inside Tag, then press Enter.
Step 4: Manage sides in Advanced Settings
You can also create and edit sides from Advanced Settings. Open Advanced Settings on any side card.
- Use the side tabs at the top (Front, Back, and so on) to switch which side you are editing.
- Click New Side in the modal to add another side while you stay in Advanced Settings.
- Click a tab name to rename it. Reorder or delete sides when you have more than one.
- Finish Upload Images & Styles and Print Area for each side.
- Click Update in Advanced Settings, then click Save on Customize Product.
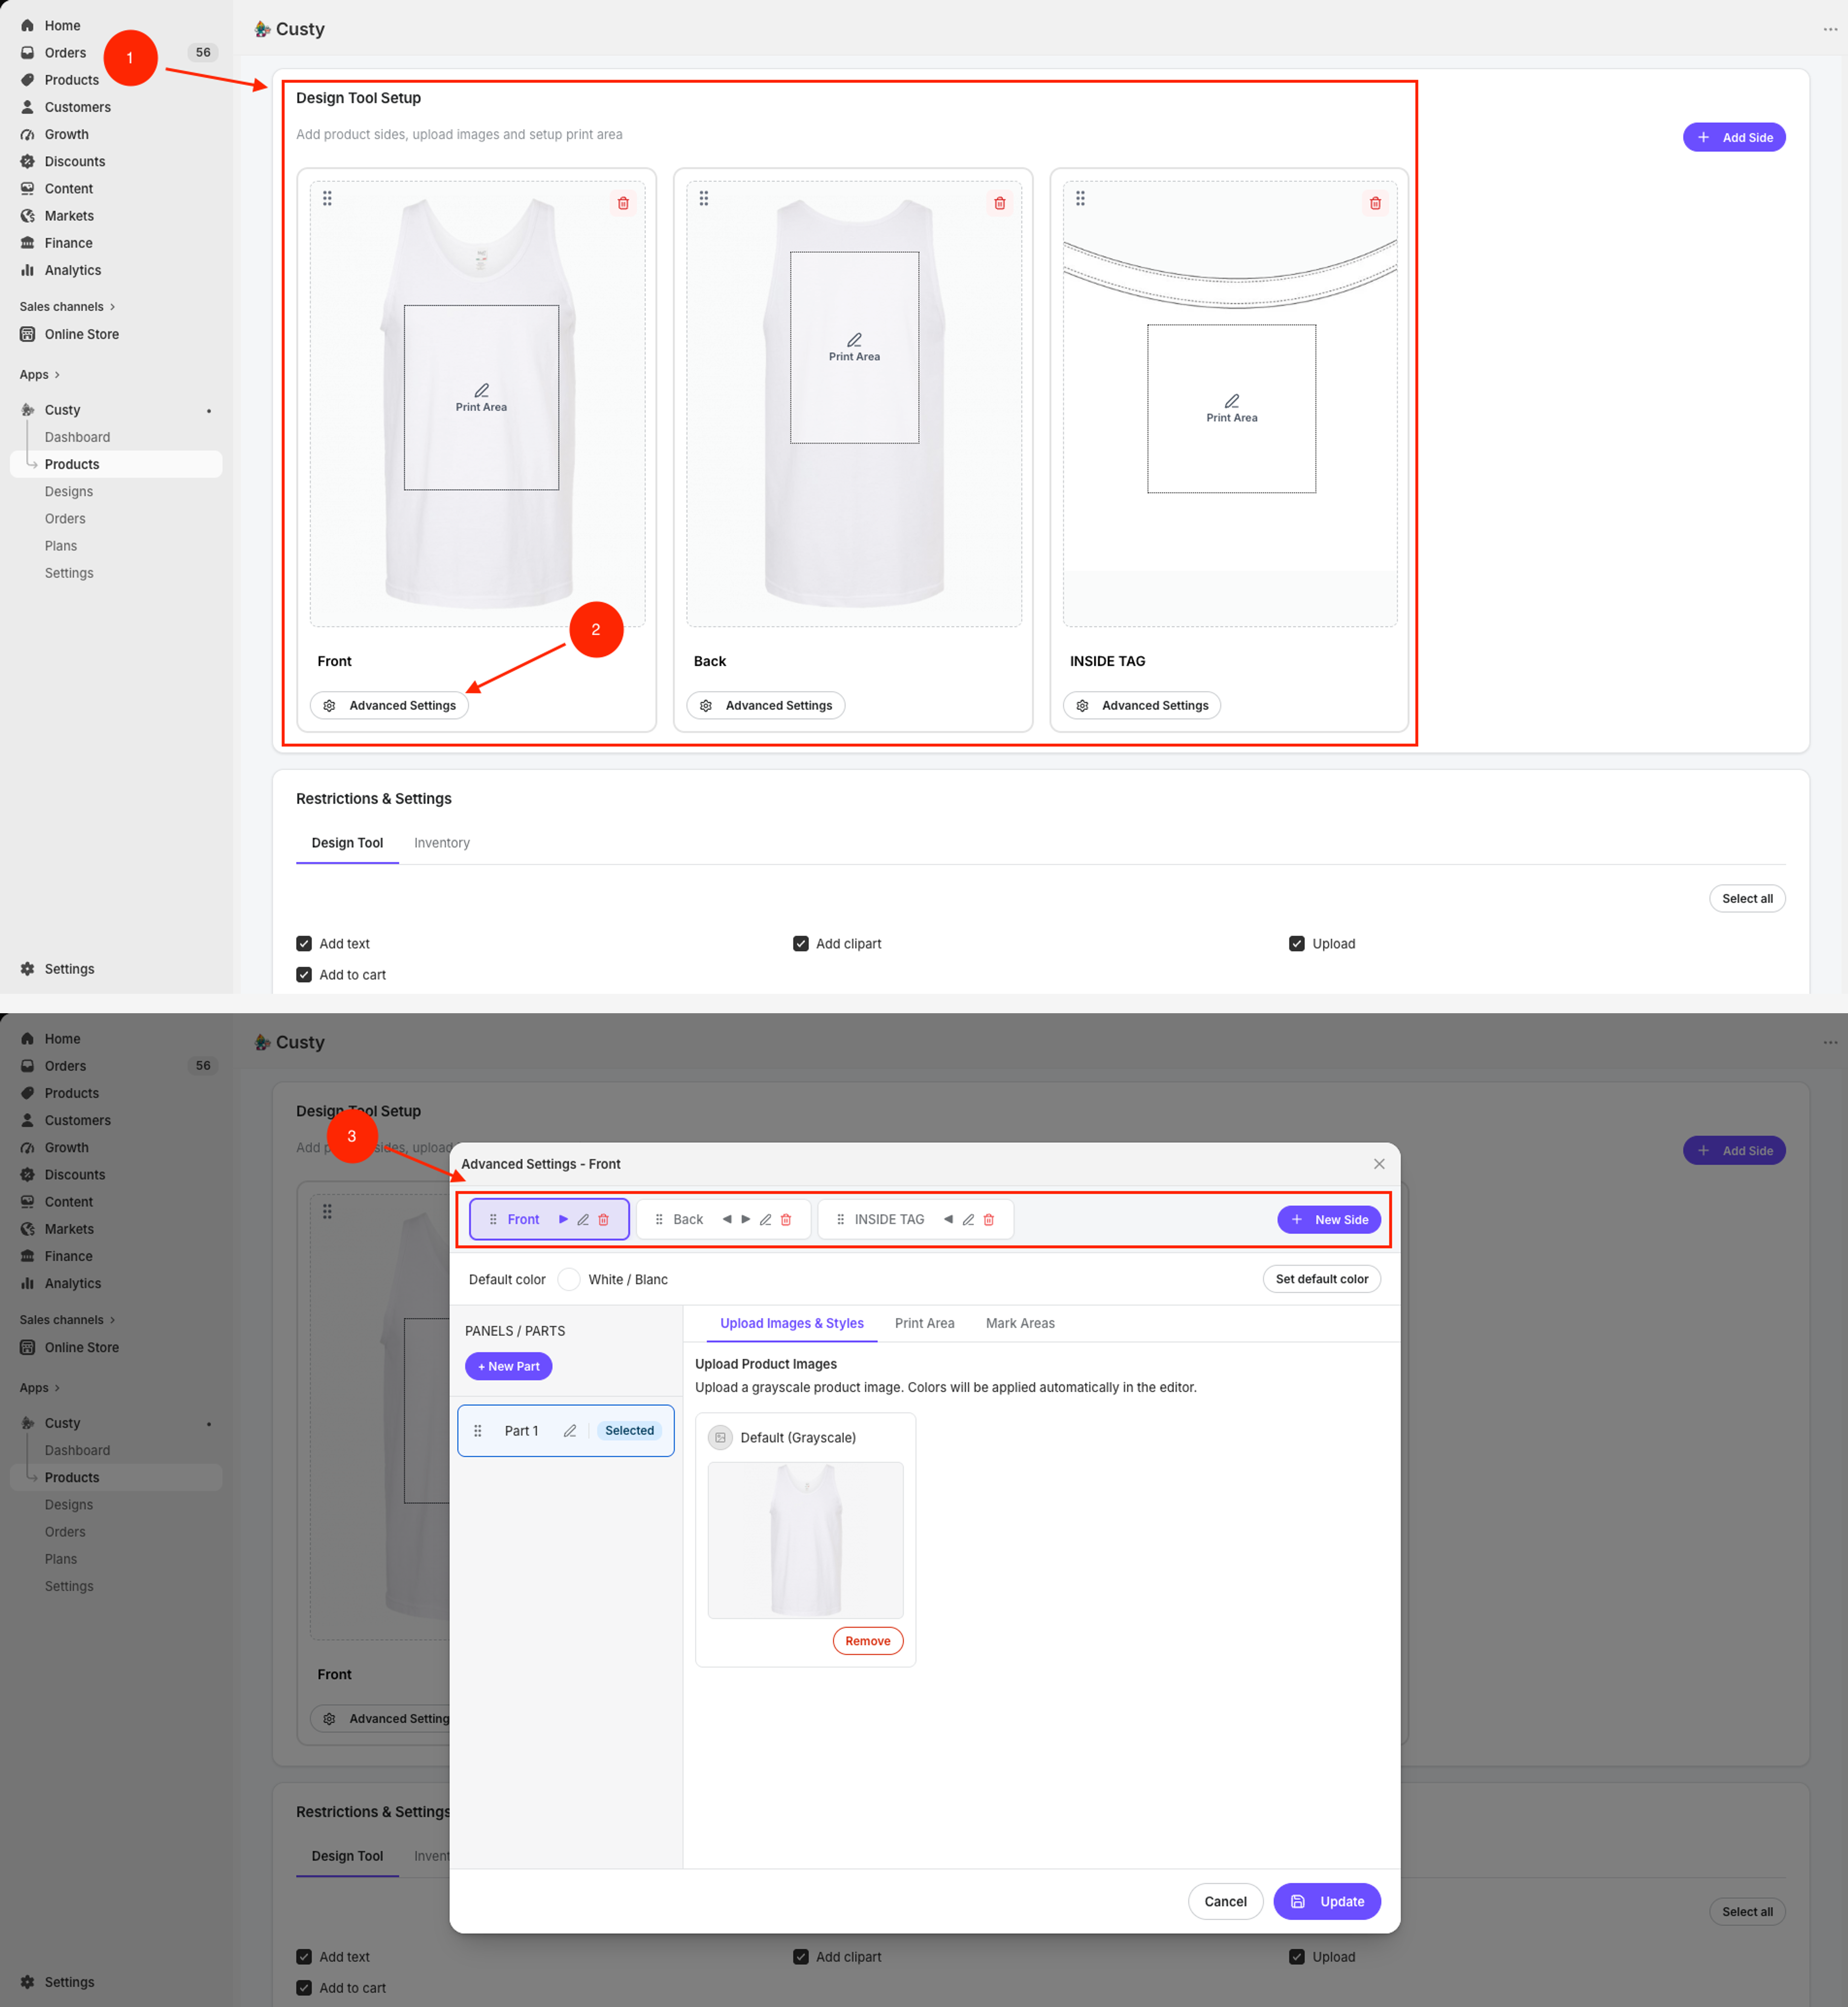 Full size
- 1
Design Tool Setup
Your side cards on the product page.
- 2
Advanced Settings
Opens the modal for the side you clicked.
- 3
Side tabs / New Side
Switch sides at the top. Click New Side to add another while you stay in Advanced Settings.
What to do next
Upload a product photo for each side, then draw the print area. When everything looks right, set Active on designer to Yes and click Save.