
How to Configure Settings in Custy?
Custy Settings is where you control store-wide preferences: your plan, the logo shoppers see in the Design Lab, quote email, currency, size units, image DPI warnings, and the Artwork and Mockup Approval modal.
Open Custy, then Settings. Change what you need, then click Save Settings. Use Sync Shopify Resources when you want Custy to refresh products and related Shopify data.
Step 1: Open Settings
In Shopify Admin, open the Custy app. Click Settings on the left.
- Open the Custy app.
- Click Settings.
- Optional: click Sync Shopify Resources to refresh Shopify data into Custy.
Step 2: Subscription
The Subscription card shows your current plan and whether it is active. Click Manage plan to upgrade, downgrade, or open Plans.
- Check the plan name and status badge.
- Click Manage plan when you want to change plans.
Step 3: Product editor header
Shoppers see this logo at the top of the Design Lab. On the Free plan, Custy always shows the Custy logo. On a paid plan you can upload your own PNG or JPG (about 40px tall works well).
- On a paid plan, click Upload logo and pick a PNG or JPG.
- Leave it as the Custy logo if you do not want a custom header.
Paid plan only
If Upload logo is not available, upgrade to Starter or Pro first.
Step 4: General Settings
These fields control email for quotes, the money symbol in the Design Lab, and the default size unit for text and graphics. The top of Settings also has Sync Shopify Resources and Save Settings.
- Optional: type a Get a Quote Email address for quote notifications.
- Set Currency Symbol (for example $, euro, or pound). Keep it short (up to 5 characters).
- Pick Designer Default Size Unit: Inch, cm, or px.
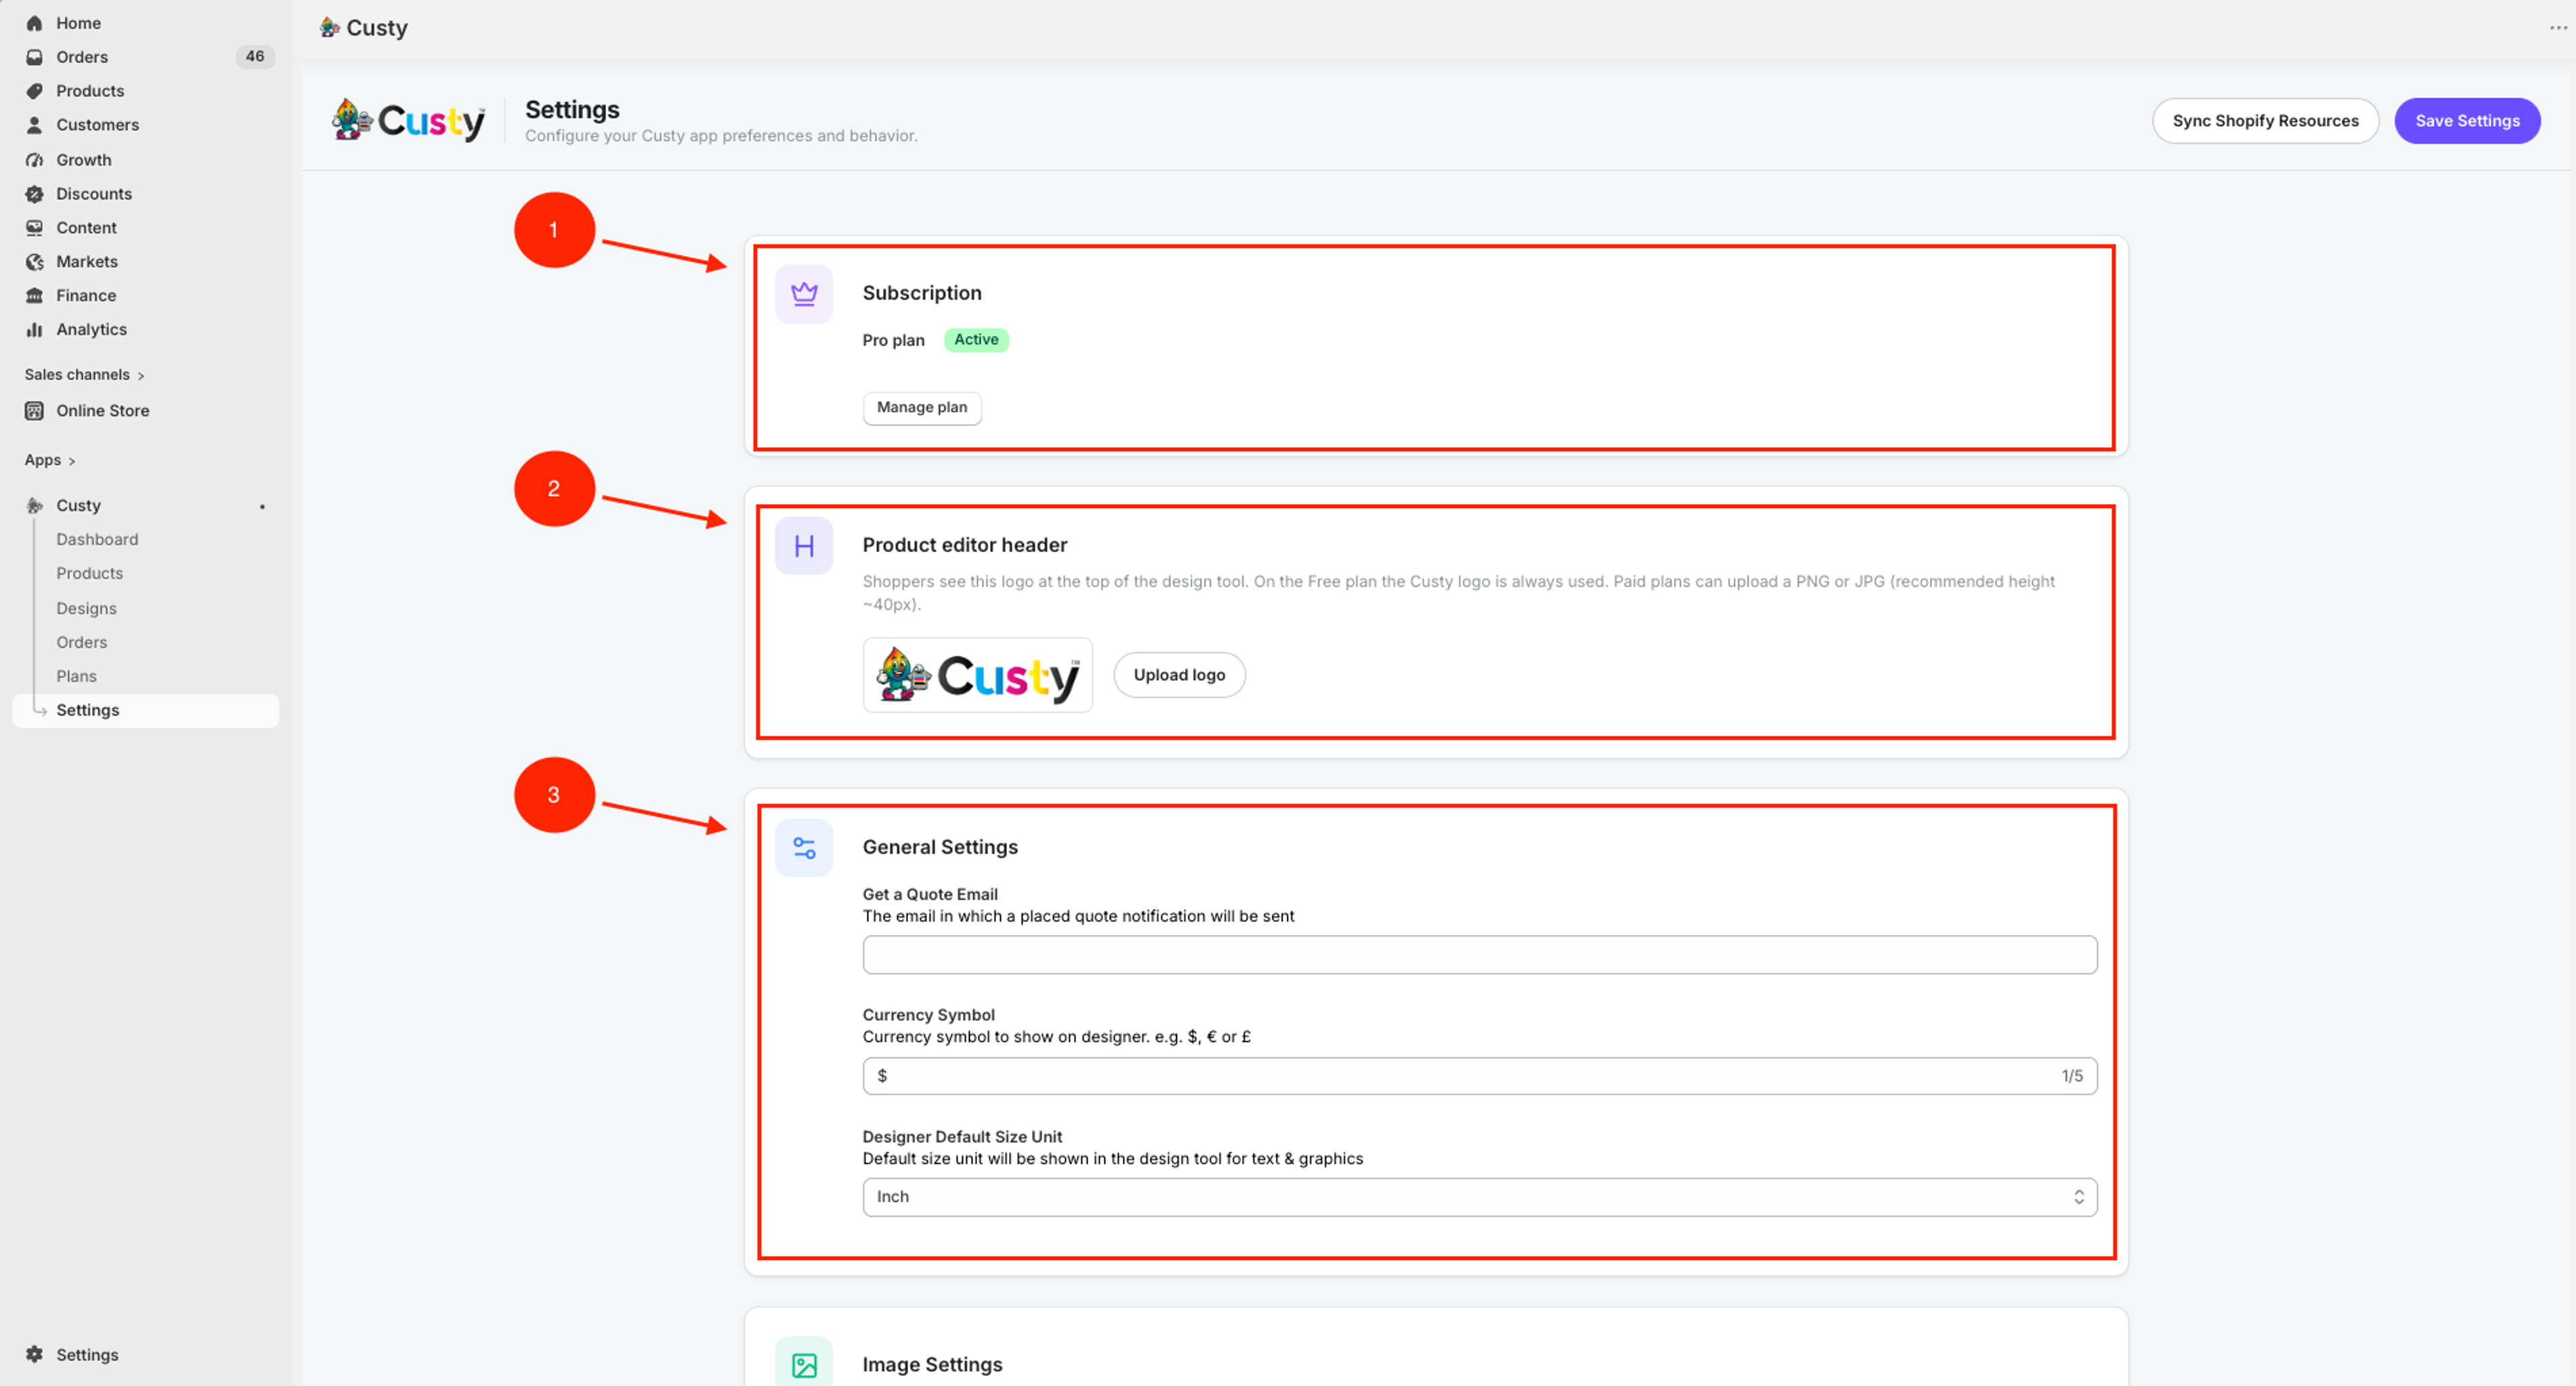 Full size
- 1
Subscription
Your plan and Manage plan.
- 2
Product editor header
Upload logo for the Design Lab header on paid plans.
- 3
General Settings
Quote email, currency symbol, and default size unit.
Step 5: Image Settings
Image Settings control how Custy warns shoppers about print quality and designs that leave the print area.
- Set Required DPI for Raster Image (default is often 150). The Design Lab uses this for size and low-resolution warnings.
- Turn Warning for low resolution image on if shoppers should see a warning when an image is too soft for print.
- Turn Design outside warning on if shoppers should see a warning when artwork goes outside the print area.
Orders downloads
Required DPI also matters when you download artwork from Orders. Low-DPI designs may be flagged there too.
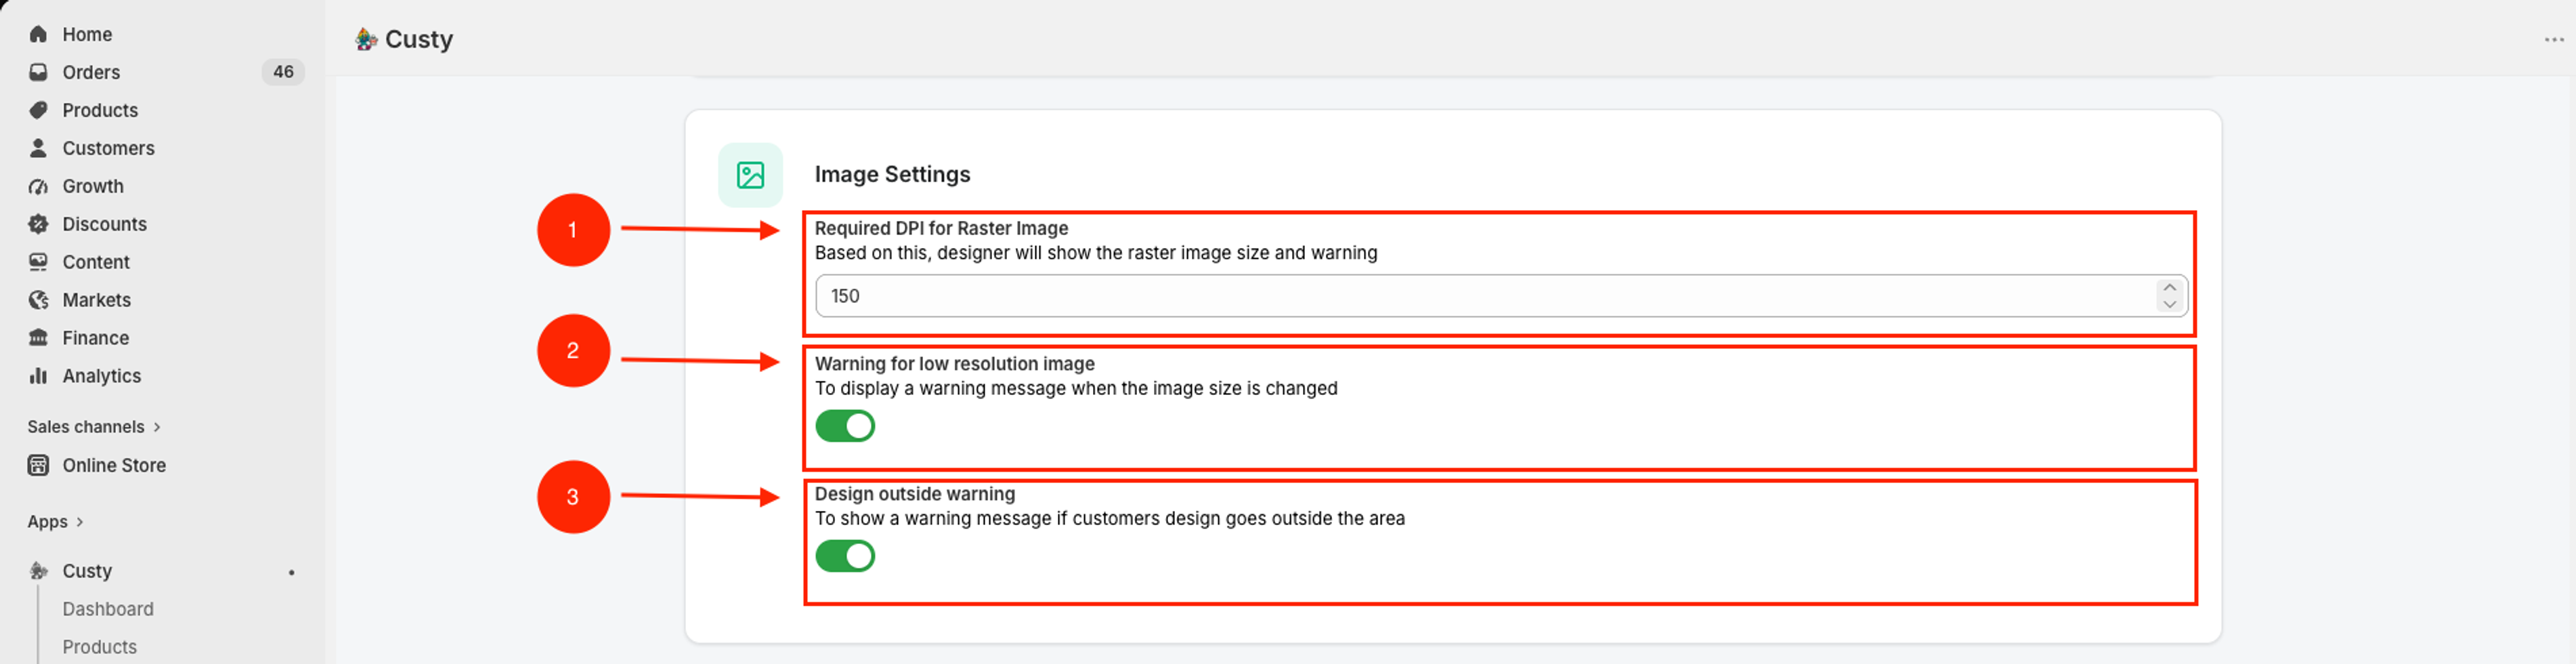 Full size
- 1
Required DPI for Raster Image
The DPI Custy uses to judge uploaded raster images.
- 2
Warning for low resolution image
Shows a warning when the image is below your required DPI.
- 3
Design outside warning
Shows a warning when the design leaves the print area.
Step 6: Artwork and Mockup Approval Modal
This modal can appear when the Design Lab opens, so shoppers confirm artwork and mockup rules before they design. Customizing the title, HTML body, and button text needs the Pro plan.
- Turn Show Approval Modal on or off.
- Pick Language: English or Français. Edit each language separately. Leave French blank to use built-in French defaults.
- Edit Modal Title.
- Optional: paste Modal Content (HTML) using tags such as p, ul, li, strong, and hr. Leave blank to use the default body for that language.
- Edit Confirm Button Label (for example I Confirm & Agree).
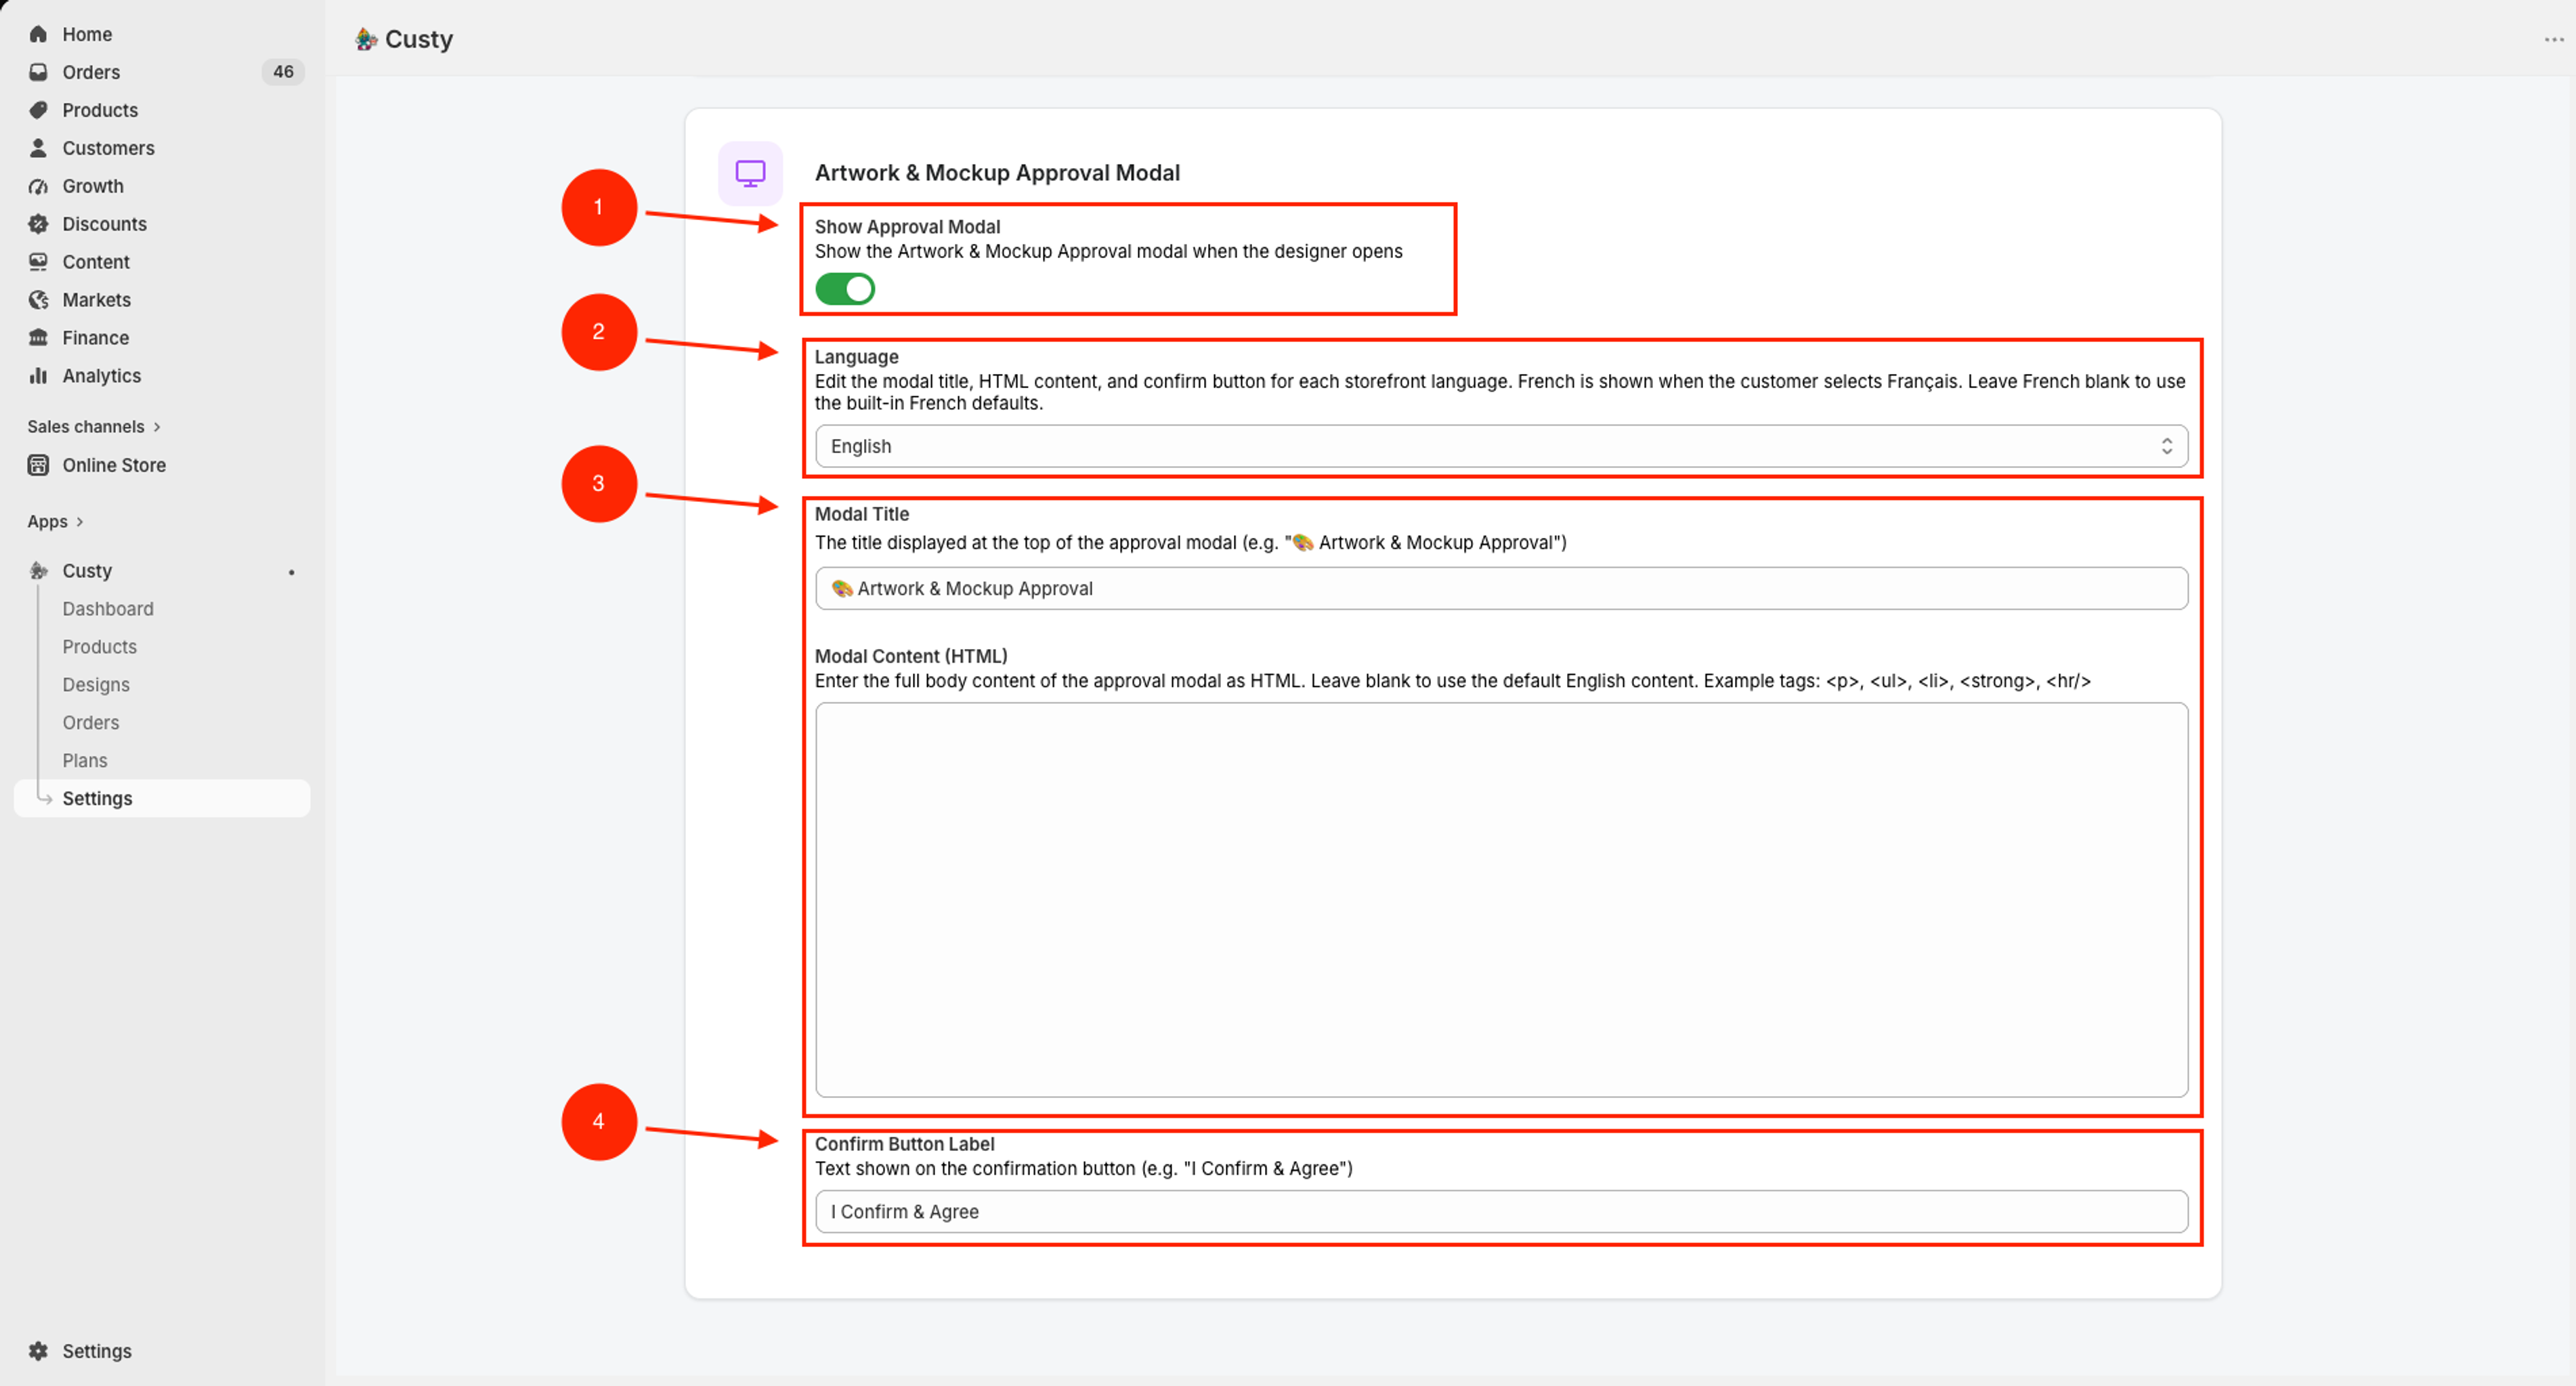 Full size
- 1
Show Approval Modal
Shows the modal when the Design Lab opens.
- 2
Language
Edit English or French copy for the same modal.
- 3
Modal Title and Content
Title at the top, then optional HTML body.
- 4
Confirm Button Label
Text on the button shoppers click to continue.
Step 7: Save your changes
Nothing in General Settings, Image Settings, or the approval modal sticks until you click Save Settings at the top. Logo upload saves when you finish the upload. Plan changes happen under Manage plan.
- Click Save Settings.
What to do next
After Settings look right, confirm the Design Lab and your first custom product still behave the way you want.