
How to Set Up Product Sizes?
Custy Product Size options let you offer several sizes and charge a little more for bigger ones if you want. Shoppers pick sizes in the Design Lab when they add the design to the cart.
You can build size lists once and reuse them on many products. Changing a size set does not delete your Shopify products.
Two places to work with sizes
You will use sizes in two spots. Both use the same size lists.
- 1Products → Product Size tab: build and edit shared size sets for the whole store
- 2Customize Product → Product Sizes: pick which size set this one product uses
Step 1: Open the Product Size tab
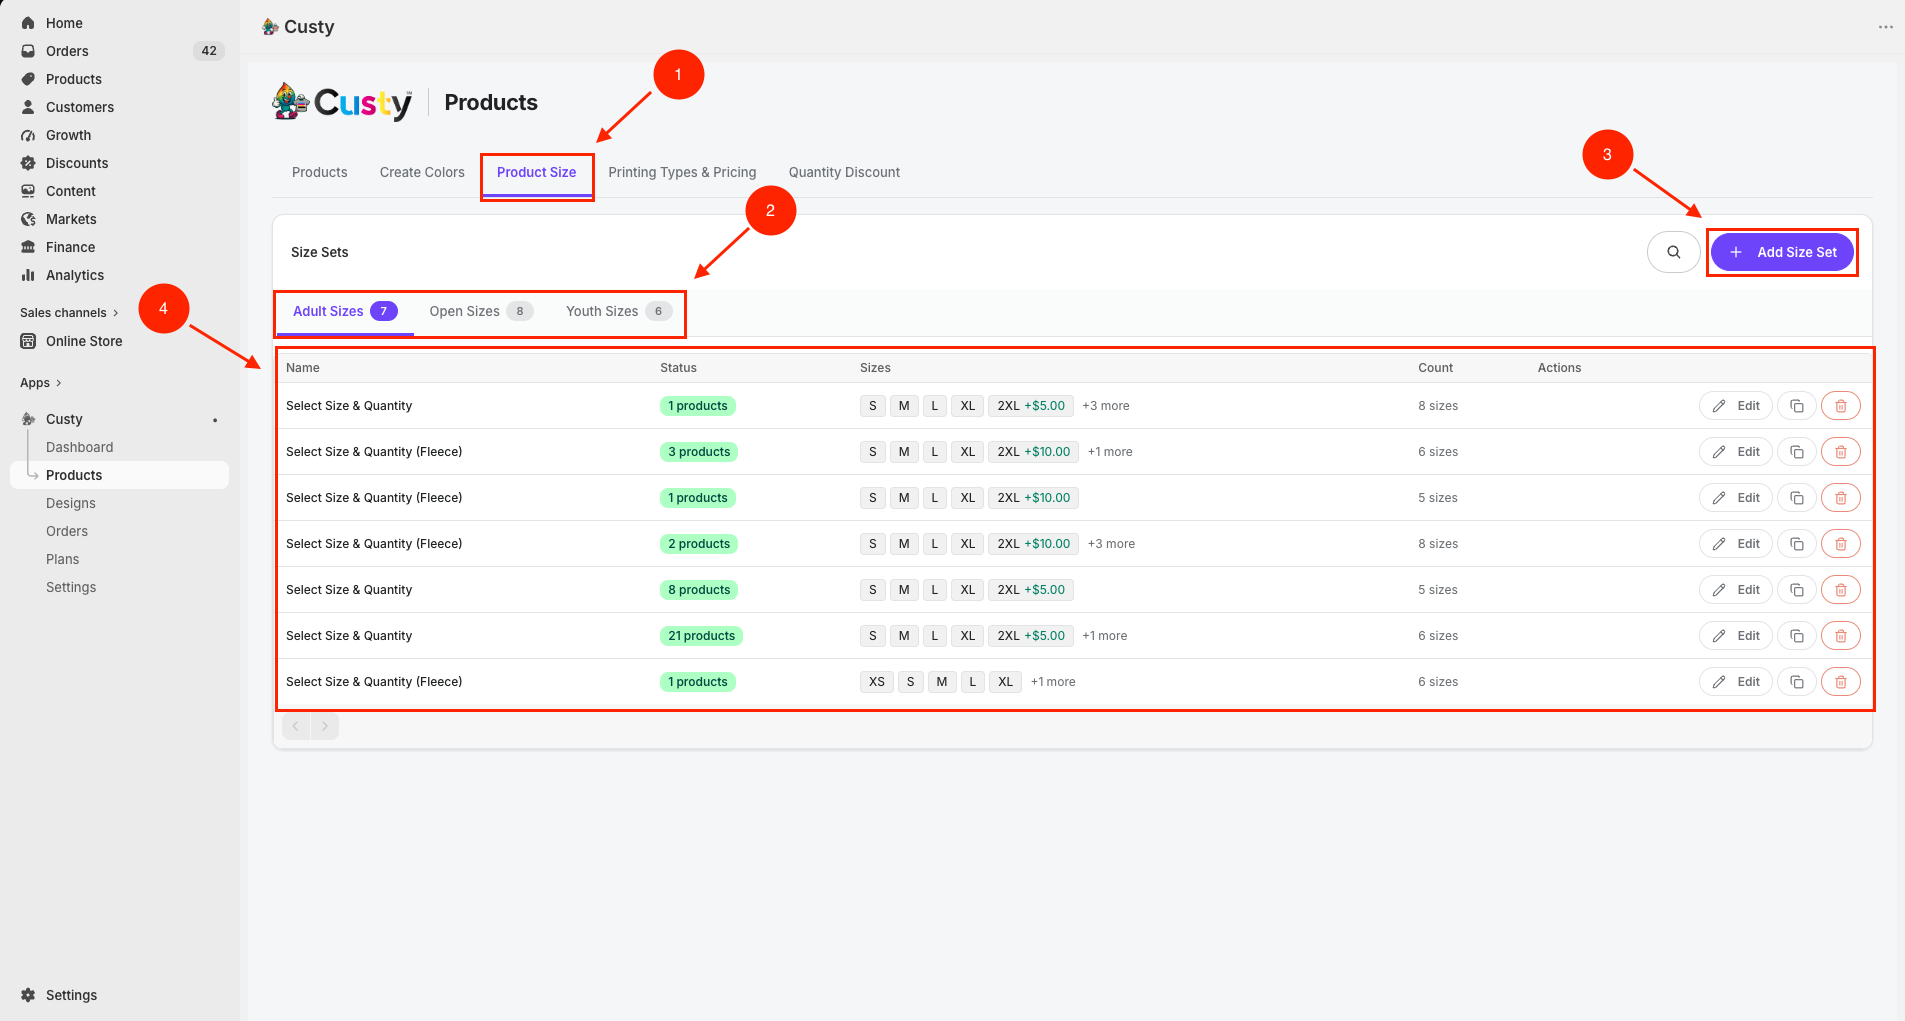
In Custy, click Products on the left. At the top, click the Product Size tab. This is where you manage shared size sets.
 Full size
- 1
Product Size
Top tab for shared size catalogs (next to Create Colors and Printing Types).
- 2
Category tabs
Open Sizes, Adult Sizes, and Youth Sizes. Pick the group that matches the product.
- 3
Add Size Set
Create a new size list for the category you selected.
- 4
Size set list
Each row shows the set name, sizes, and whether products already use it.
Step 2: Pick a size category
Custy gives you three categories. They work the same way: each holds size sets with named sizes (S, M, L, and so on).
- 1Adult Sizes: for adult apparel and most everyday products
- 2Youth Sizes: for kids and youth products
- 3Open Sizes: another labeled group for size lists (same setup as Adult and Youth)
Good to know
Shoppers do not type free-form measurements here. They pick from the size titles you add. If a product has no size set, the Design Lab may show a simple quantity step instead.
Step 3: Create a new size set
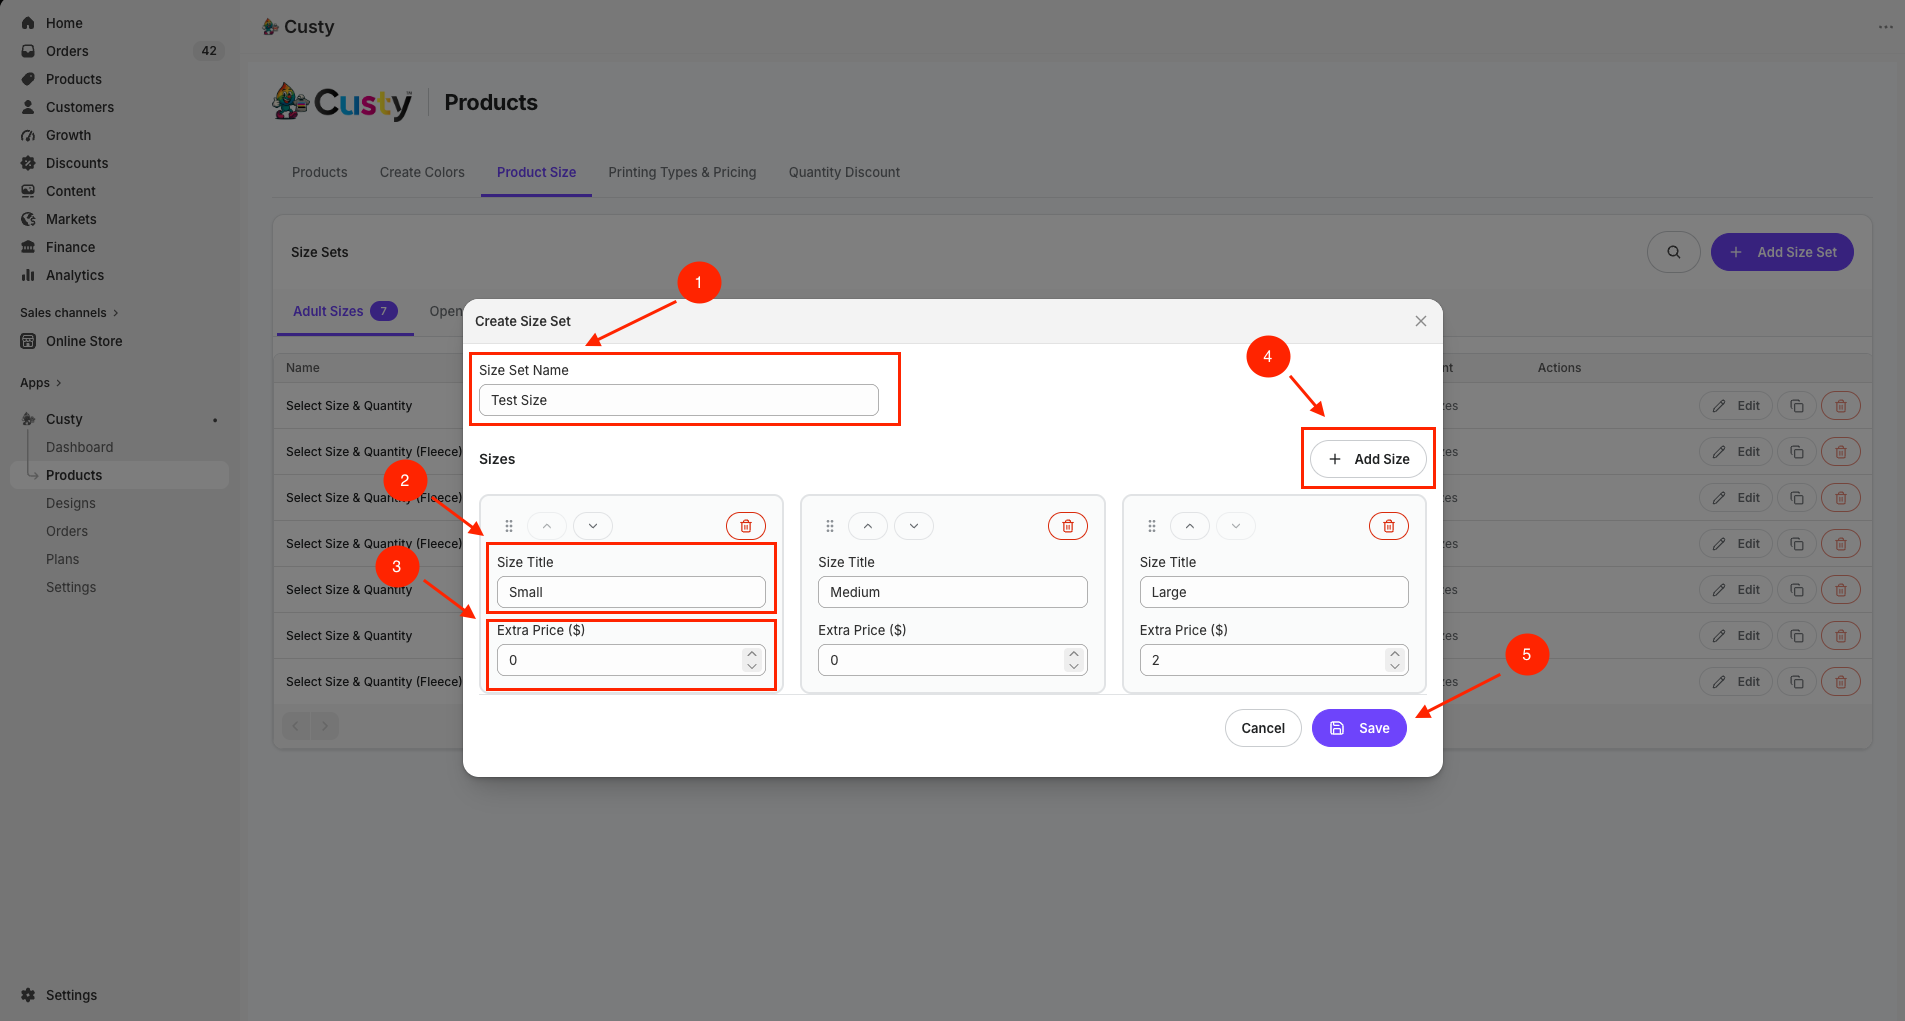
On the Product Size tab, pick a category, then click Add Size Set. The Create Size Set window opens.
- Enter a Size Set Name (for example Adult Tee or Mug One Size).
- For each size, fill in Size Title (S, M, L, XL) and optional Extra Price ($).
- Click Add Size for more rows.
- Drag the handle to reorder sizes. Use the trash icon to remove a size.
- Click Save.
 Full size
- 1
Size Set Name
A clear name you will recognize when assigning this set to products.
- 2
Size Title
What shoppers see (for example S, M, L, or 2XL).
- 3
Extra Price ($)
Optional add-on for that size. Use 0.00 if there is no extra charge.
- 4
Add Size
Add another size row to the list.
- 5
Save
Creates the size set. On edit, this button says Update.
Step 4: Edit, copy, or delete a size set
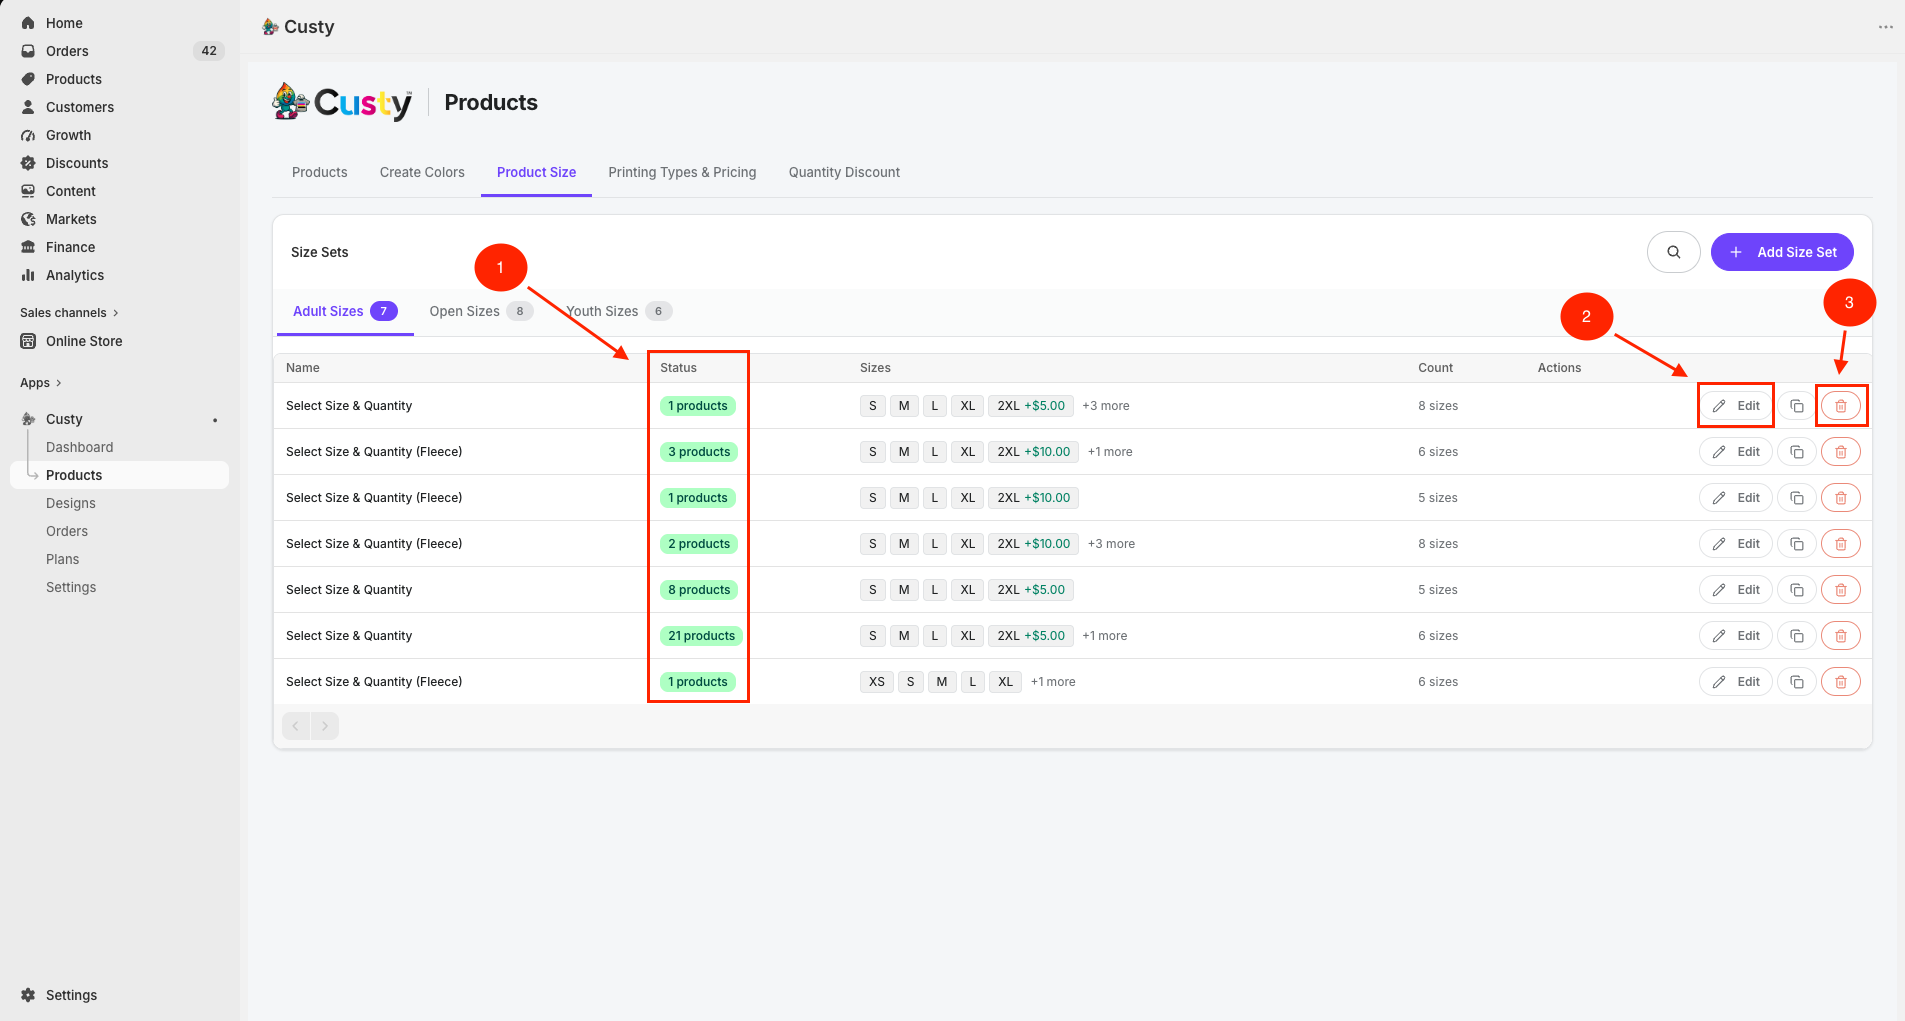
On the Product Size list, use the row actions:
- Edit: open Edit Size Set, change names or prices, then click Update.
- Duplicate (copy icon): makes {name} (Copy) so you can tweak a new list without changing the original.
- Delete: only when the set is Not used. If products already use it, remove it from those products first.
 Full size
- 1
Status
Shows how many products use this set, or Not used.
- 2
Edit
Change the set name, sizes, or extra prices.
- 3
Delete
Available when the set is not assigned to any product.
Step 5: Assign a size set on Customize Product
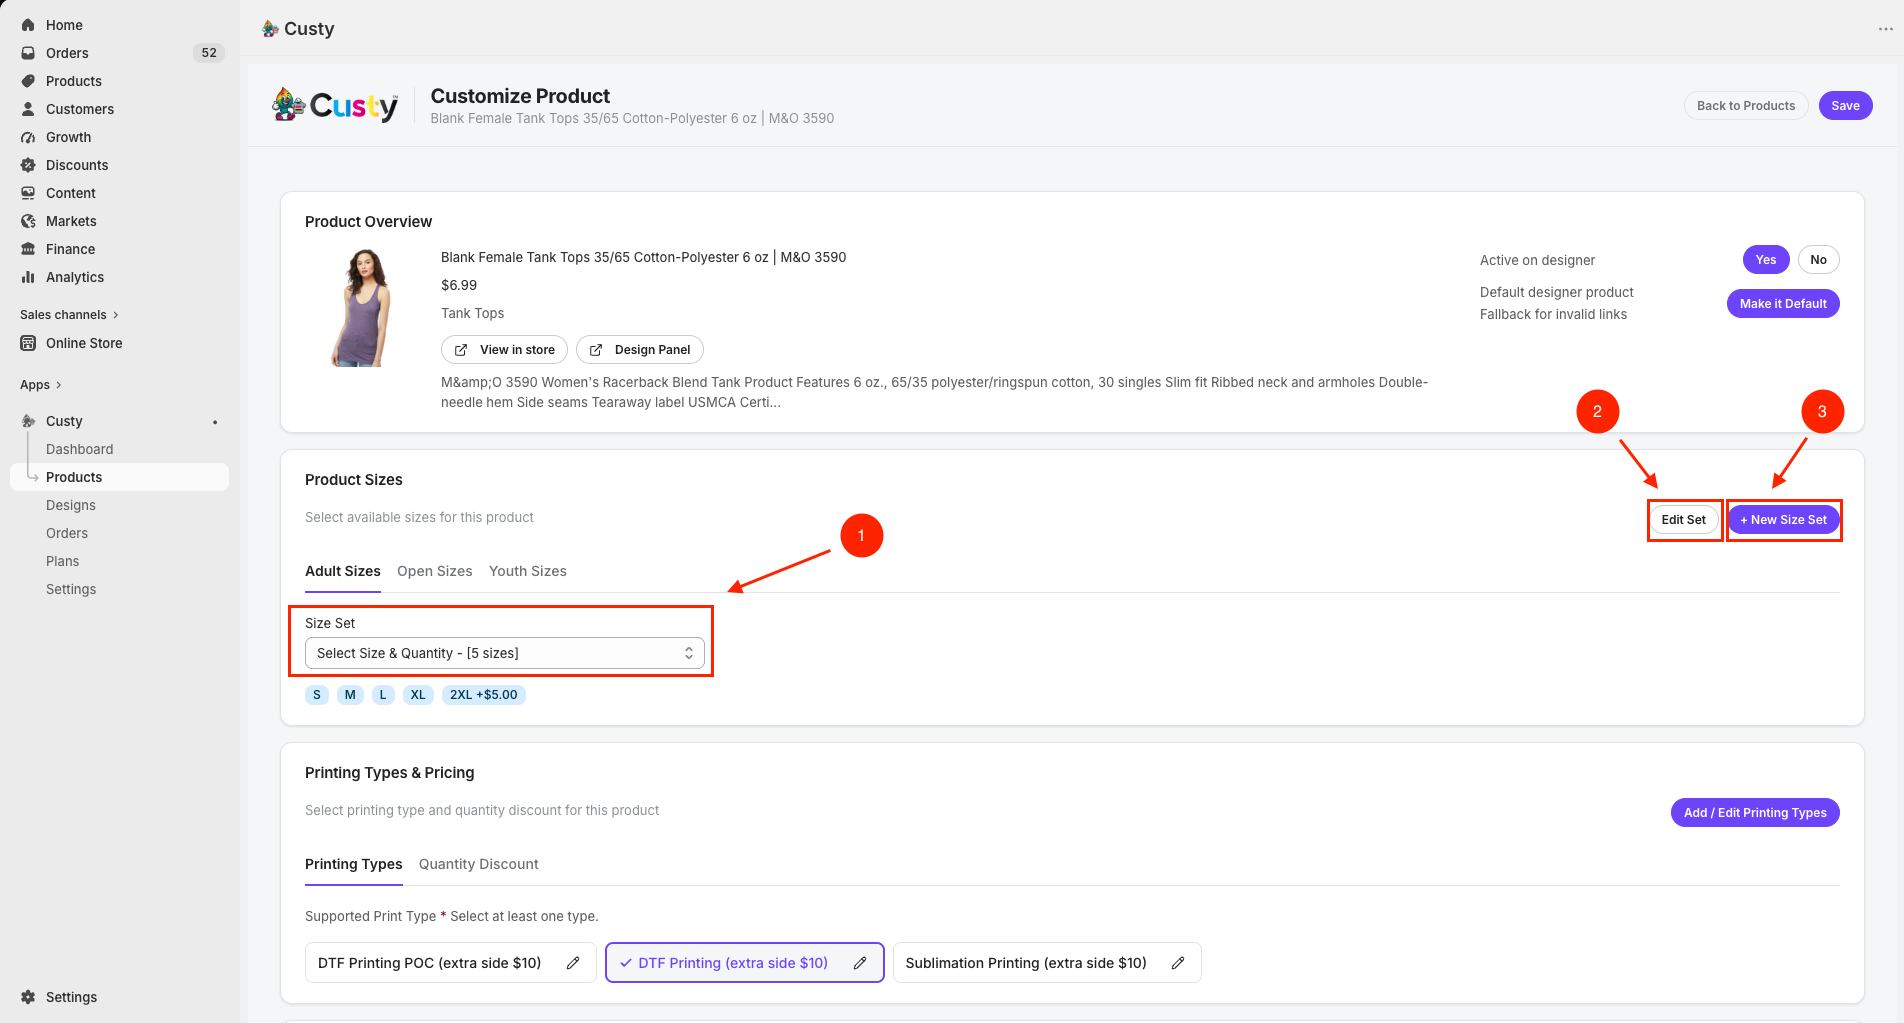
Open the product (Make it customizable or Edit). Scroll to Product Sizes.
- Choose Adult Sizes, Youth Sizes, or Open Sizes.
- Open the Size Set dropdown and pick a set (or leave No Size Set).
- Optional: click Edit Set to change the selected set, or + New Size Set to create one here.
- Check the size badges under the dropdown. Custy saves the choice as you go.
After you assign sizes
Finish the rest of Customize Product if needed, set Active on designer to Yes, and click Save. Shoppers then pick these sizes in the Design Lab.
 Full size
- 1
Size Set
Choose an existing size list for this product.
- 2
Edit Set
Change the sizes inside the selected set.
- 3
+ New Size Set
Create a new size list and use it on this product.
What to do next
Next, add extra prices on sizes if you need them, then set up product colors.