
How to Set Up Price in Product Sizes?
Size-based pricing lets you add an extra charge on top of the product base price for specific sizes. For example, if the base price is $20 and you want $22 for XXL, put 2.00 in Extra Price ($) for that size.
Larger sizes often cost more to print or ship. This keeps the base price fair, and you are not undercharging the sizes that cost more.
What is size-based pricing?
Each size in a size set can have its own Extra Price ($). When a shopper chooses that size in SIZE & QUANTITY, Custy adds that amount on top of the product base price for each piece of that size.
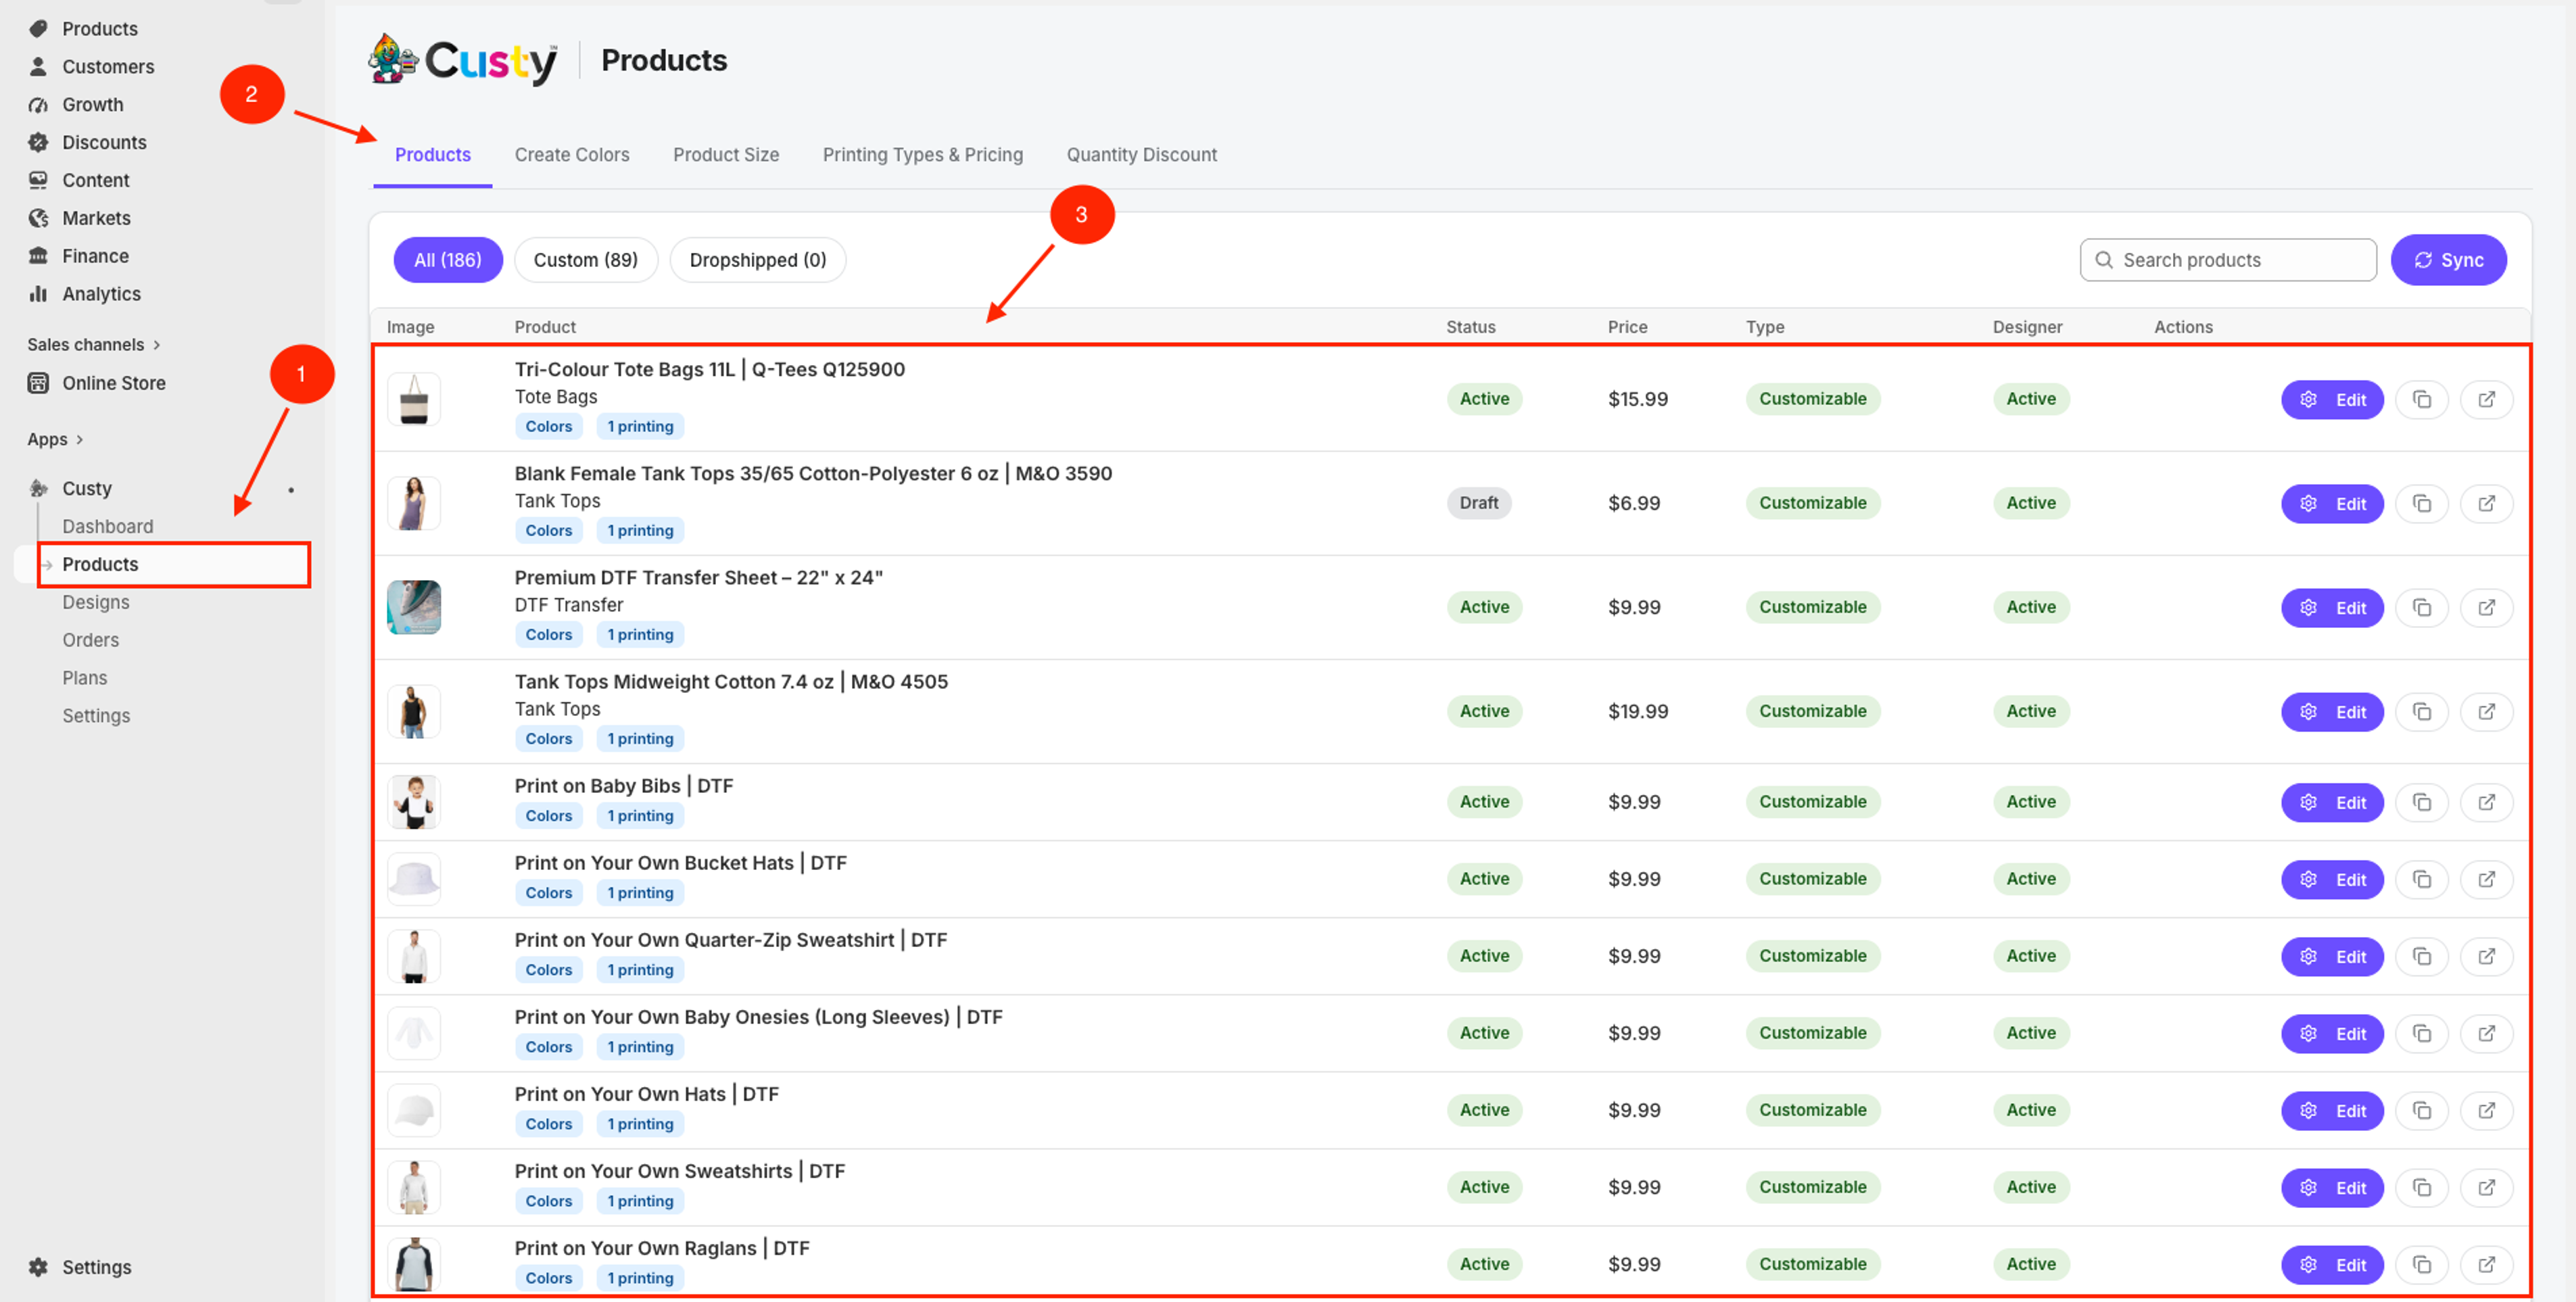
Step 1: Open Products
In Custy, click Products on the left. This is your store product list.
 Full size
- 1
Products (left menu)
Opens the product list for this store.
- 2
Products tab
Stay on this tab (not Create Colors or Product Size) to see the catalog.
- 3
Product list
Synced Shopify products. Search or filter if the list is long.
Step 2: Find and edit the product
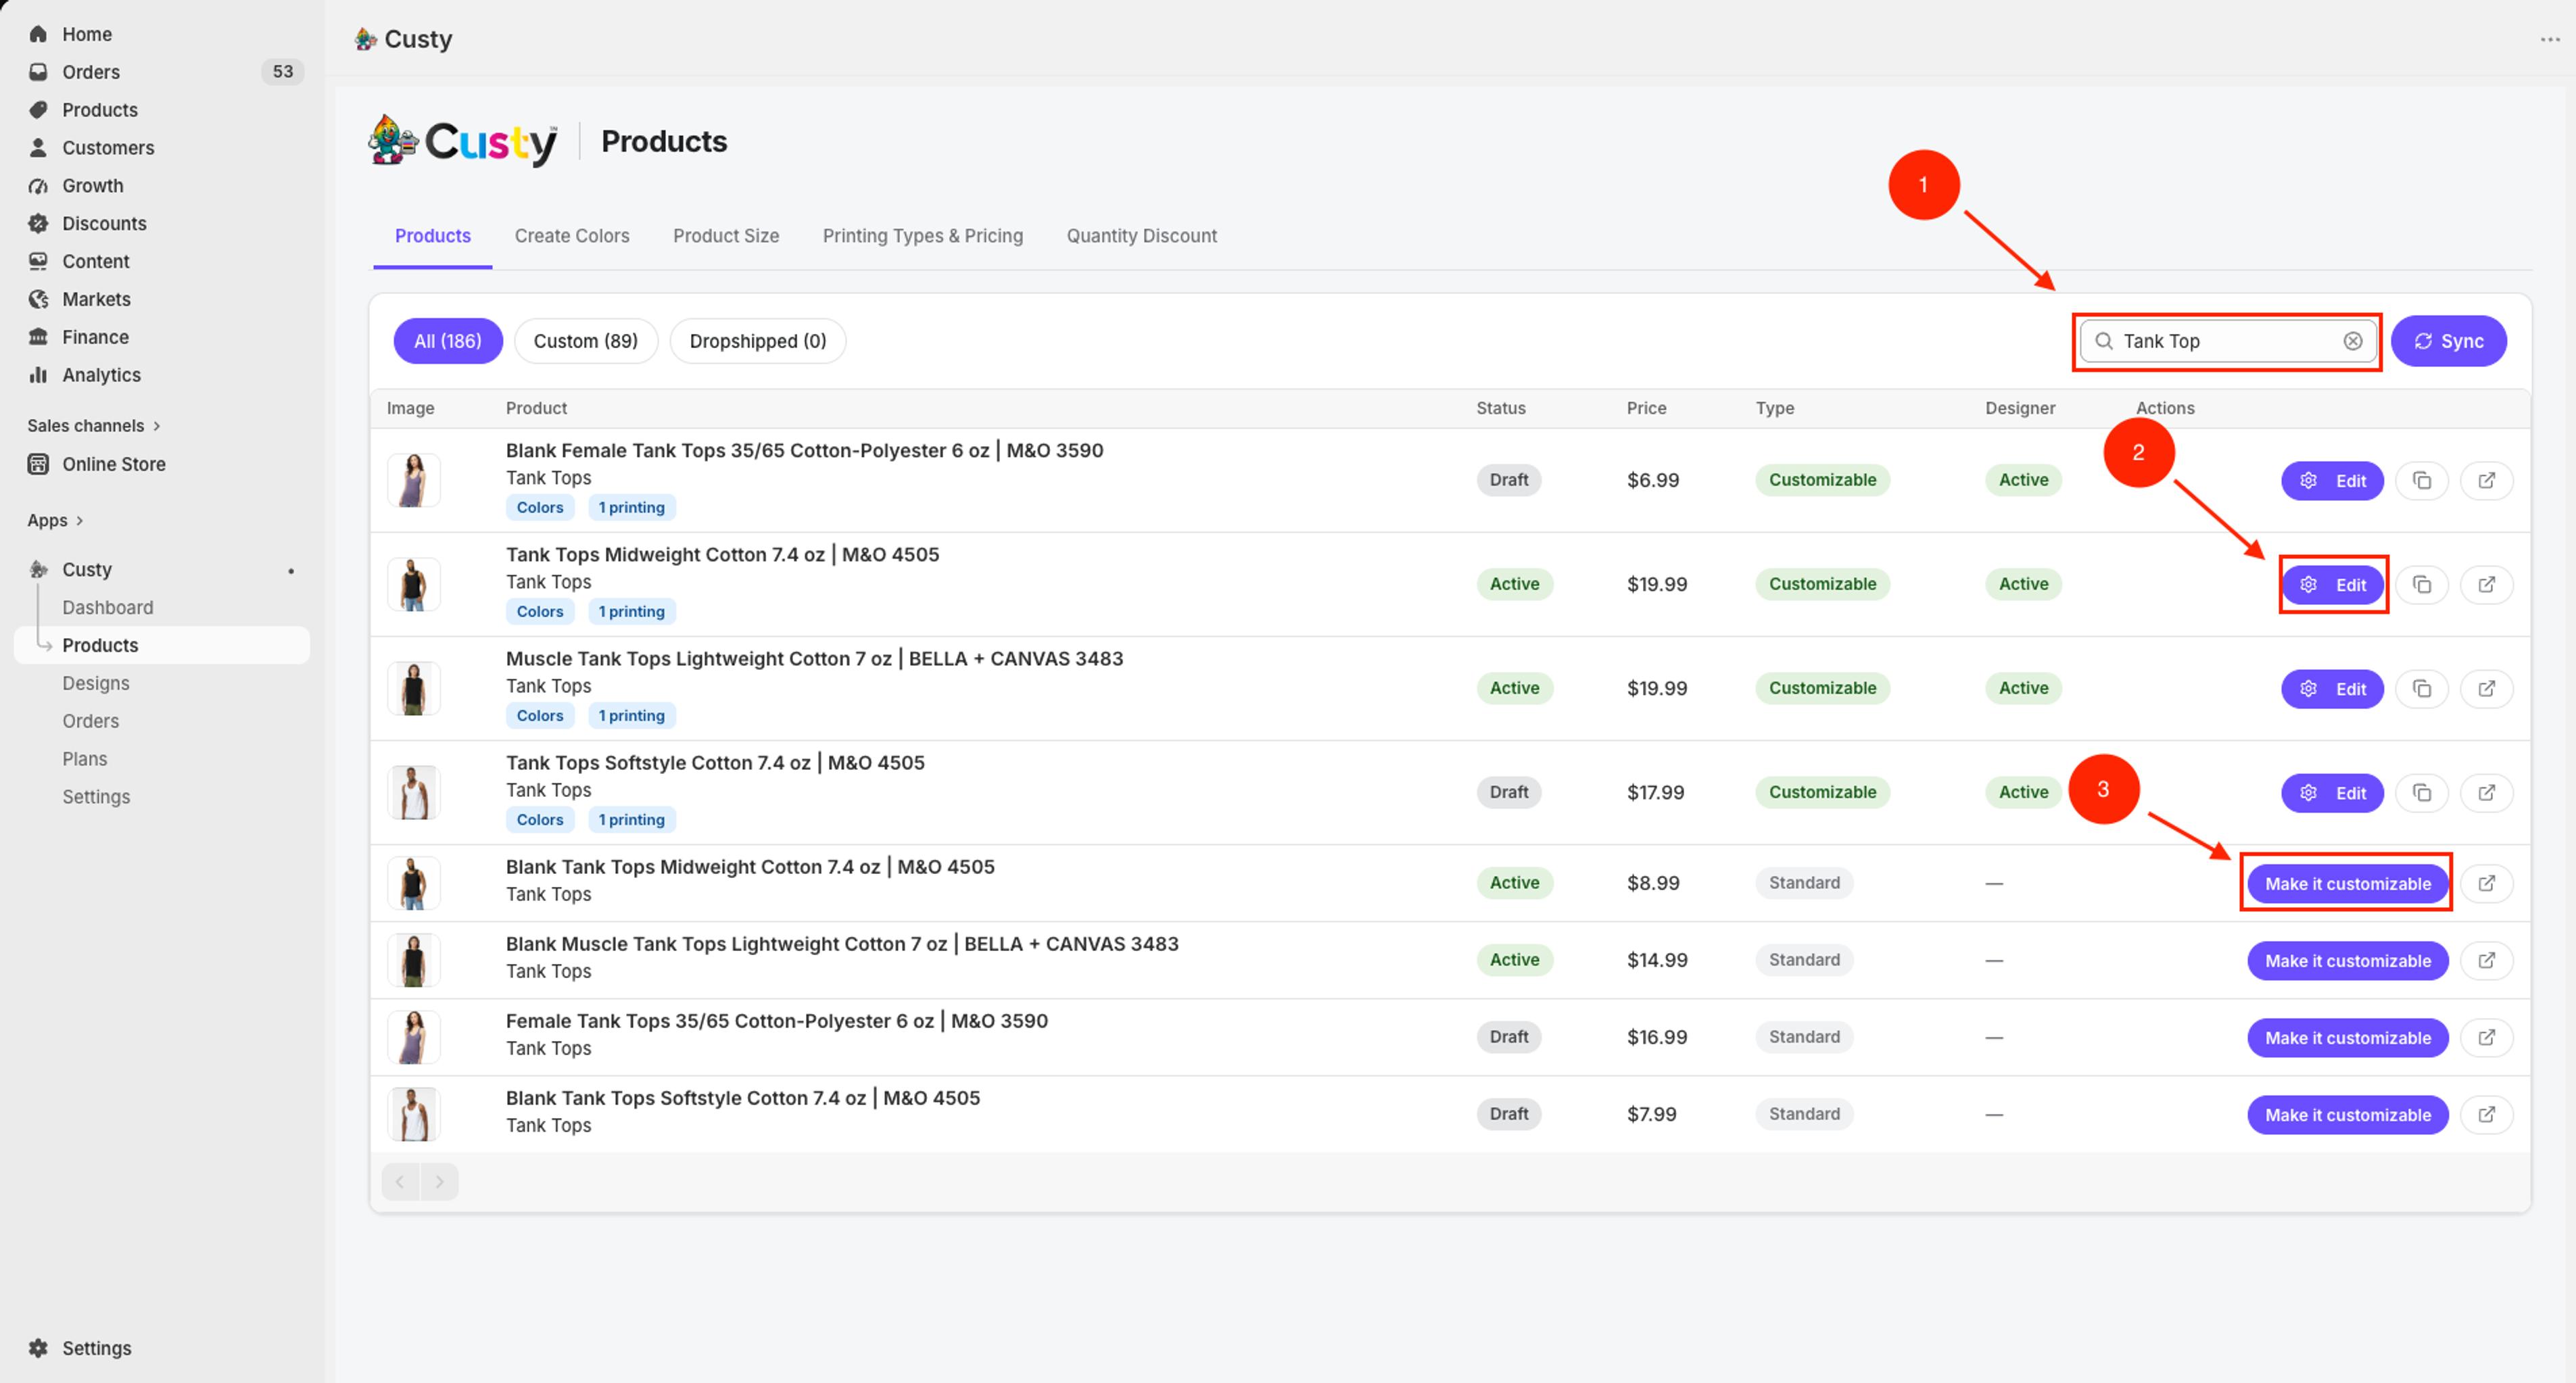
Find the product you want to update. Click Edit. If it is not customizable yet, click Make it customizable first.
- Use Search products or the All / Custom filters if you need to.
- On a customizable product, click Edit.
- On a standard product, click Make it customizable first, then continue with Product Sizes.
 Full size
- 1
Search products
Type part of the product name to find it faster.
- 2
Edit
Opens Customize Product for a product that is already customizable.
- 3
Make it customizable
Use this first if the product still says Standard. If you hit your plan limit, you will see Upgrade Plan instead.
Step 3: Open Product Sizes
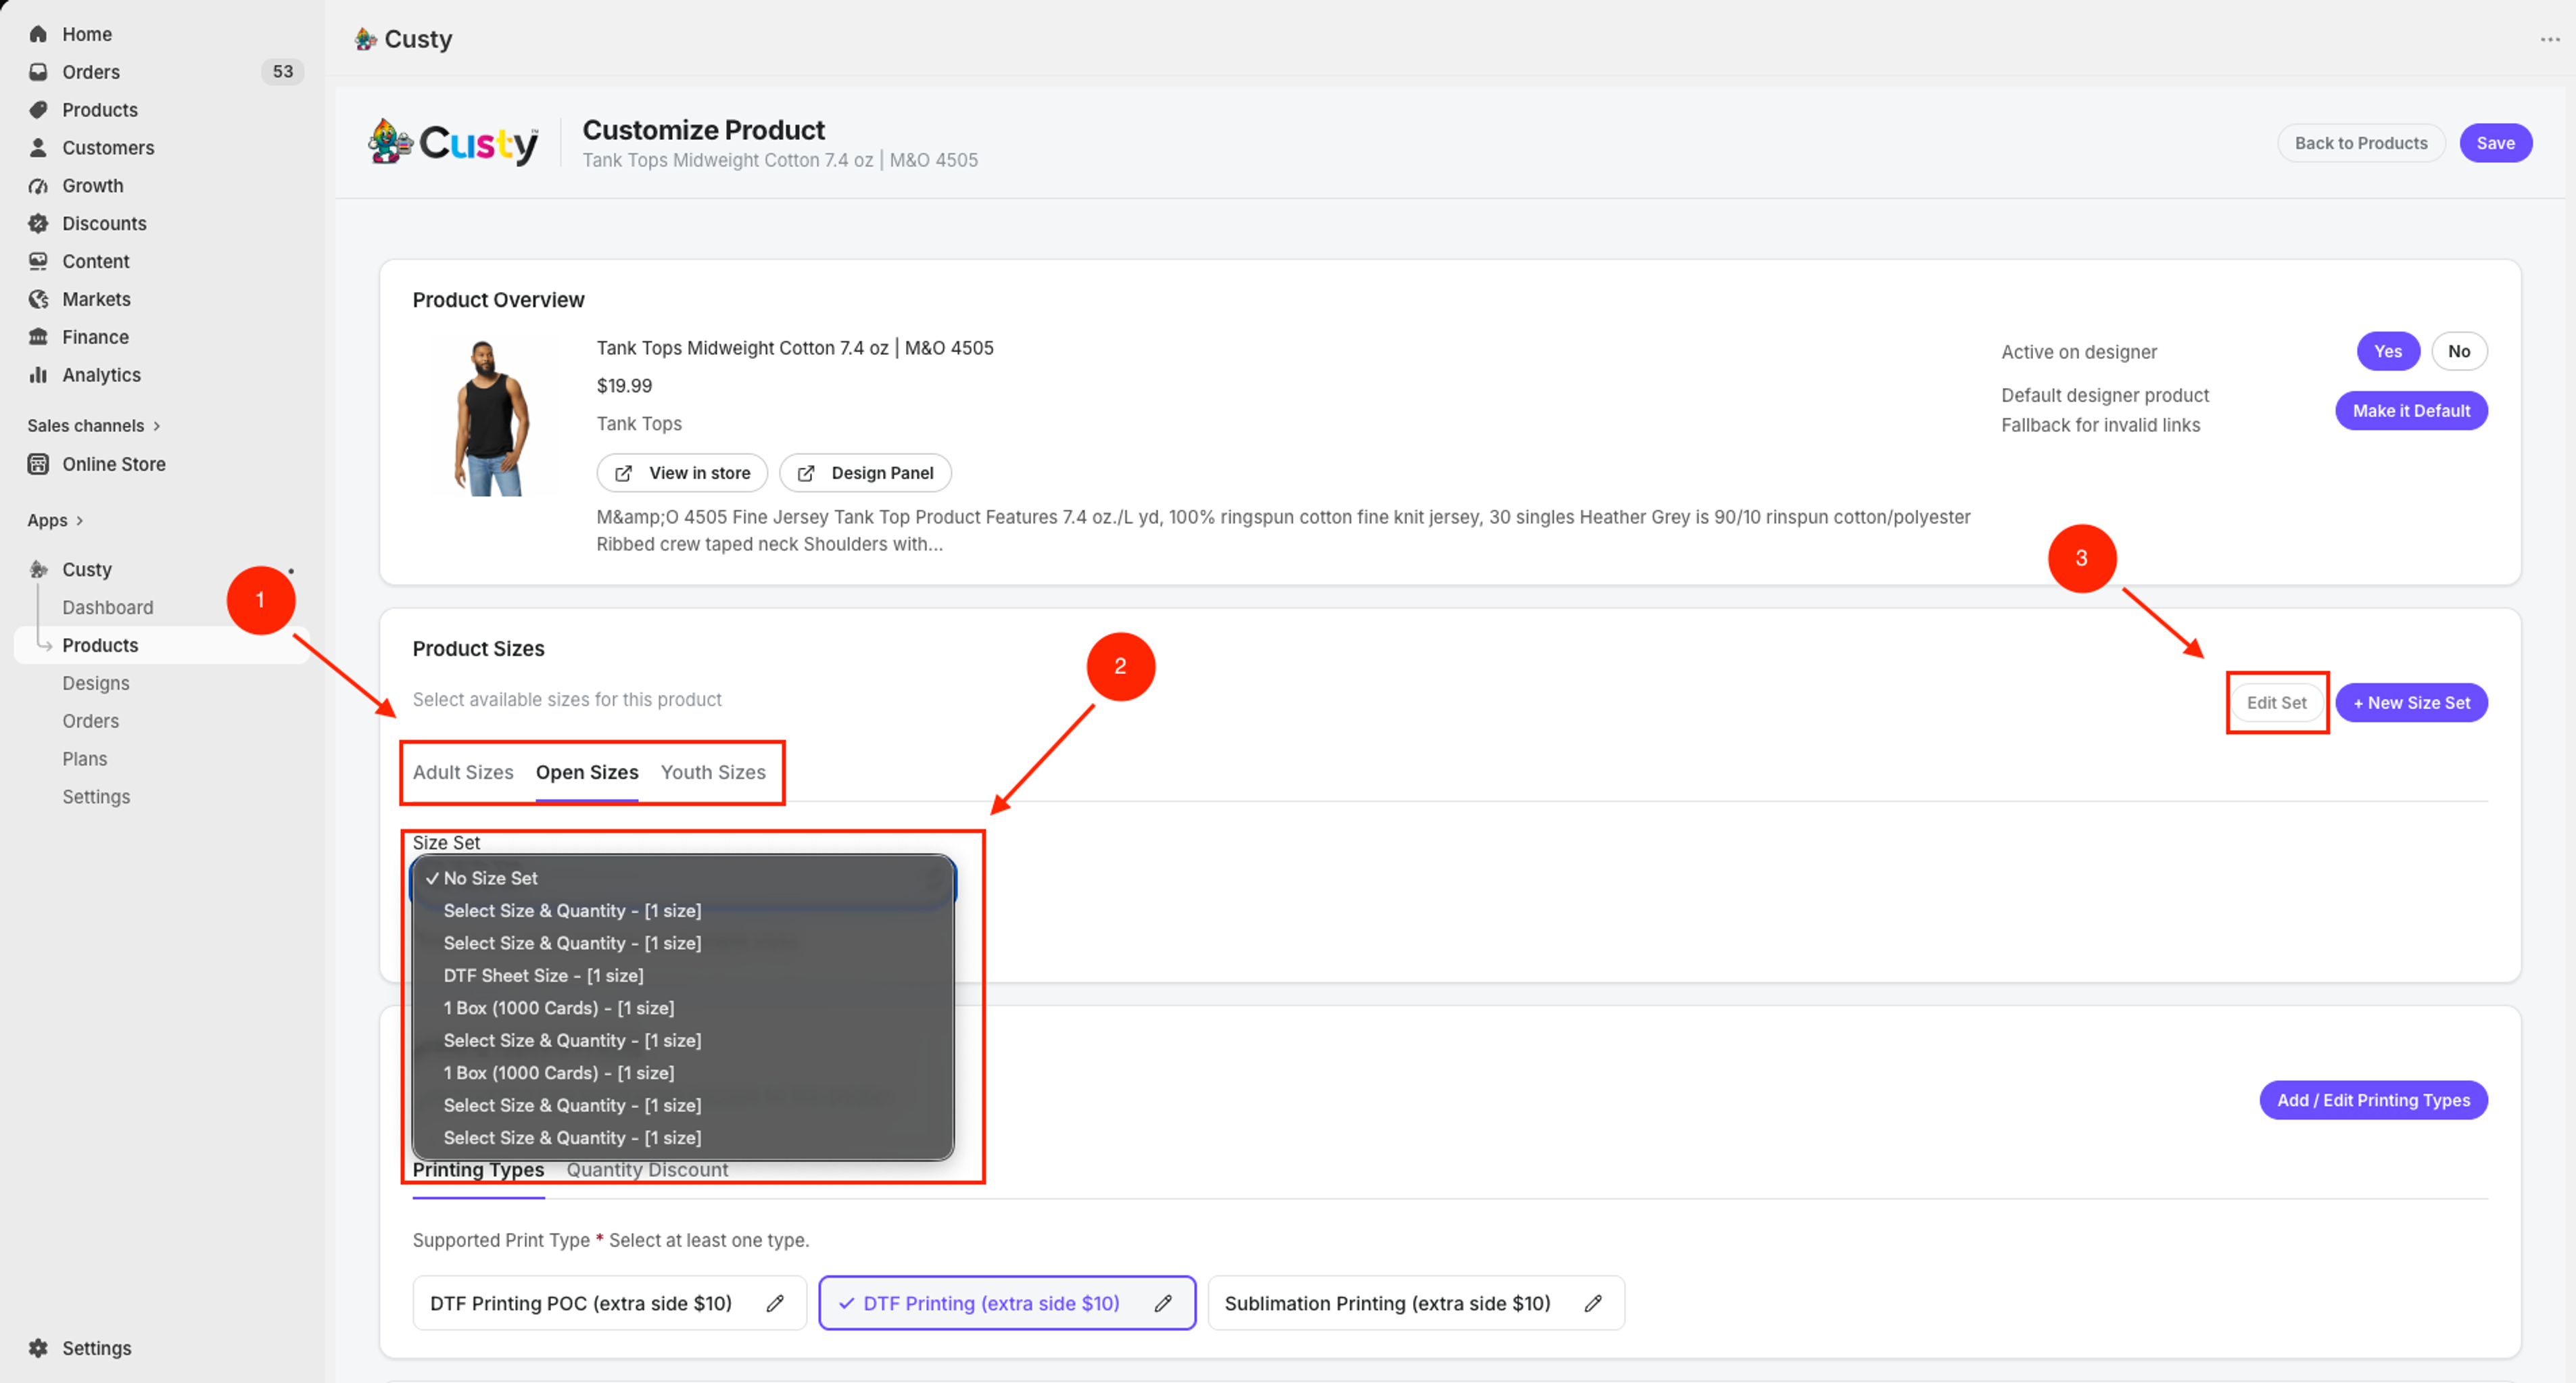
On Customize Product, Product Sizes sits near the top, just under the product title block. You will see the size category tabs and the Size Set currently assigned.
Badges under the dropdown
If a size already has an extra, the badge shows it as +$X.XX next to the size title.
 Full size
- 1
Category tabs
Adult Sizes, Open Sizes, and Youth Sizes. Pick the group that matches the product.
- 2
Size Set
The list this product uses. Extra prices live inside this set.
- 3
Edit Set
Opens Edit Size Set so you can change Extra Price ($). Use + New Size Set if you still need a set.
Step 4: Open the size set
Click Edit Set next to the assigned size set. The Edit Size Set window opens with every size in that set.
- If you do not have a set yet, click + New Size Set, add Size Title rows, then save.
- You can also edit from Products → Product Size with the pencil on a set.
Step 5: Set Extra Price ($) for each size
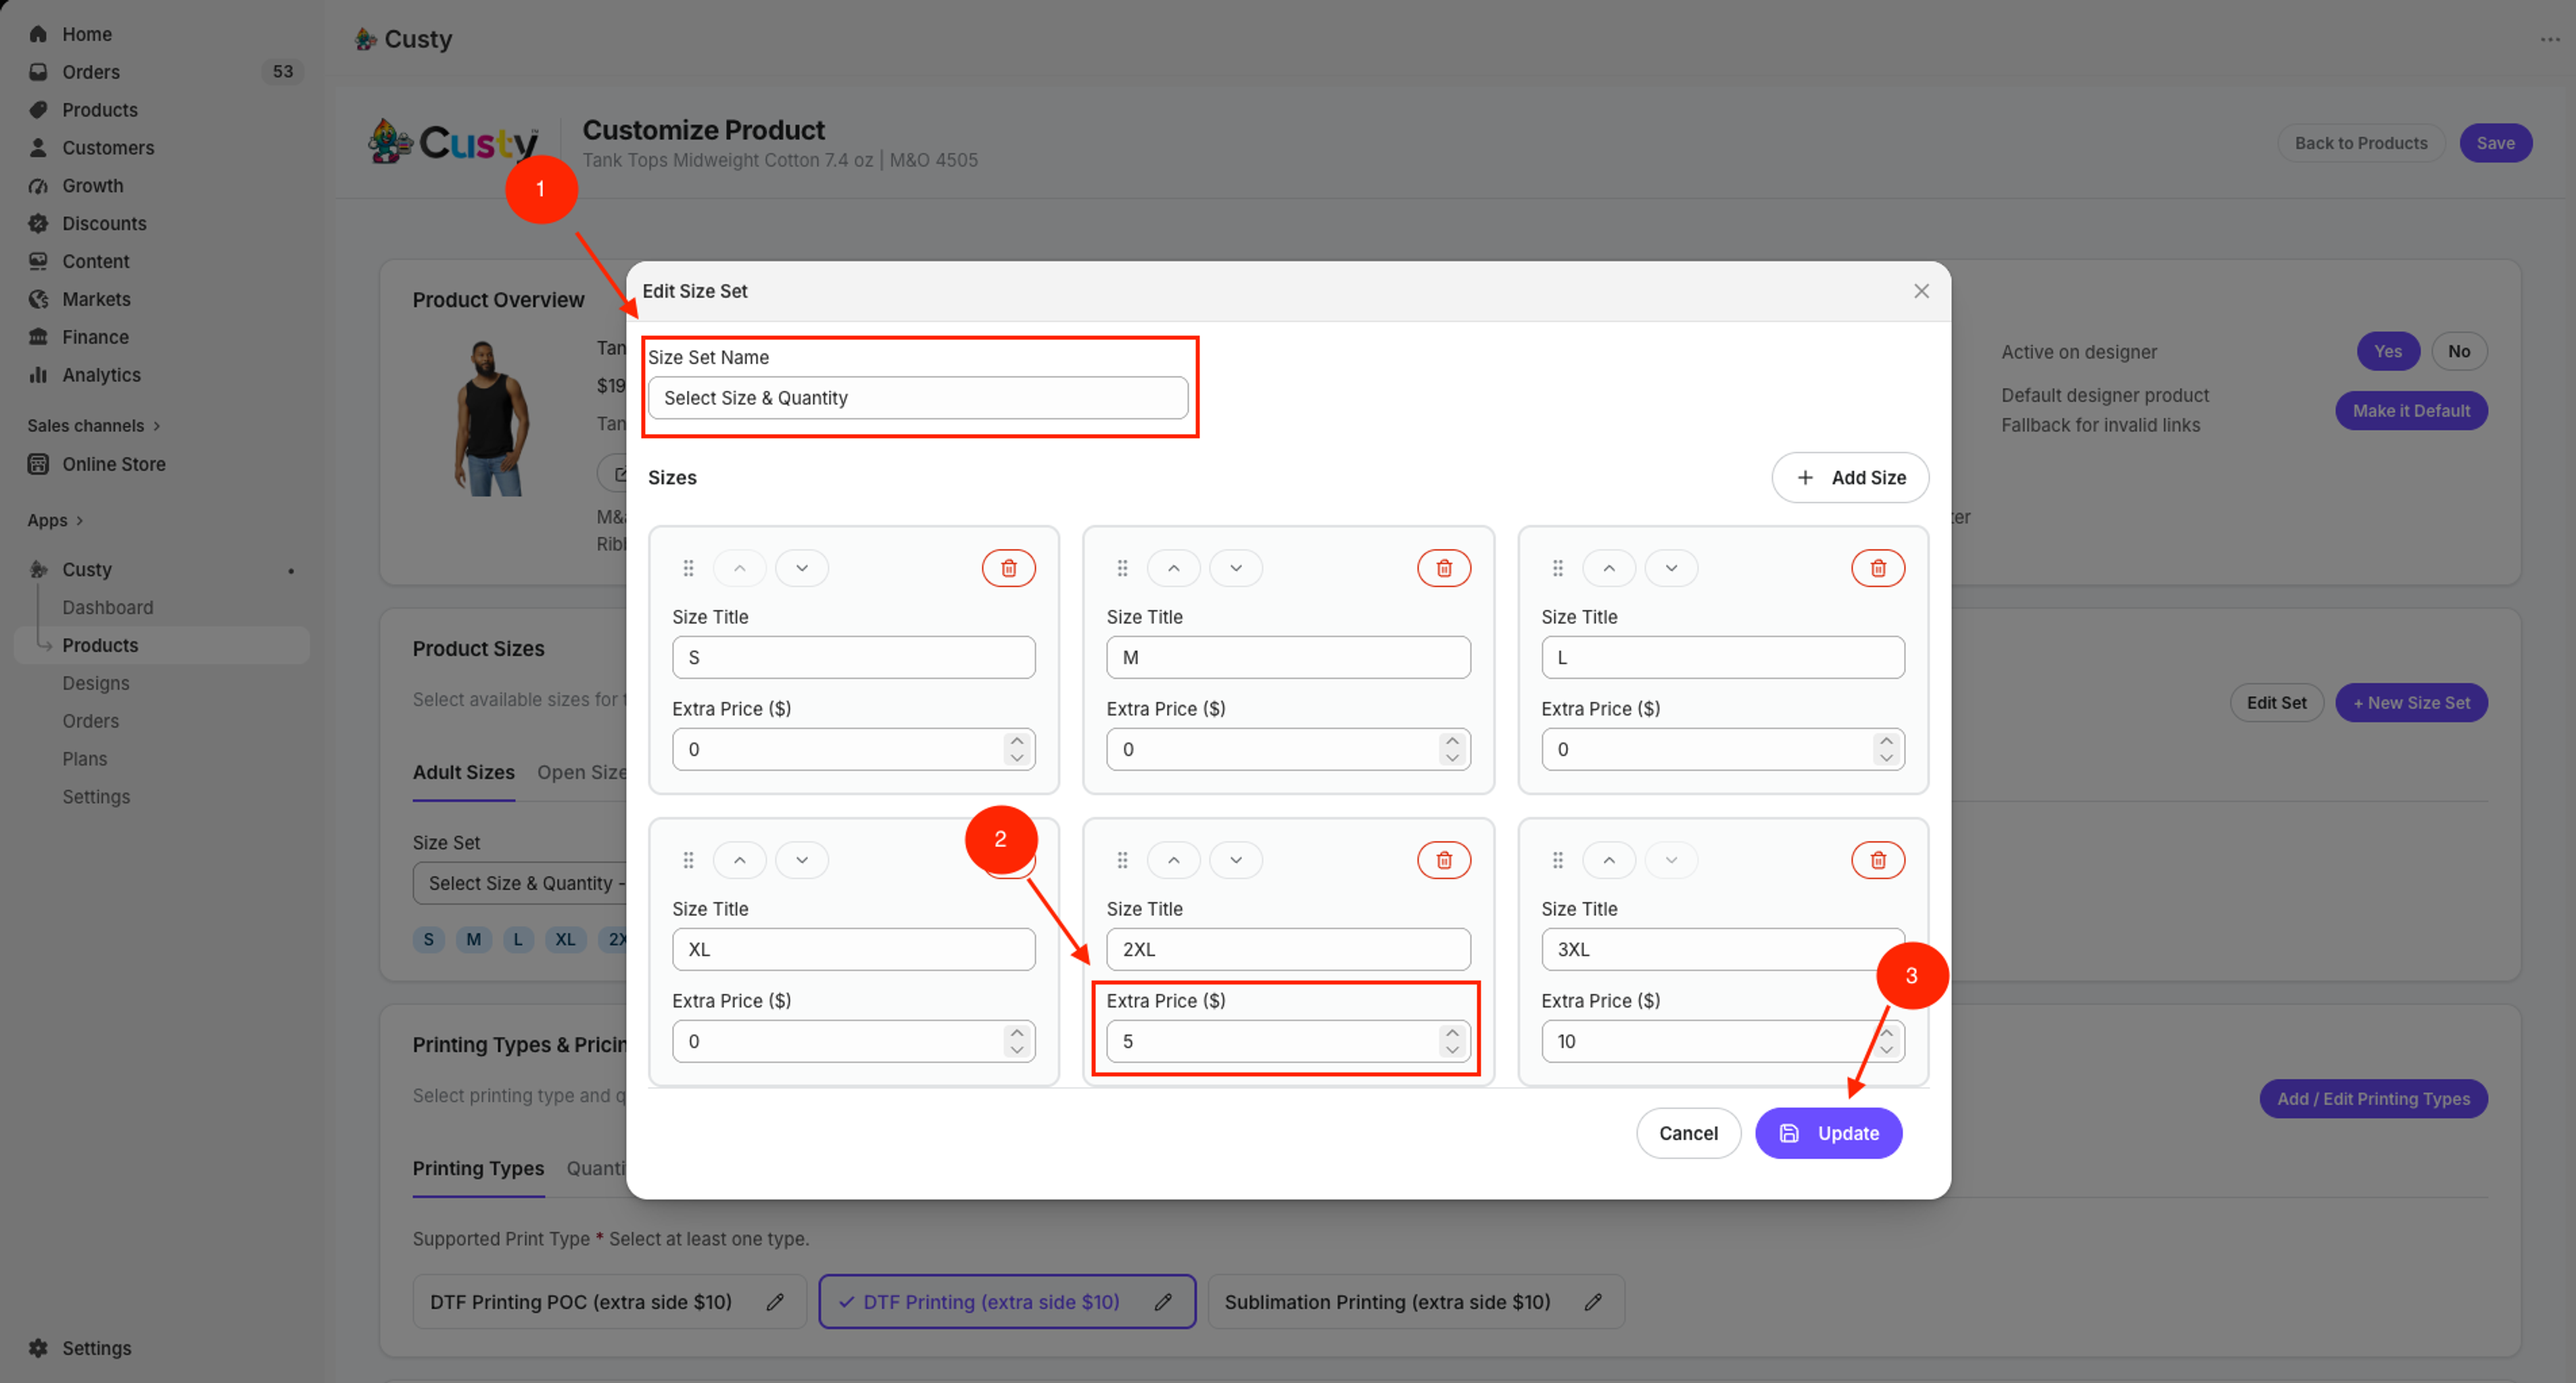
In the size set window, each size has Size Title and Extra Price ($).
- 1Extra Price ($): enter the additional amount for that size. It is added on top of the product base price for each piece the shopper orders in that size.
- 2You can set a different extra on each size, or leave 0.00 on sizes with no extra charge.
 Full size
- 1
Size Set Name
Confirms which size list you are editing.
- 2
Extra Price ($)
Add-on for that size. Use 0.00 if the base product price is enough.
- 3
Update
Saves the prices. On a new set, this button says Save.
Step 6: Save your changes
Click Update (or Save on a new set). The extra applies automatically when a shopper picks that size in the Design Lab.
What shoppers see
In the Design Lab, shoppers click SELECT SIZE & QUANTITY. Next to a size with an extra, they see +$X.XX. That amount is included when they add the design to the cart.
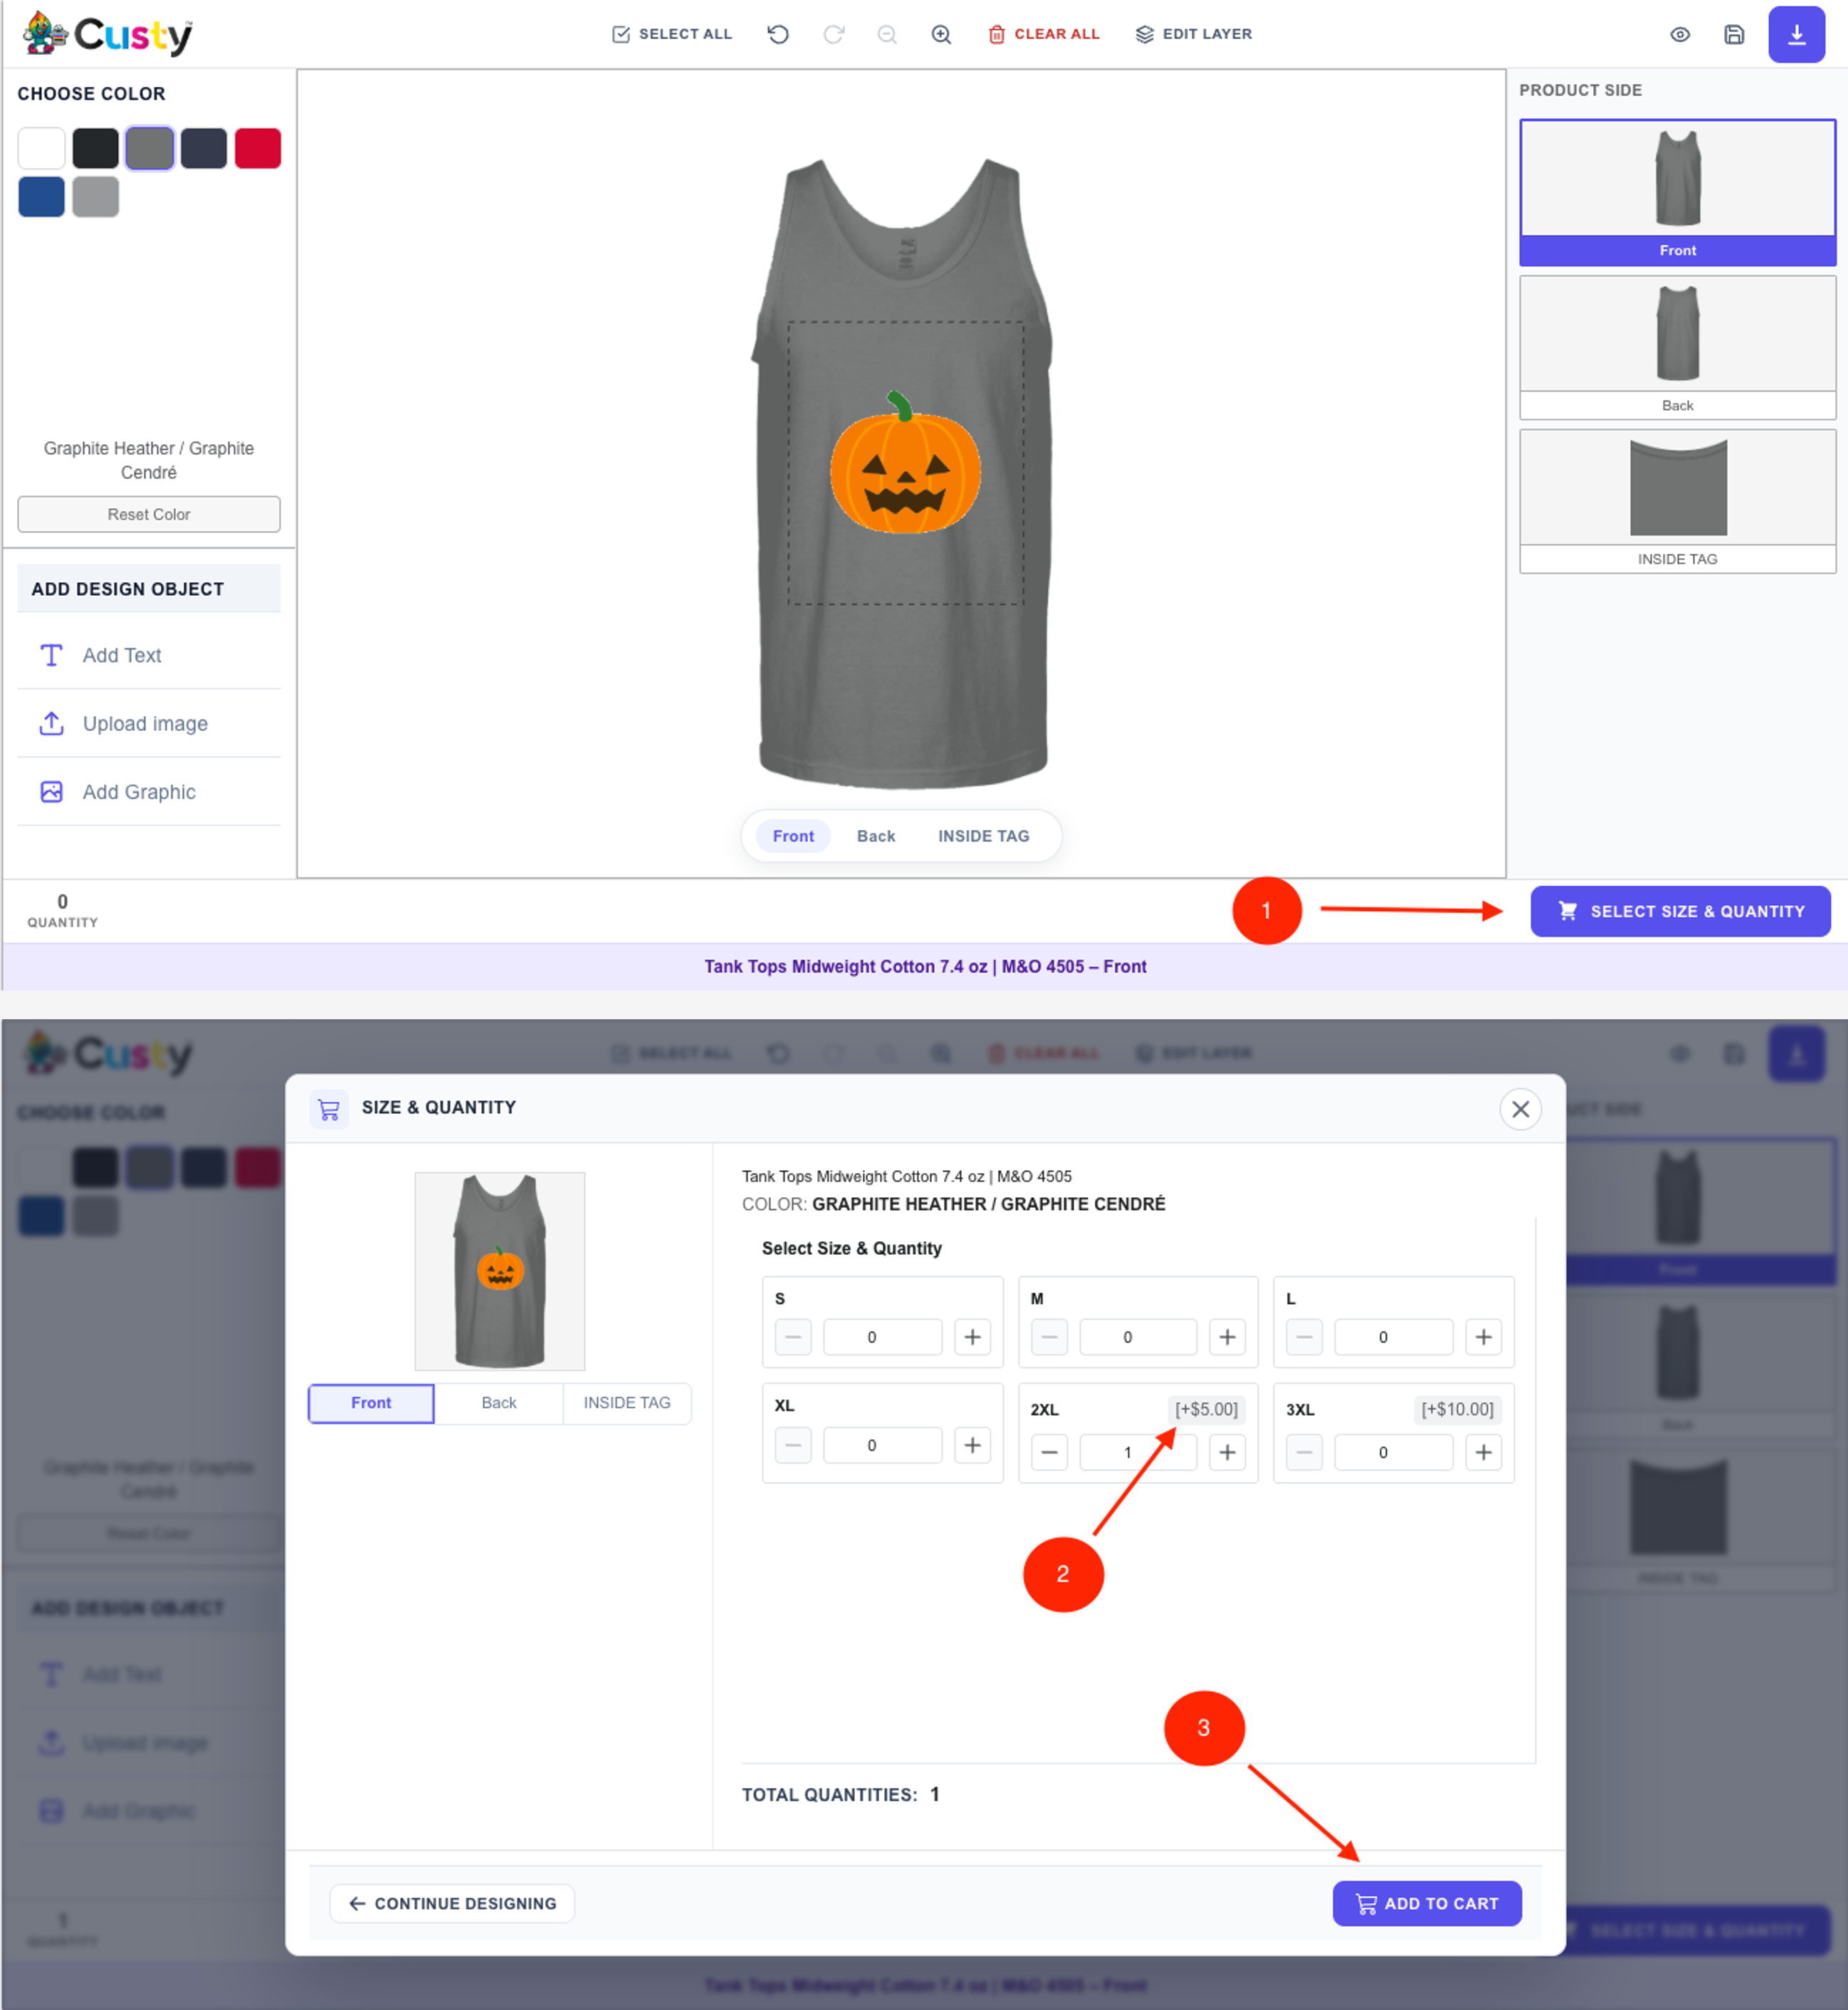 Full size
- 1
SELECT SIZE & QUANTITY
Opens the size and quantity step.
- 2
Size extra
Shown as +$ next to the size title when Extra Price ($) is greater than 0.
- 3
ADD TO CART
The cart total includes the size extra for each piece of that size.
What to do next
If some colors also cost more, set Price ($) on those colors. Then finish printing types if you still need printing fees.