
How to Upload Custom Fonts Using Custy?
Custom fonts let shoppers type with your typefaces in the Design Lab. You upload them under Designs → Manage Fonts.
Custy accepts .woff and .woff2 only. If you have a .ttf or .otf file, convert it first (for example with cloudconvert.com), then upload.
Step 1: Open Manage Fonts
Click Designs, then Manage Fonts. Click Add Font.
- Click Designs.
- Click Manage Fonts.
- Click Add Font.
No category yet?
Click Manage Categories, add a category, then come back to Add Font.
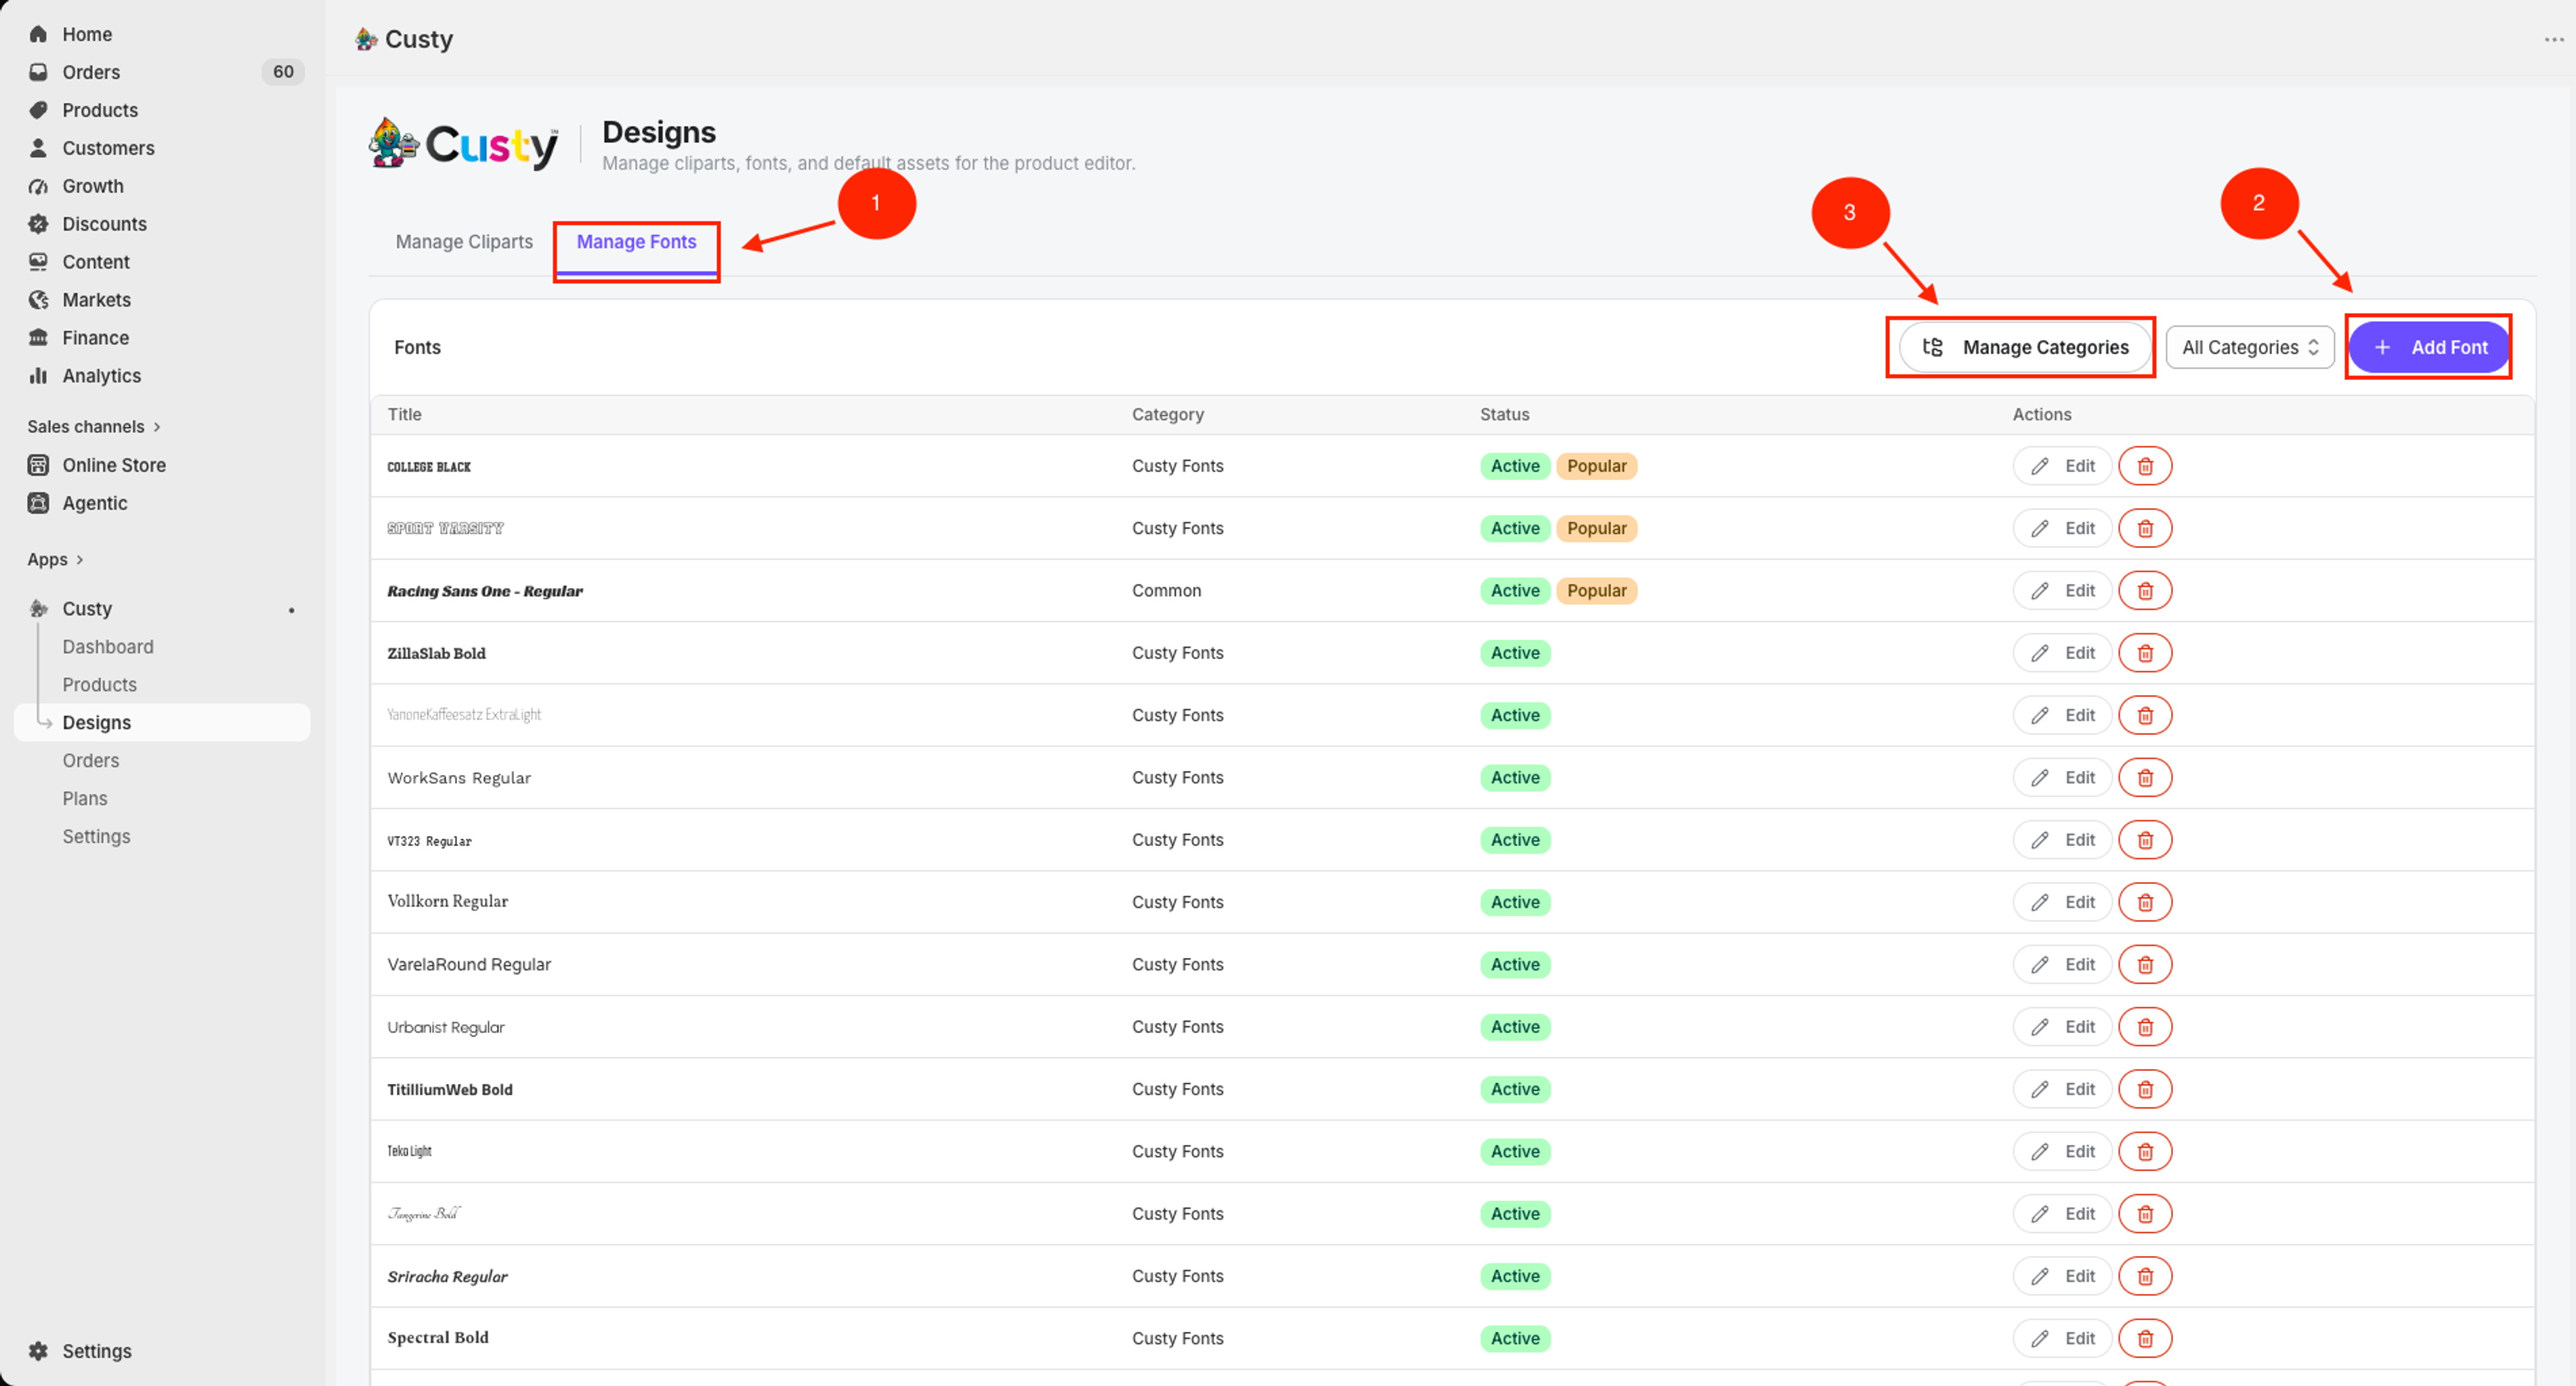 Full size
- 1
Manage Fonts
This tab holds your custom fonts.
- 2
Add Font
Click to upload a new font file.
- 3
Manage Categories
Make a folder first if you do not have one yet.
Step 2: Fill in the font
In New Font, fill the boxes. Check the preview so the face looks right.
- Type a Title (required).
- Click Upload Font File and pick a .woff or .woff2 file.
- Pick a Category (required).
- Optional: turn on Popular or Active. Leave Active on if shoppers should see it.
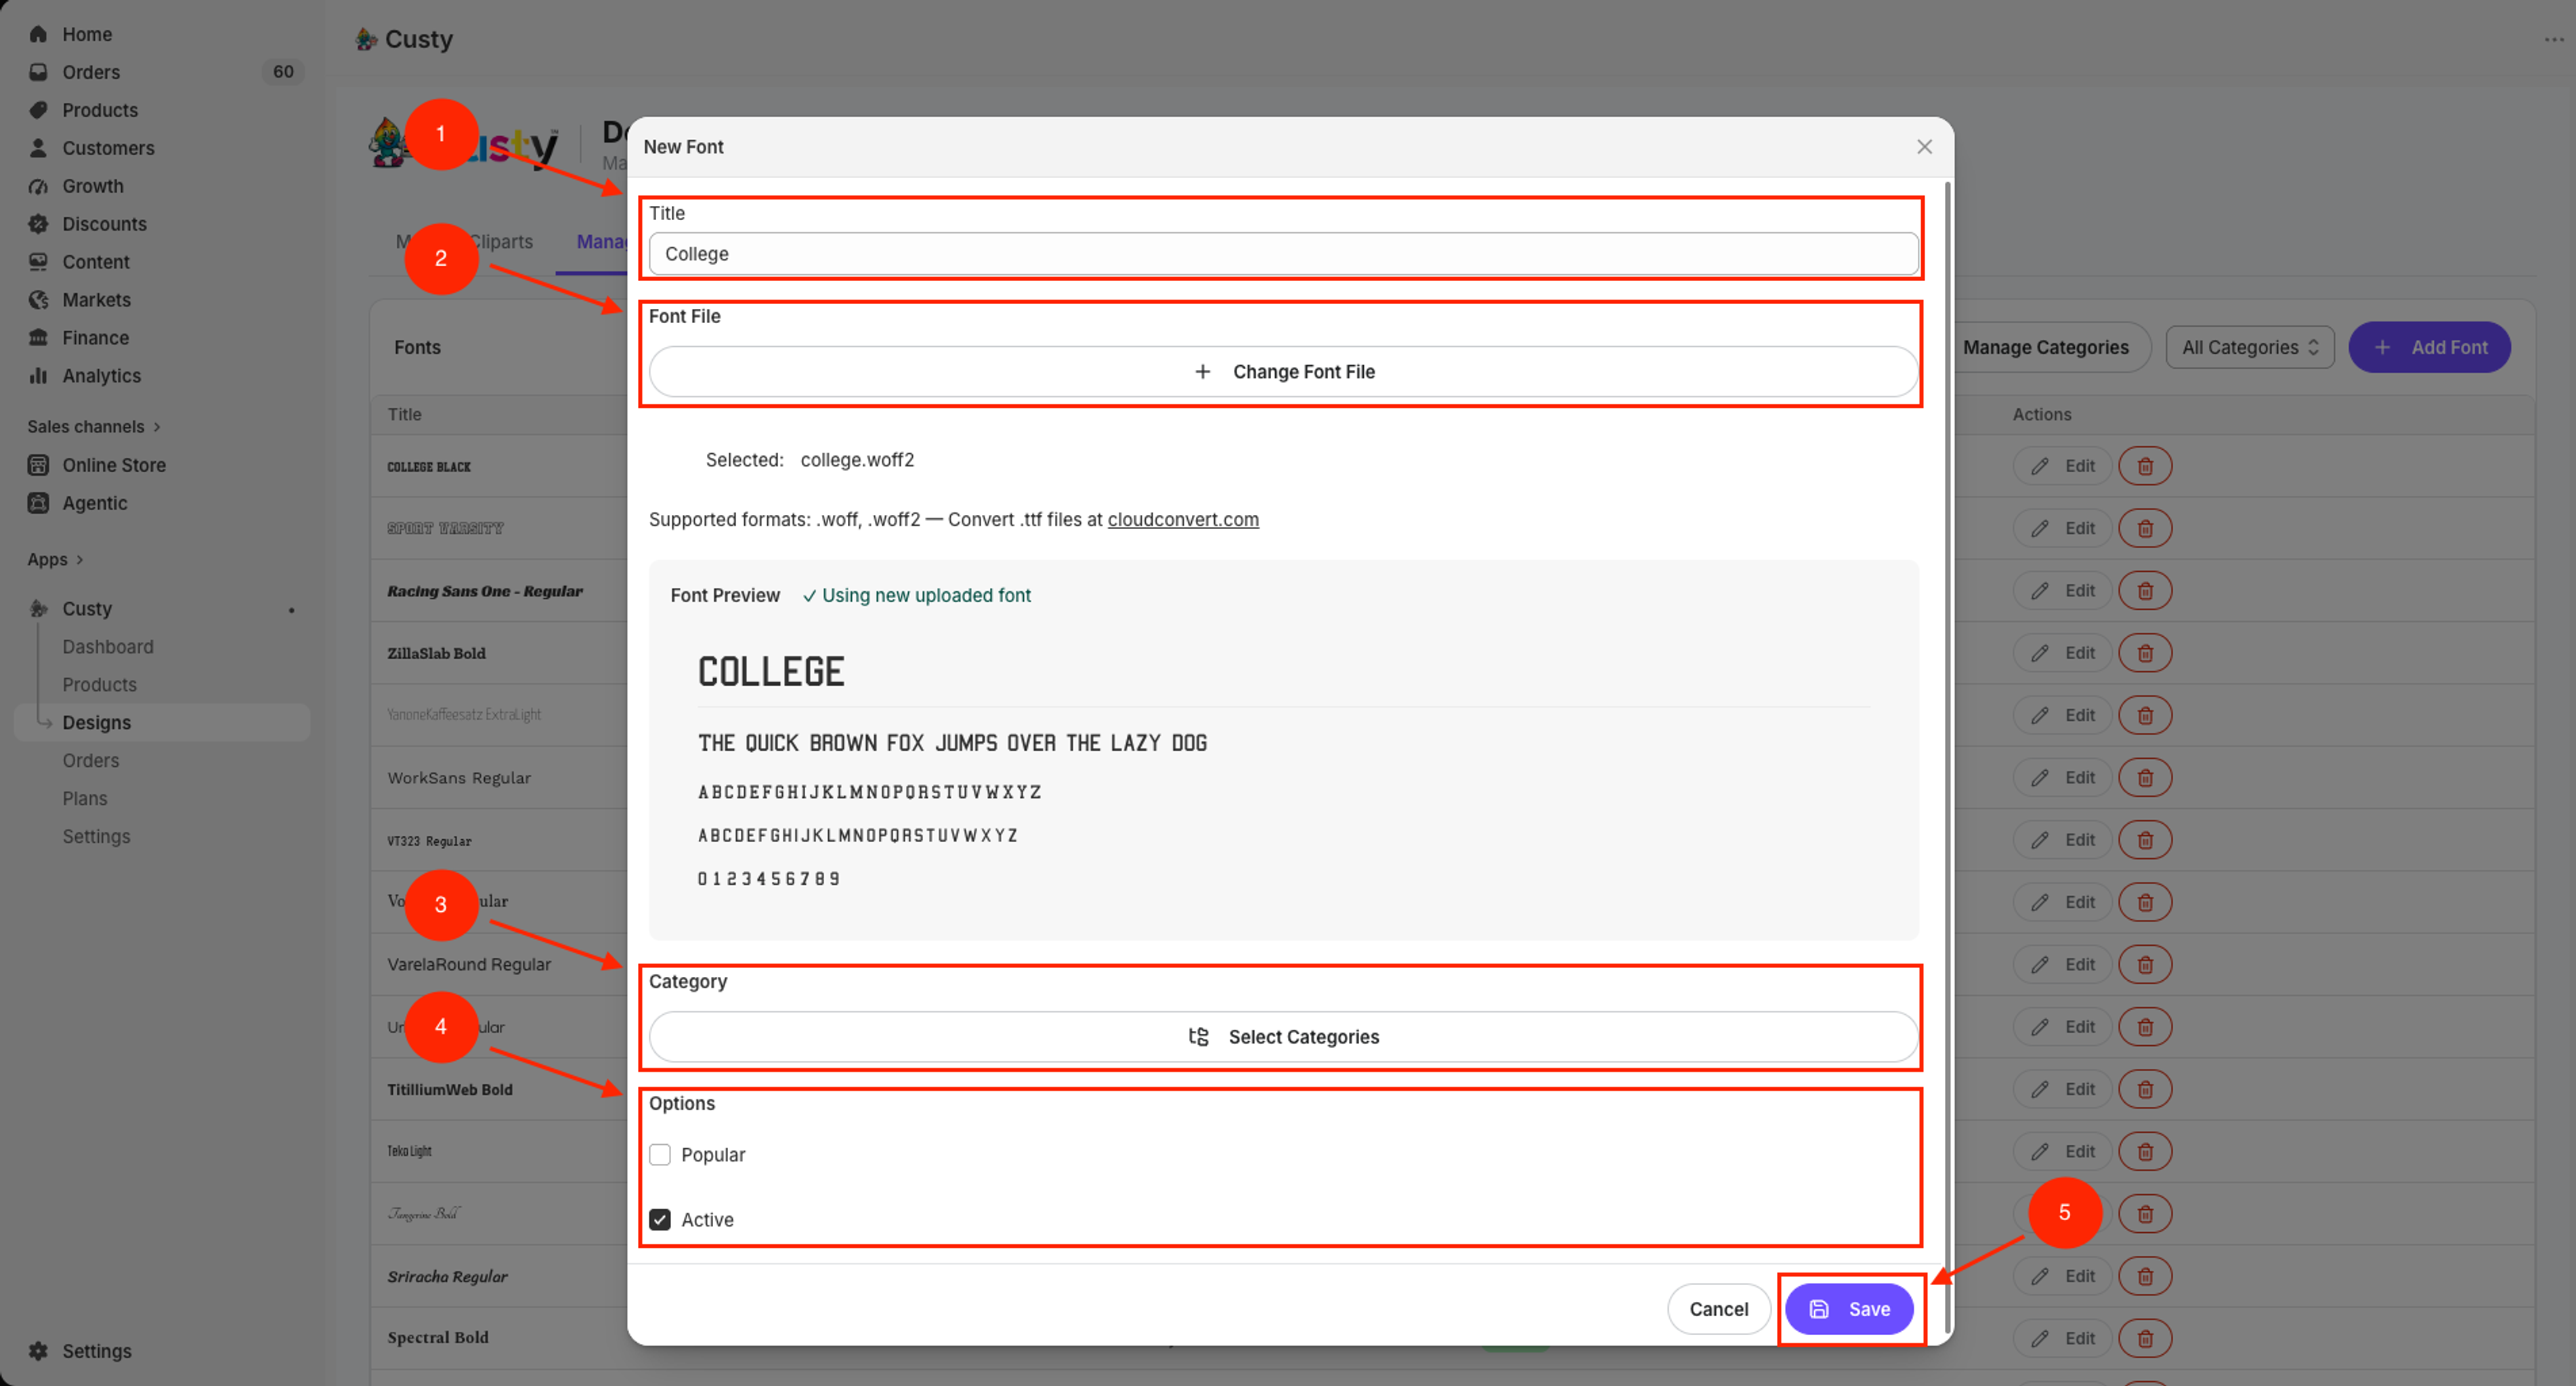 Full size
- 1
Title
The name in your font list.
- 2
Font File
Upload or change the .woff / .woff2 file.
- 3
Category
Pick one font category.
- 4
Popular / Active
Popular can highlight it. Active means shoppers can use it.
- 5
Save / Update
Store the font.
Step 3: Save
Click Save. If you edit later, click Update. Your products stay safe.
- Click Save or Update.
What to do next
Open a product in the Design Lab and try Add Text with your new font. Keep adding cliparts if you need library art too.