
How to Set Clipart Restrictions by Printing Type?
Sometimes a clipart folder should only appear for Screen Print, or only for DTG. In Custy you set that on the clipart category, not on each product.
Open Manage Categories, edit the category, and pick Printing Types. If you pick none, that category is available for all printing types.
Step 1: Open Manage Categories
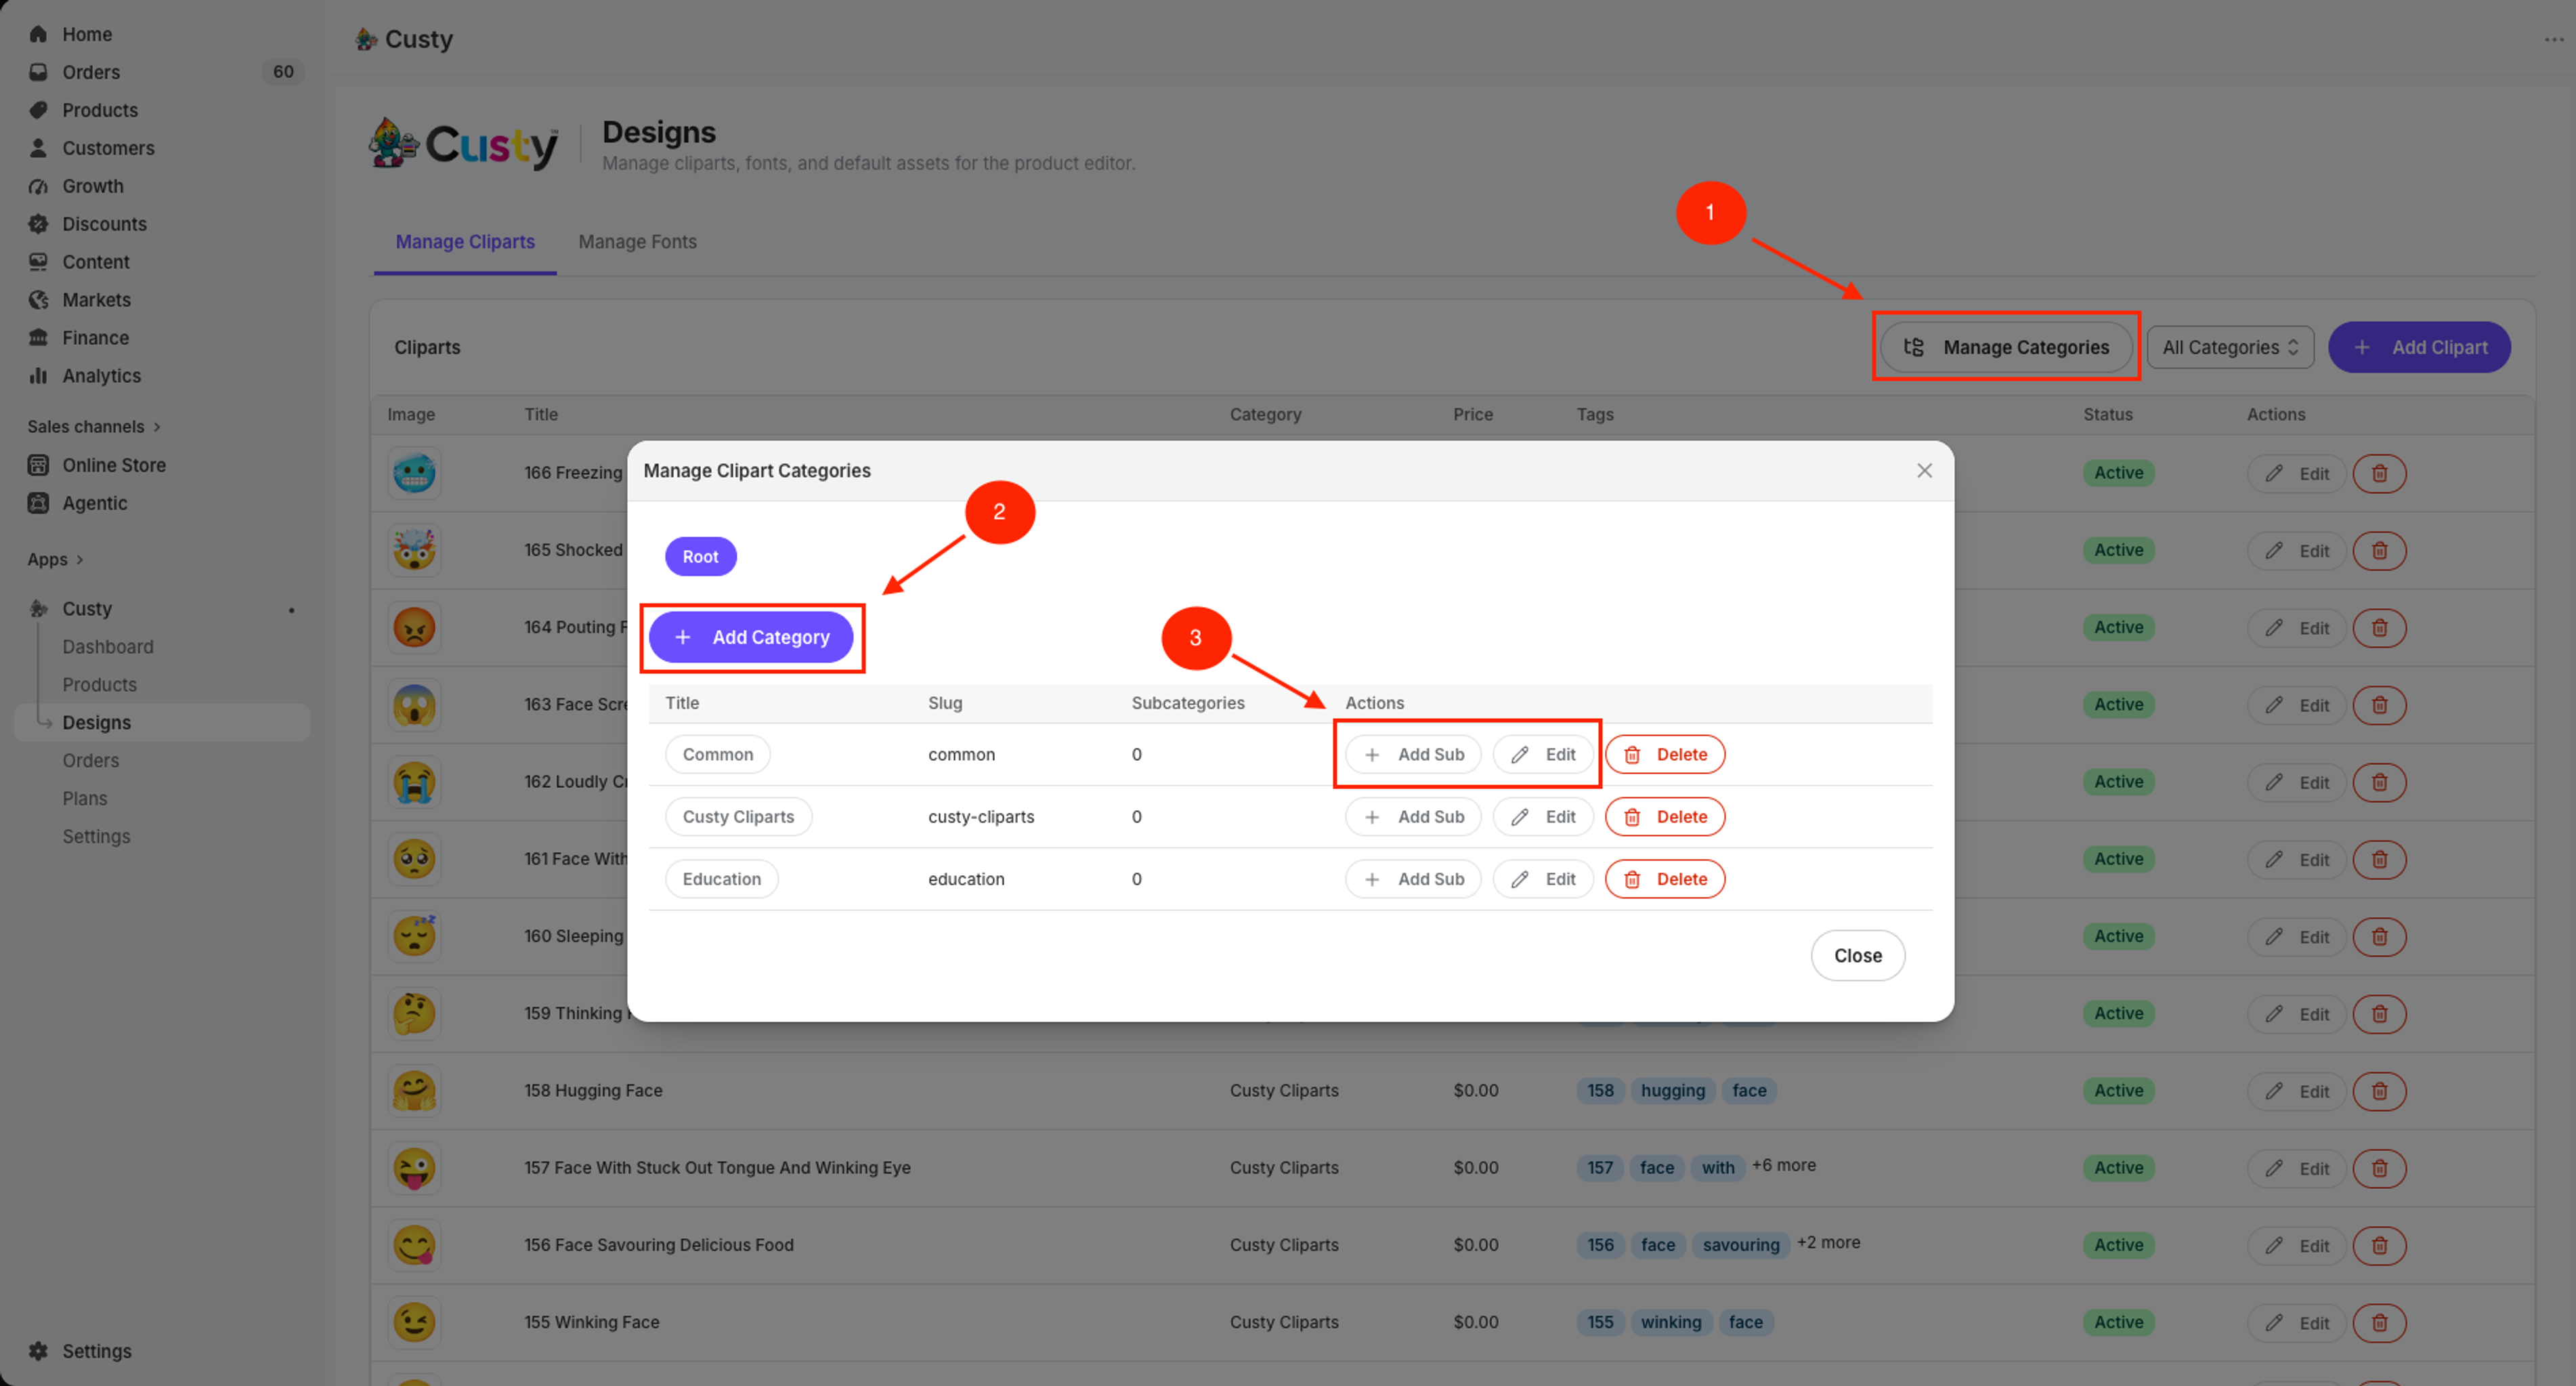
Click Designs, then Manage Cliparts. Click Manage Categories.
- Click Designs.
- Click Manage Cliparts.
- Click Manage Categories.
 Full size
- 1
Manage Categories
Opens your clipart folders and subfolders.
- 2
Add Category
Make a new top-level folder.
- 3
Add Sub / Edit
Add a subfolder or edit an existing category.
Step 2: Pick Printing Types
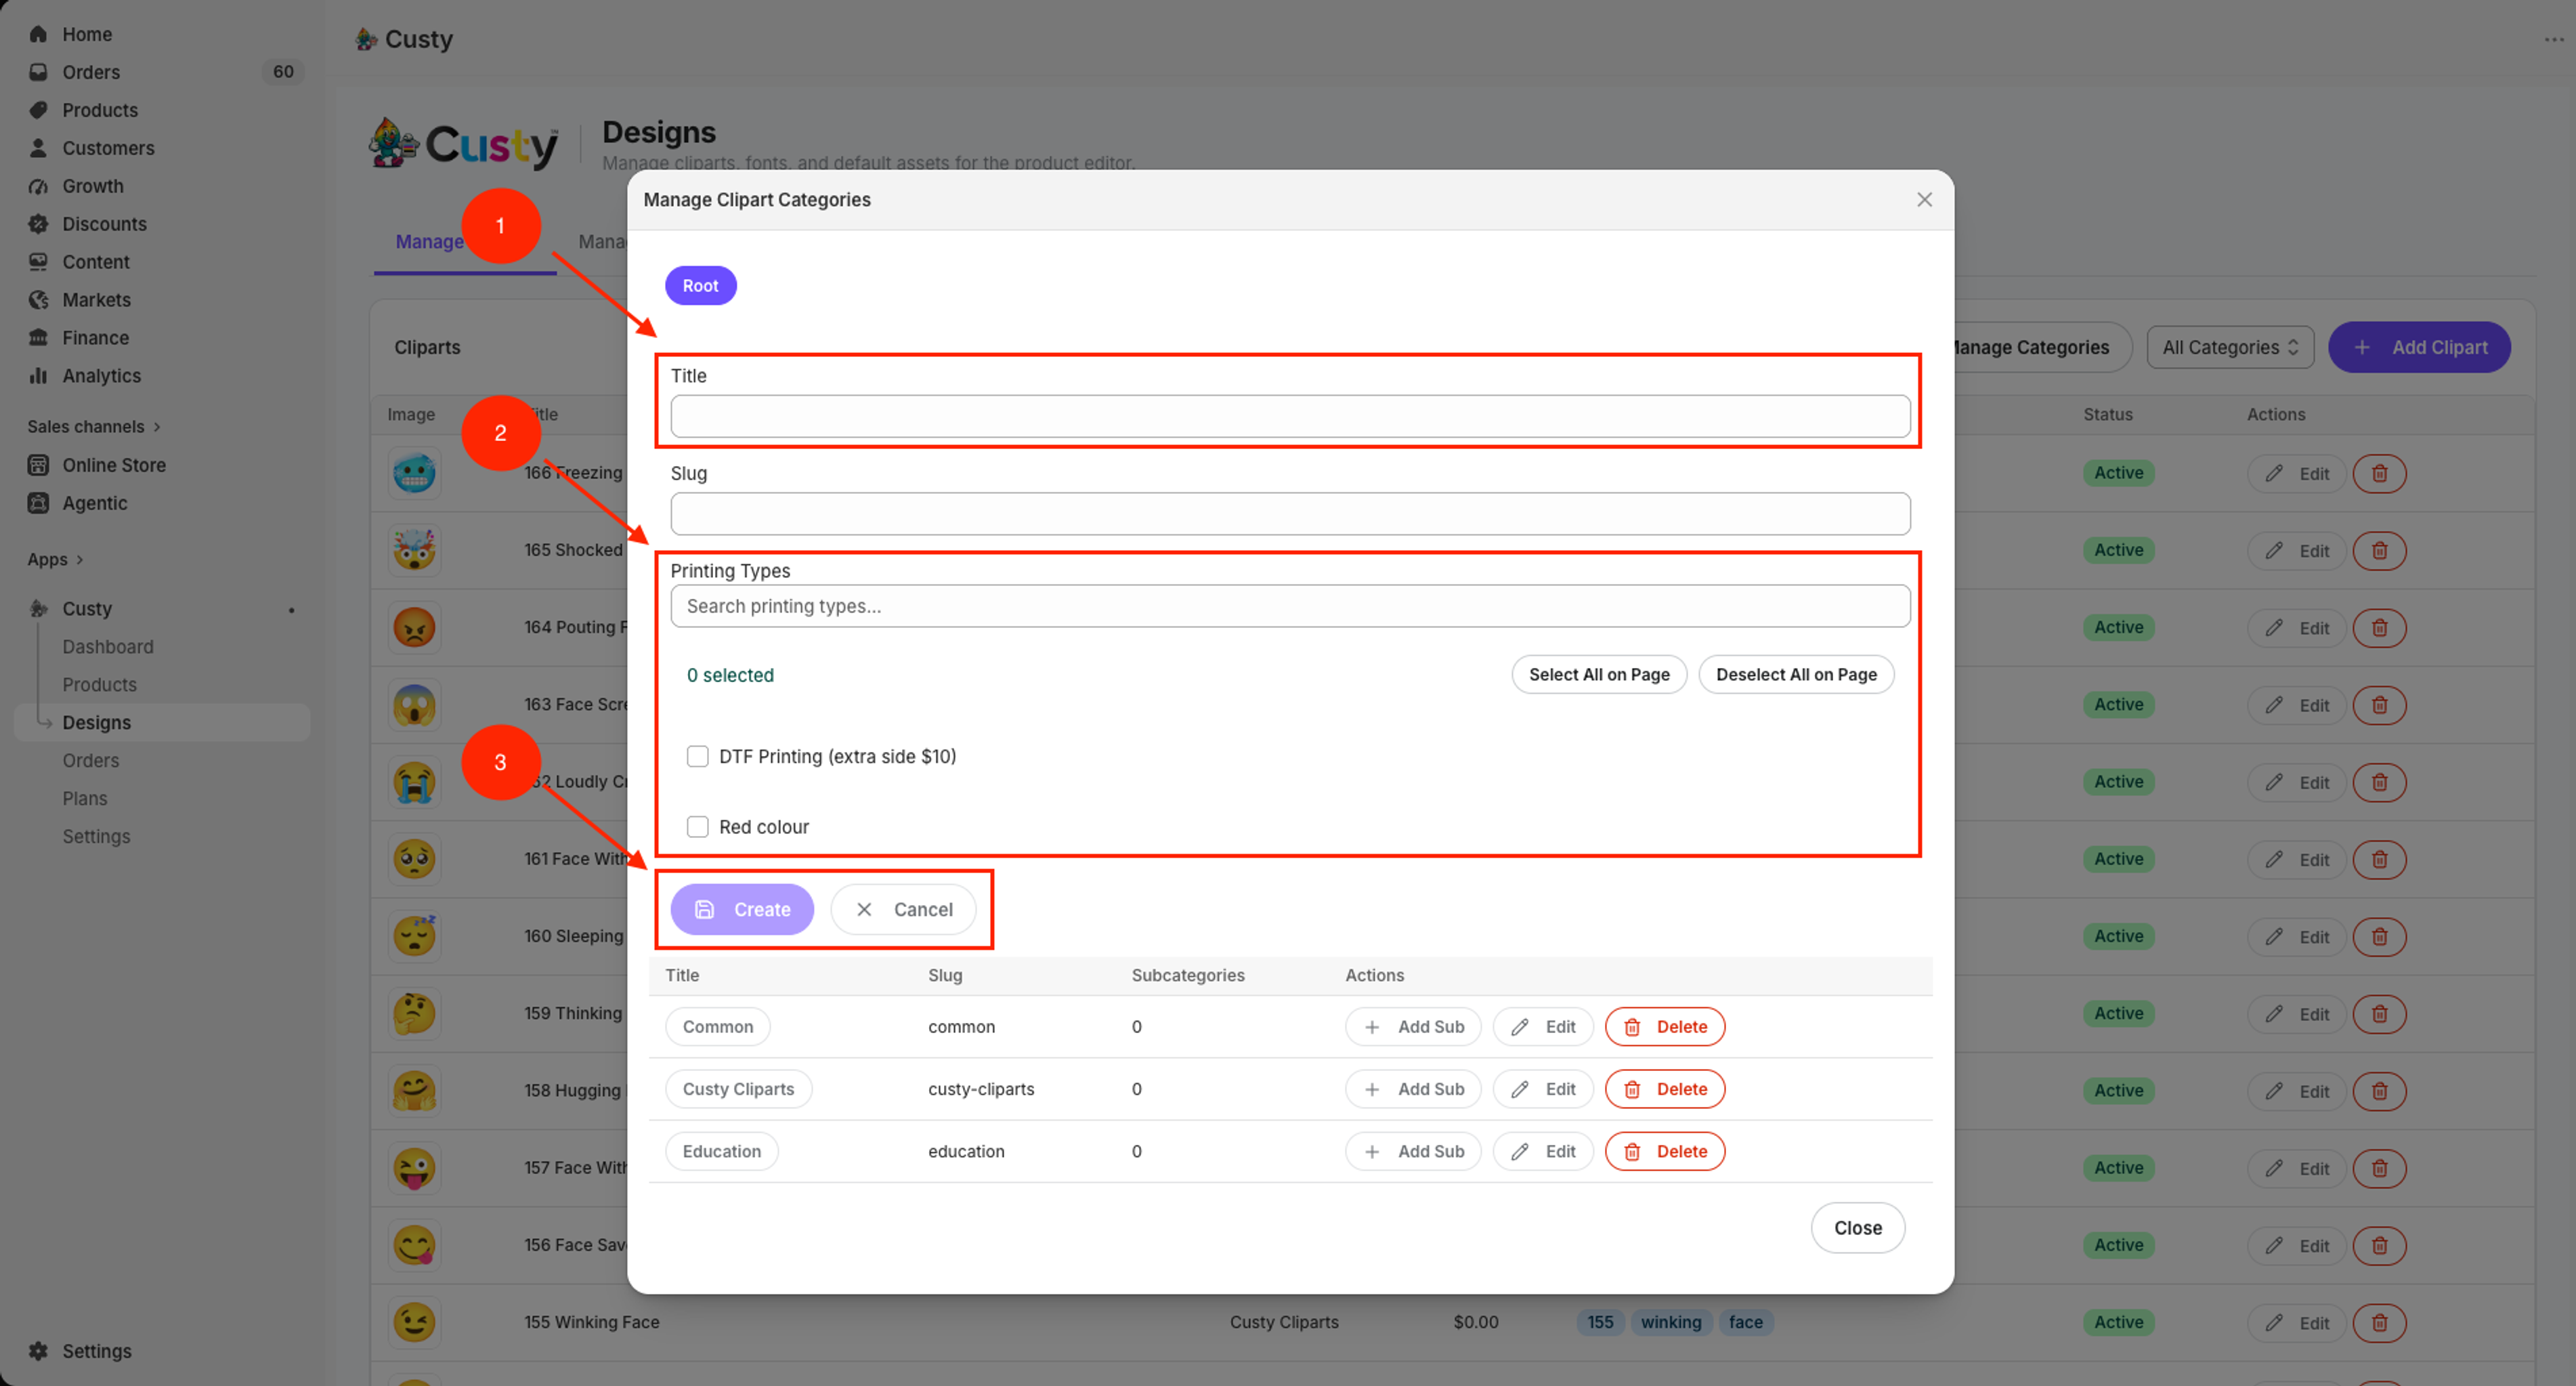
Click Add Category, or click Edit on a category you already have. Under Printing Types, pick the methods that may use cliparts in this folder.
- Click Add Category or Edit.
- Type a Title (and optional Slug, or leave slug empty to auto-generate).
- Under Printing Types, click the types you want. Use Select All on Page or Deselect All on Page if you need them.
- Leave every printing type unchecked if this category should work with all types.
- Click Create (new) or Update (edit).
Subcategories
Click Add Sub on a row to add a subcategory under that folder. Subcategories can have their own printing type list too.
 Full size
- 1
Title
Name the category. Slug can stay empty to auto-generate.
- 2
Printing Types
Choose which print methods can use cliparts in this folder.
- 3
Create / Update
Save the category.
What to do next
Upload cliparts into the category, then check the Design Lab with that printing type selected.