
How to Upload Custom Clipart Using Custy?
Cliparts are pictures shoppers can add in the Design Lab from your library. You upload them once under Designs, then reuse them on many products.
You need at least one clipart category before you can save a clipart. Changing a clipart later does not delete your products.
Step 1: Open Manage Cliparts
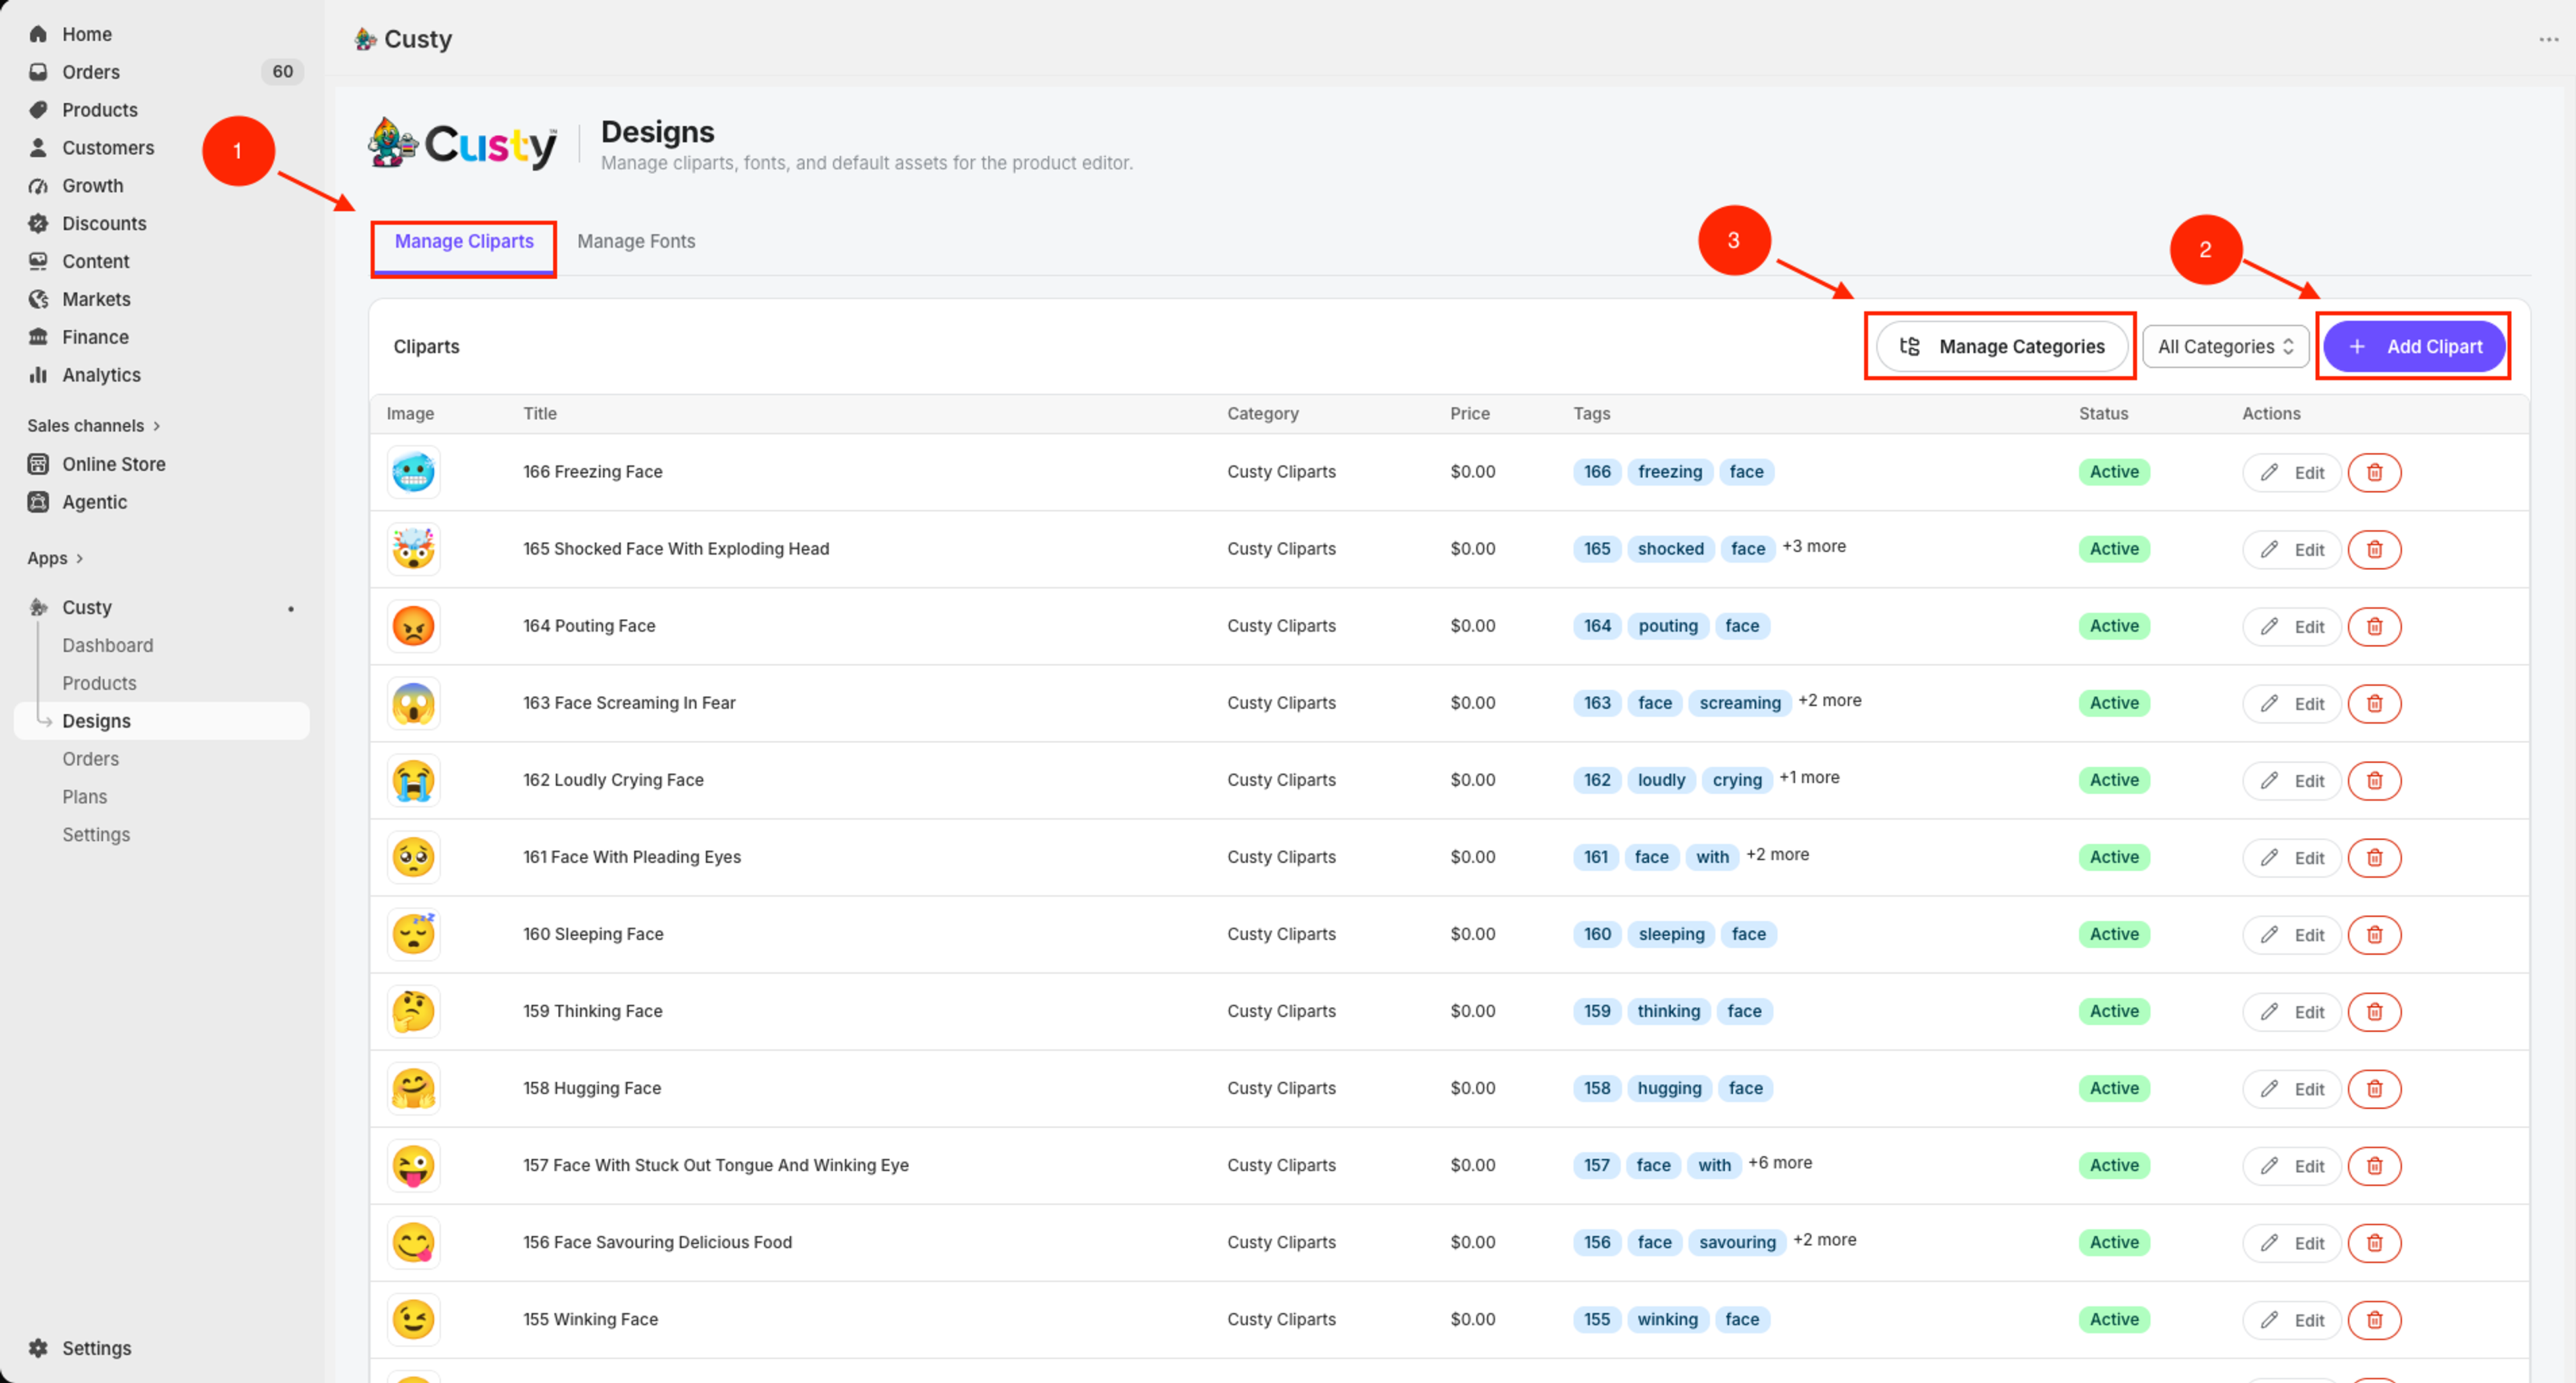
In Custy, click Designs on the left. Stay on the Manage Cliparts tab. You will see your clipart list and Add Clipart.
- Click Designs.
- Click Manage Cliparts if you are on Manage Fonts.
- Click Add Clipart.
No category yet?
Click Manage Categories, then Add Category. Type a Title. Click Create. Then come back and click Add Clipart.
 Full size
- 1
Manage Cliparts
This tab holds your clipart library.
- 2
Add Clipart
Click to upload a new picture.
- 3
Manage Categories
Create folders for your cliparts before you upload, if you need them.
Step 2: Fill in the clipart
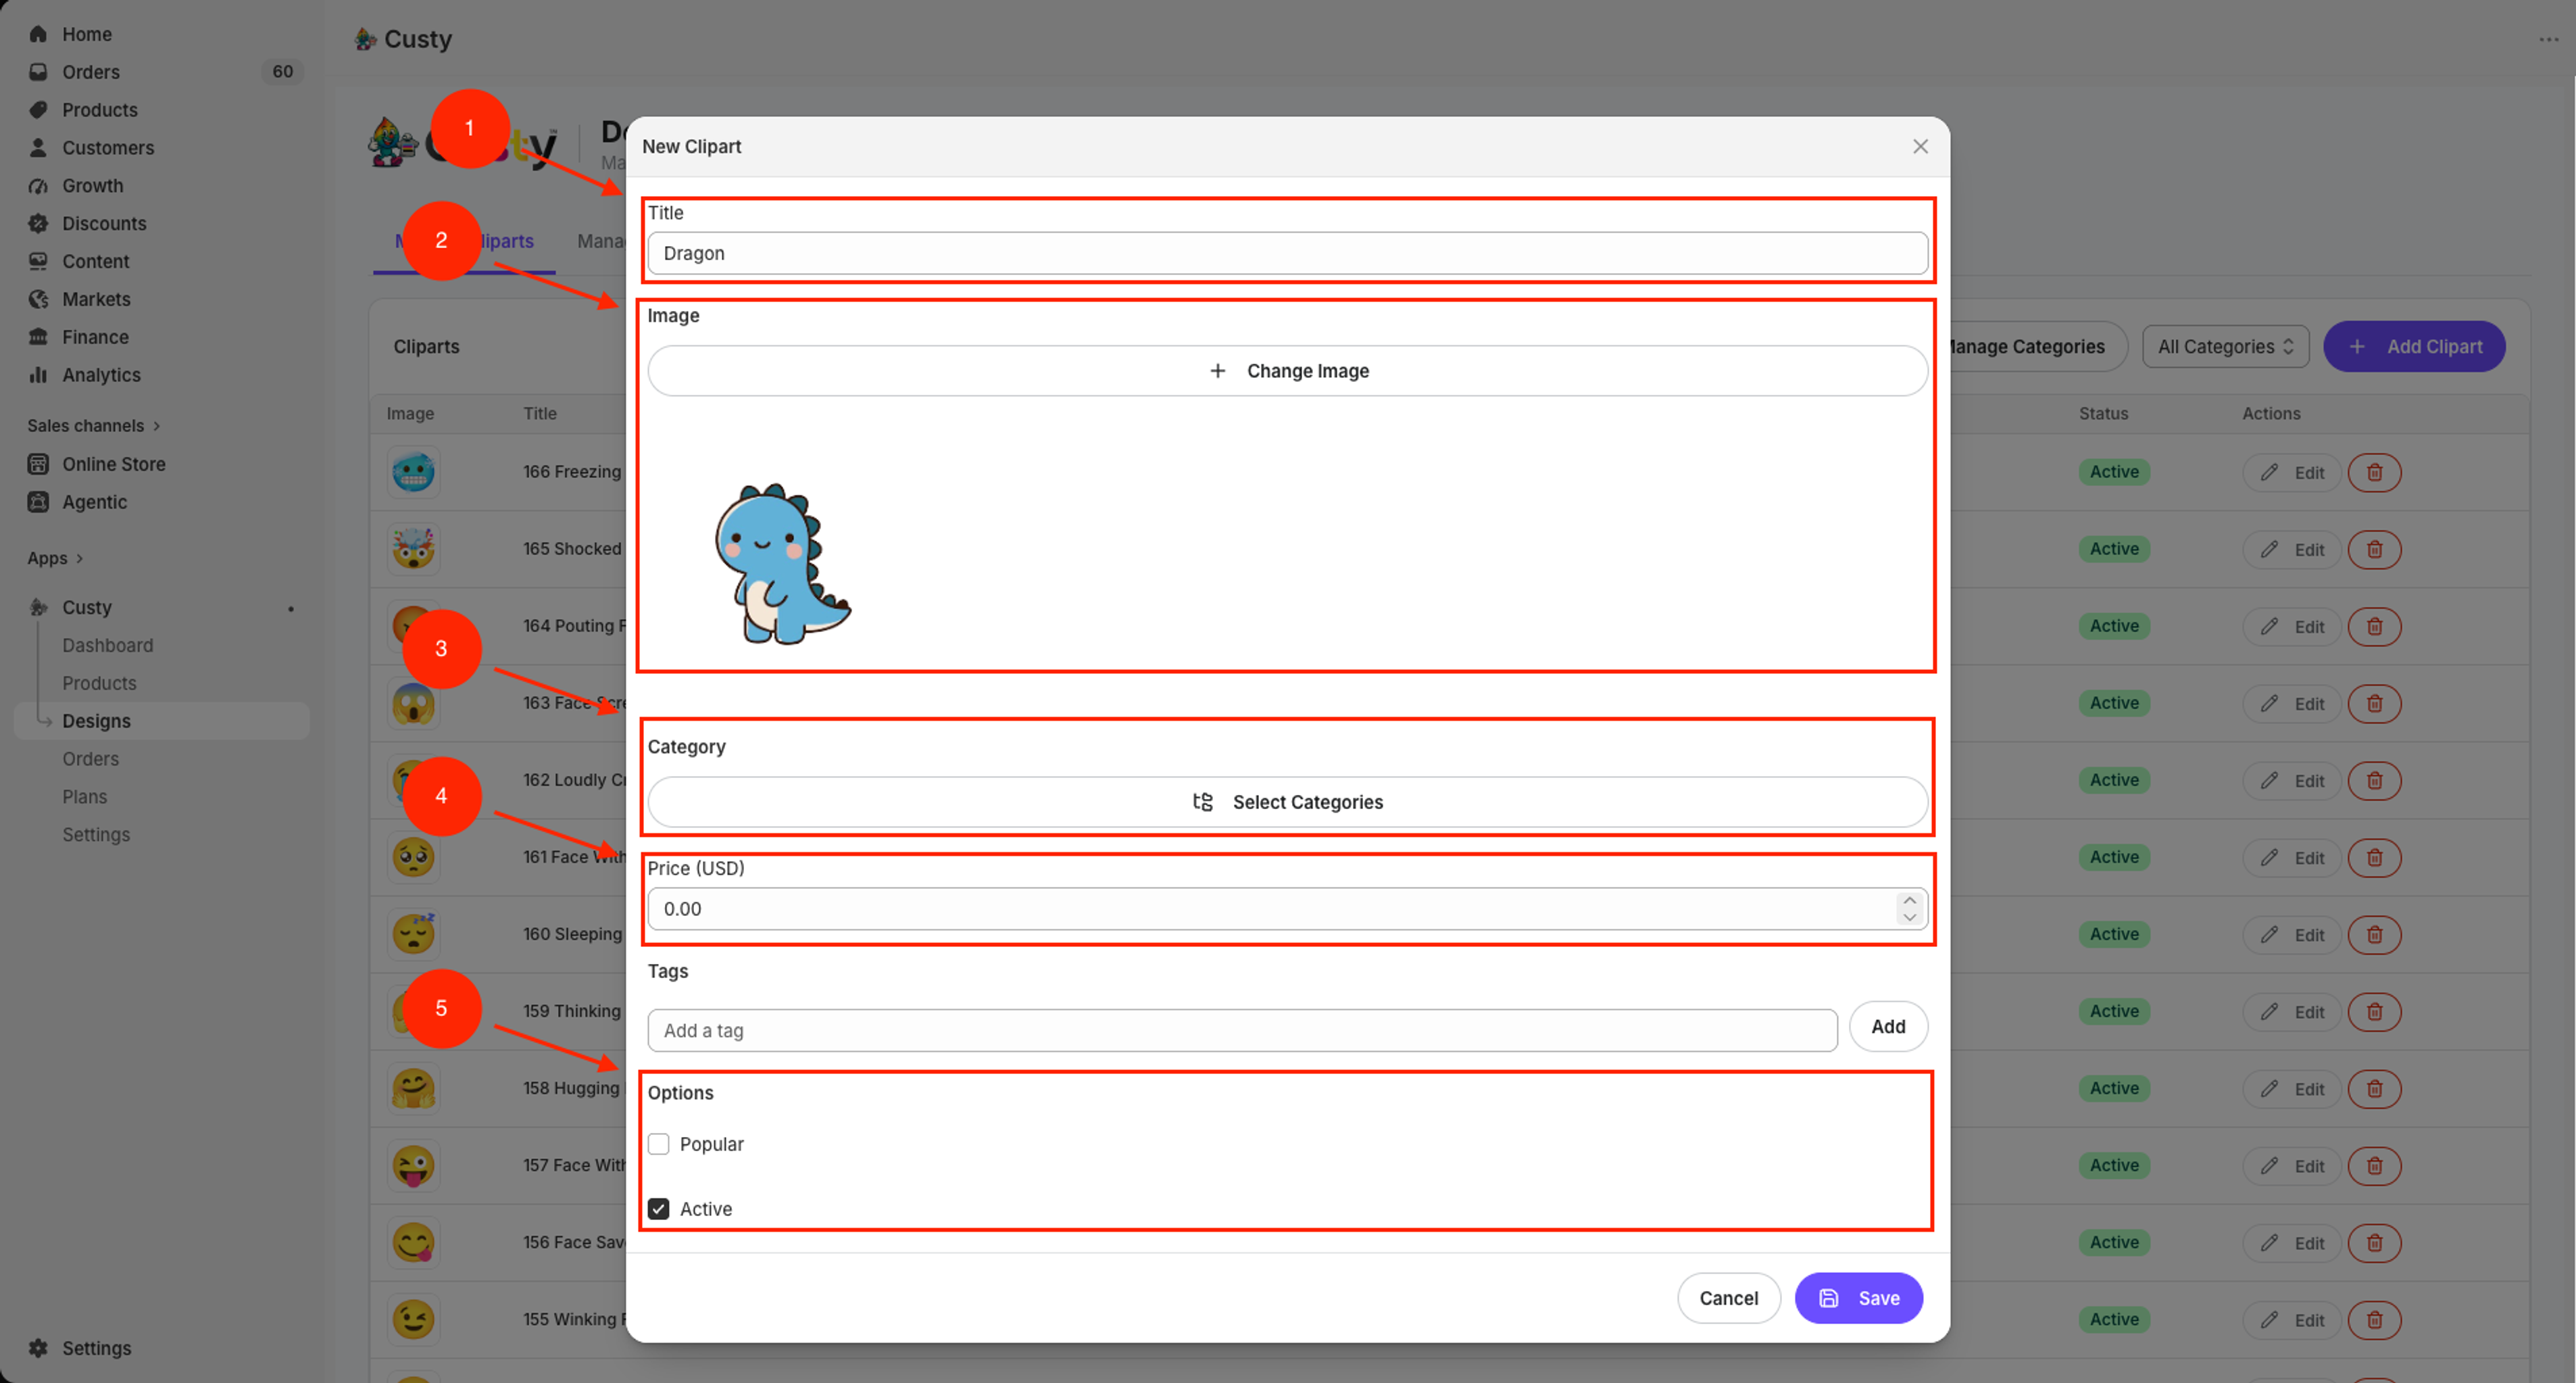
In New Clipart, fill the boxes. Leave anything you do not need at the default.
- Type a Title (required).
- Click Upload Image and pick a picture (png, jpeg, gif, svg, webp, or bmp).
- Pick a Category (required).
- Optional: type a Price (USD) if this clipart costs extra.
- Optional: add Tags and click Add.
- Optional: turn on Popular or Active. Leave Active on if shoppers should see it.
 Full size
- 1
Title
The name you see in your list.
- 2
Image
Upload or change the picture file.
- 3
Category
Pick one category for this clipart.
- 4
Price (USD)
Optional extra price for this clipart.
- 5
Popular / Active
Popular can highlight it. Active means shoppers can use it.
Step 3: Save
Click Save. If you are editing later, click Update. Your products stay safe.
- Click Save or Update.
What to do next
If some cliparts should only show for certain print methods, set printing types on the clipart category.