
How to Manage Font Categories and Subcategories?
Font categories are folders for your fonts. Make them under Designs → Manage Fonts → Manage Categories. You need a category before you can save a font.
Font categories do not have printing type limits. Those limits are only for clipart categories.
Step 1: Open Manage Categories
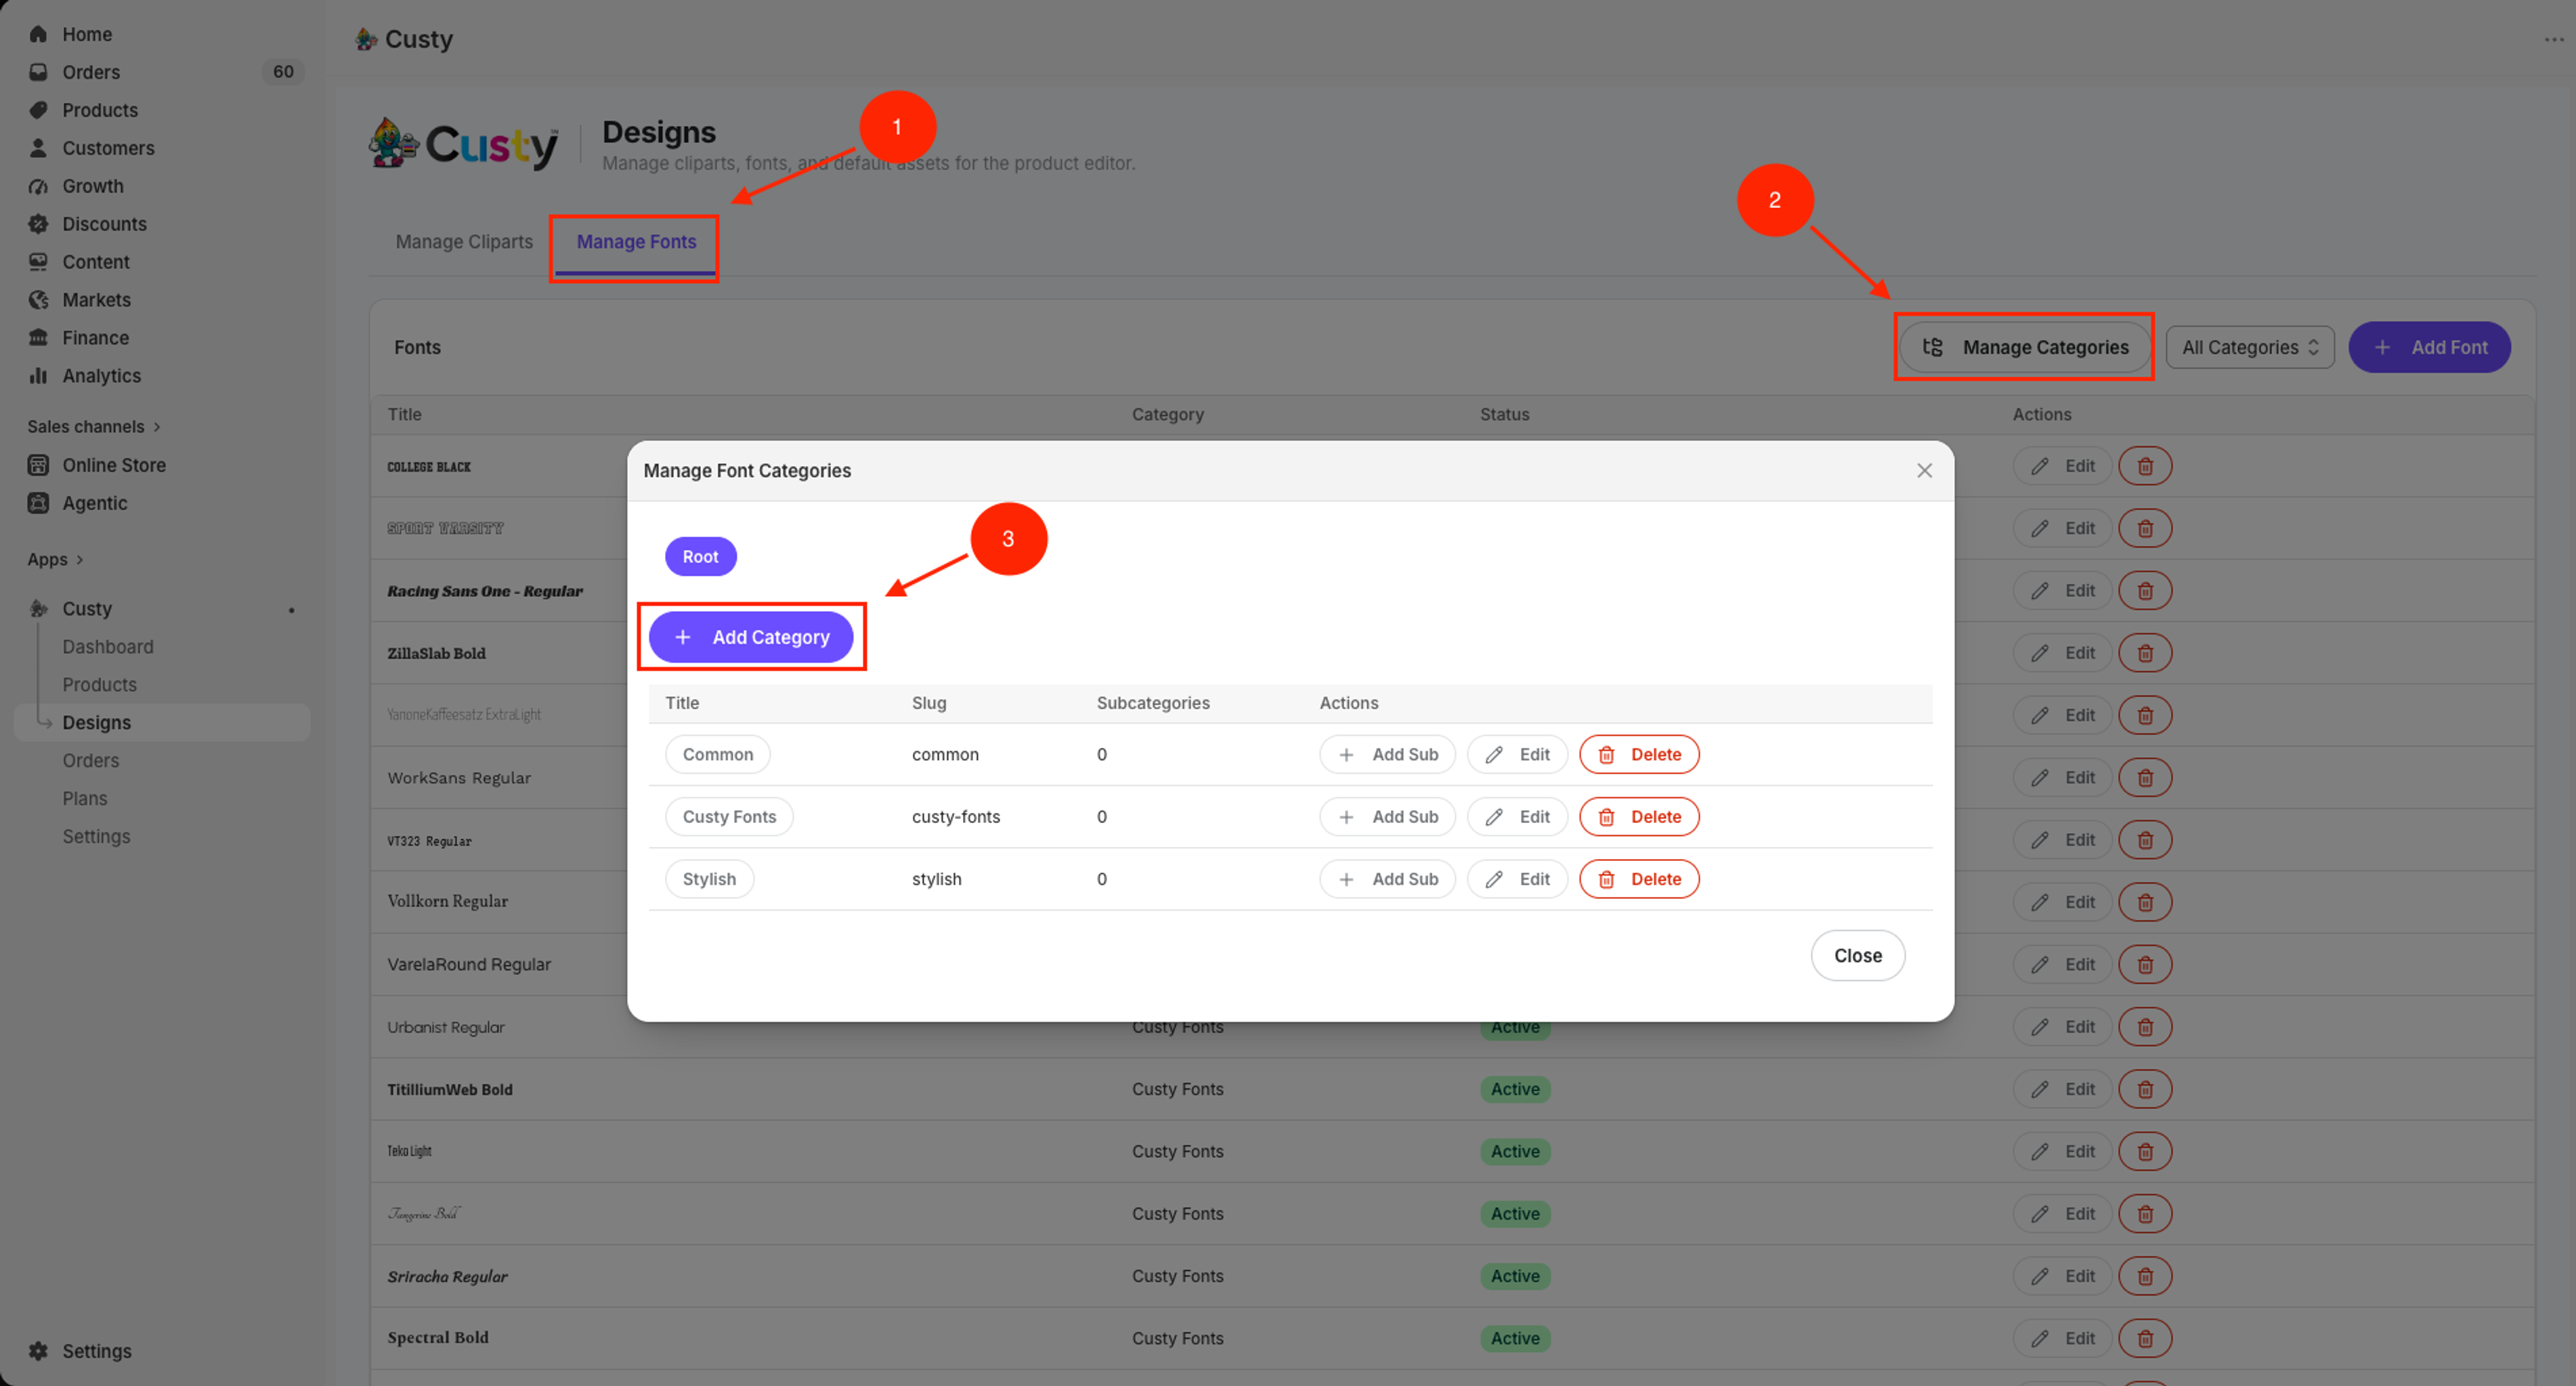
Click Designs, then Manage Fonts. Click Manage Categories.
- Click Designs.
- Click Manage Fonts.
- Click Manage Categories.
 Full size
- 1
Manage Fonts
This tab holds your fonts.
- 2
Manage Categories
Opens font folders and subfolders.
- 3
Add Category
Make a new top-level folder.
Step 2: Add a category or subcategory
Click Add Category for a top folder. Or click Add Sub on a row to nest a folder under that one.
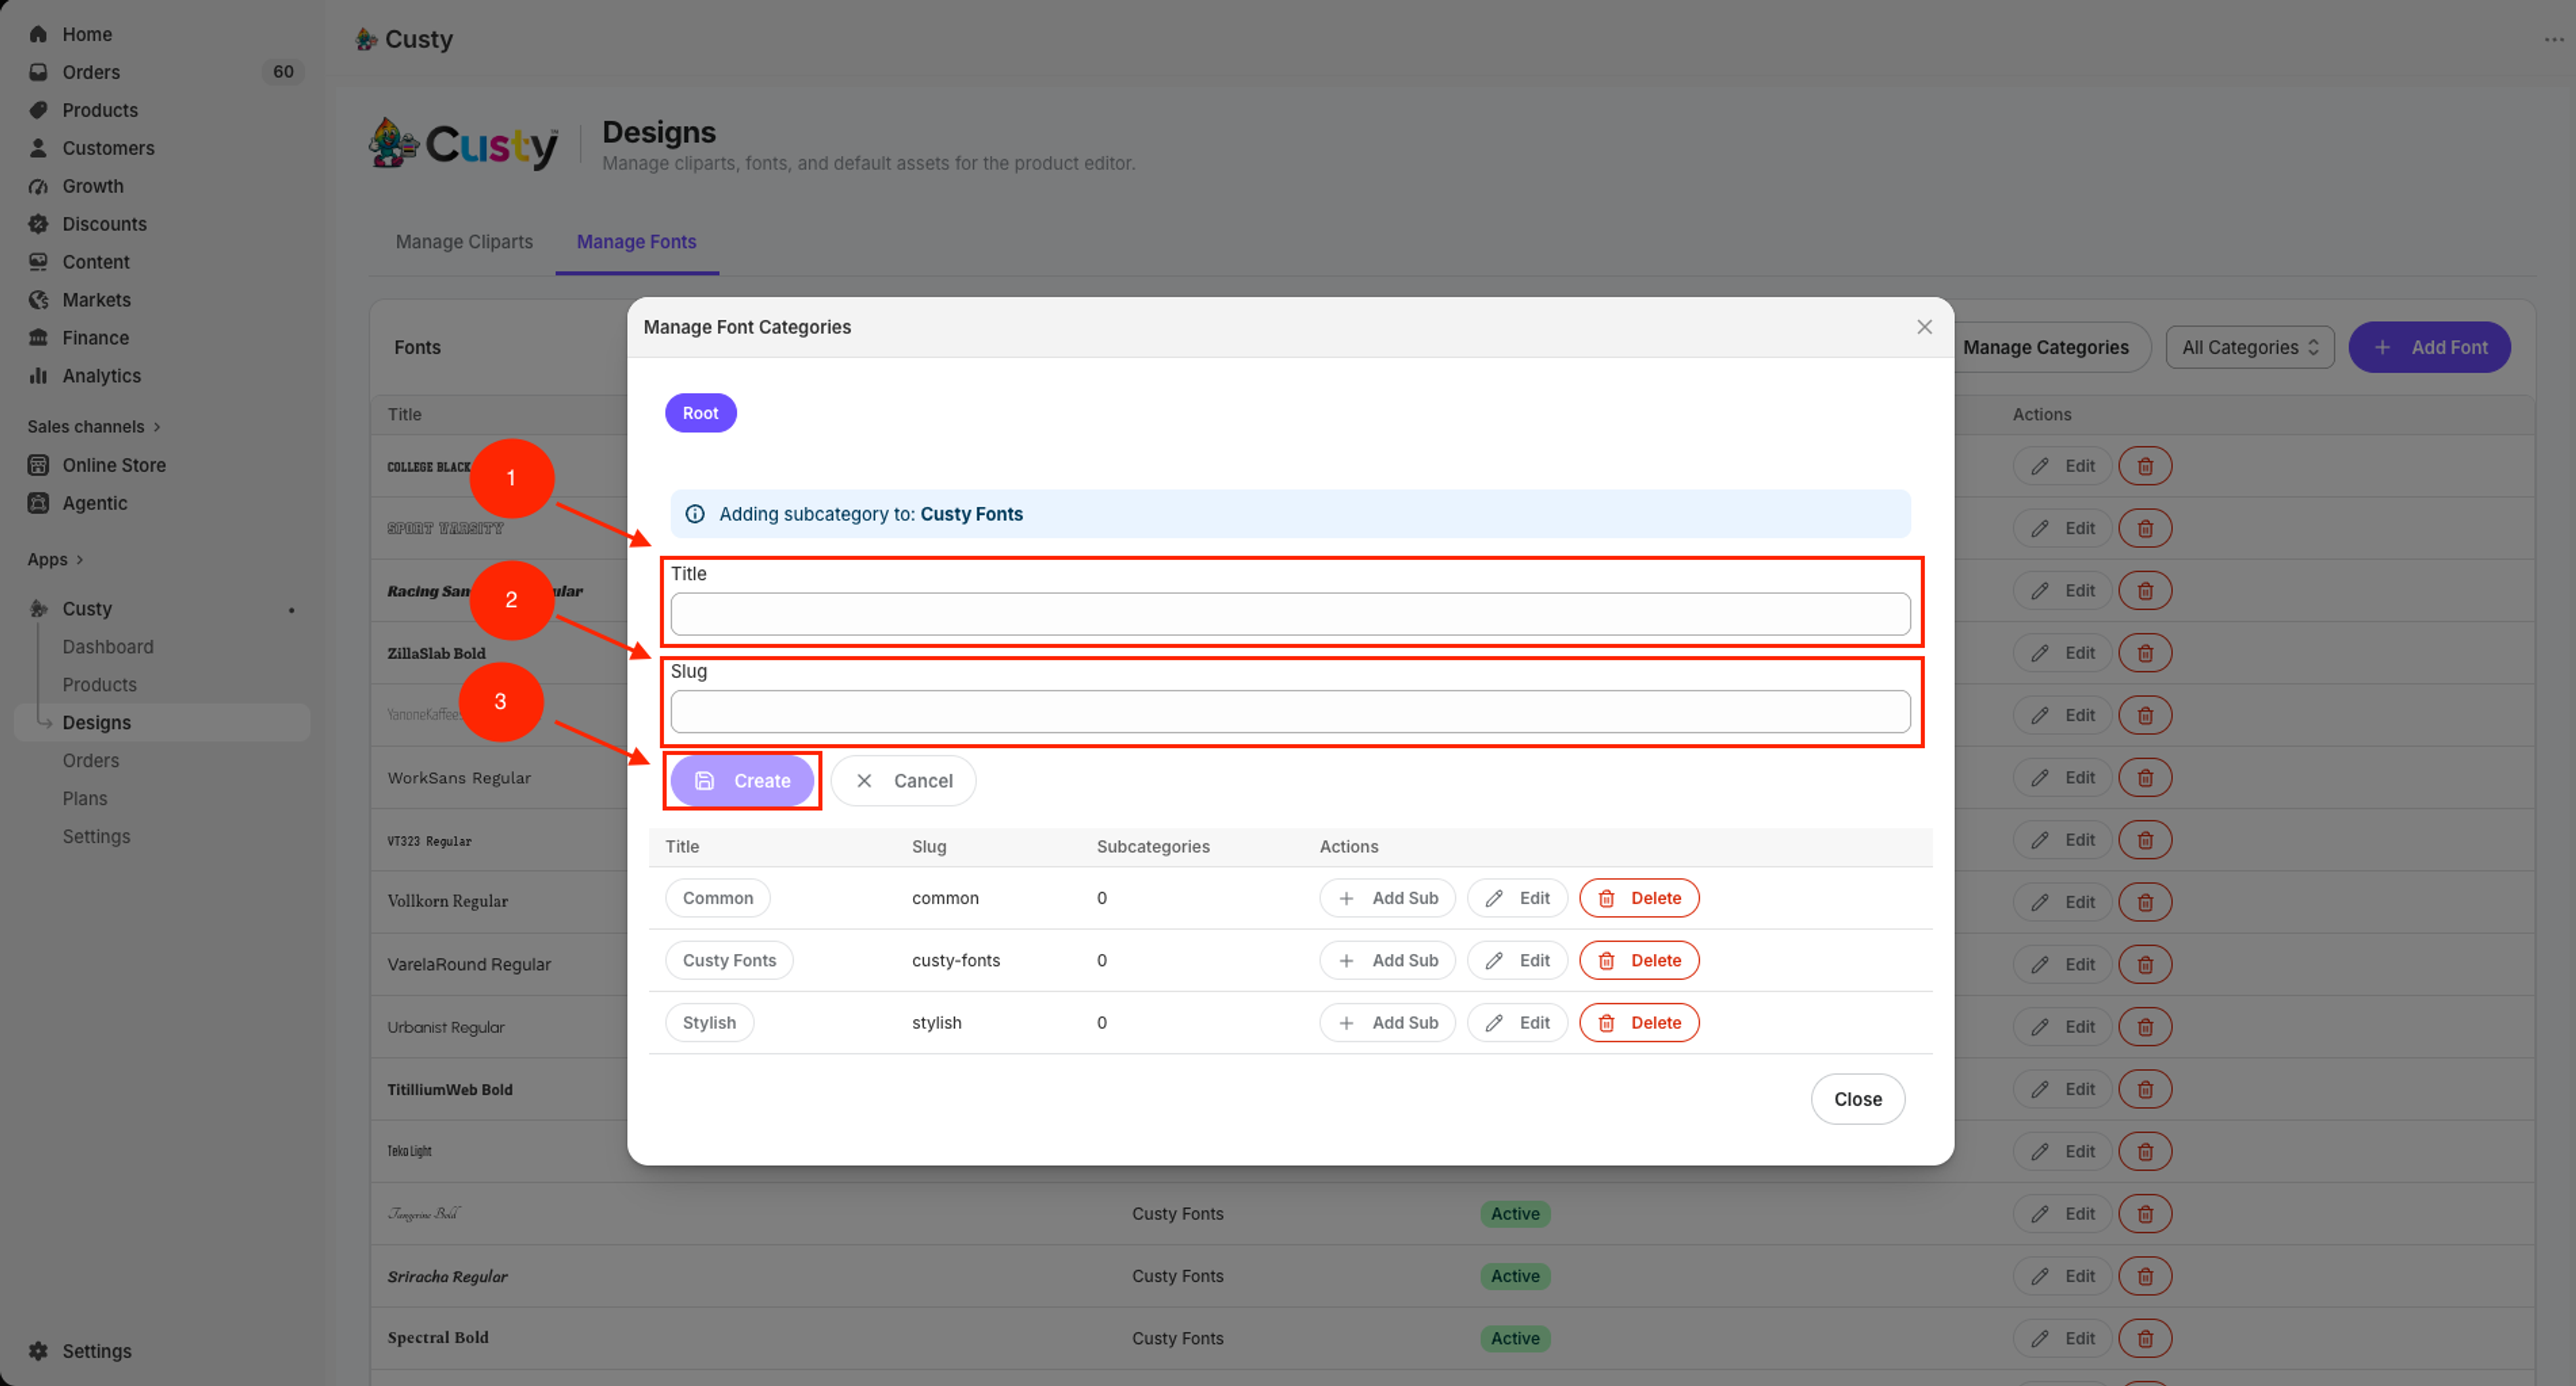
- Click Add Category, or Add Sub on a category row.
- Type a Title.
- Optional: type a Slug, or leave it empty so Custy makes one.
- Click Create.
Edit or delete
Click Edit to change a category. Click Delete to remove one. If fonts are still in that folder, move or delete them first.
 Full size
- 1
Title
The folder name you see in the list.
- 2
Slug
Optional. Leave empty to auto-generate.
- 3
Create / Update
Save the category.
What to do next
Upload fonts into your new categories.