
How to Install Custy?
Adding Custy is like installing an app on your phone. You click a few buttons. You do not need to write any code.
After this guide, Custy will be on your store. Next you will turn on a button so shoppers can see it. We will show you that later.
Follow these steps in order
Use the store where you sell your products. If you have more than one store, double-check the name at the top before you start. You will not break your store by installing an app.
Step 1: Open Shopify
Open your web browser. Go to Shopify and sign in, the same way you always do. Make sure you are looking at the right store.
Step 2: Click Apps
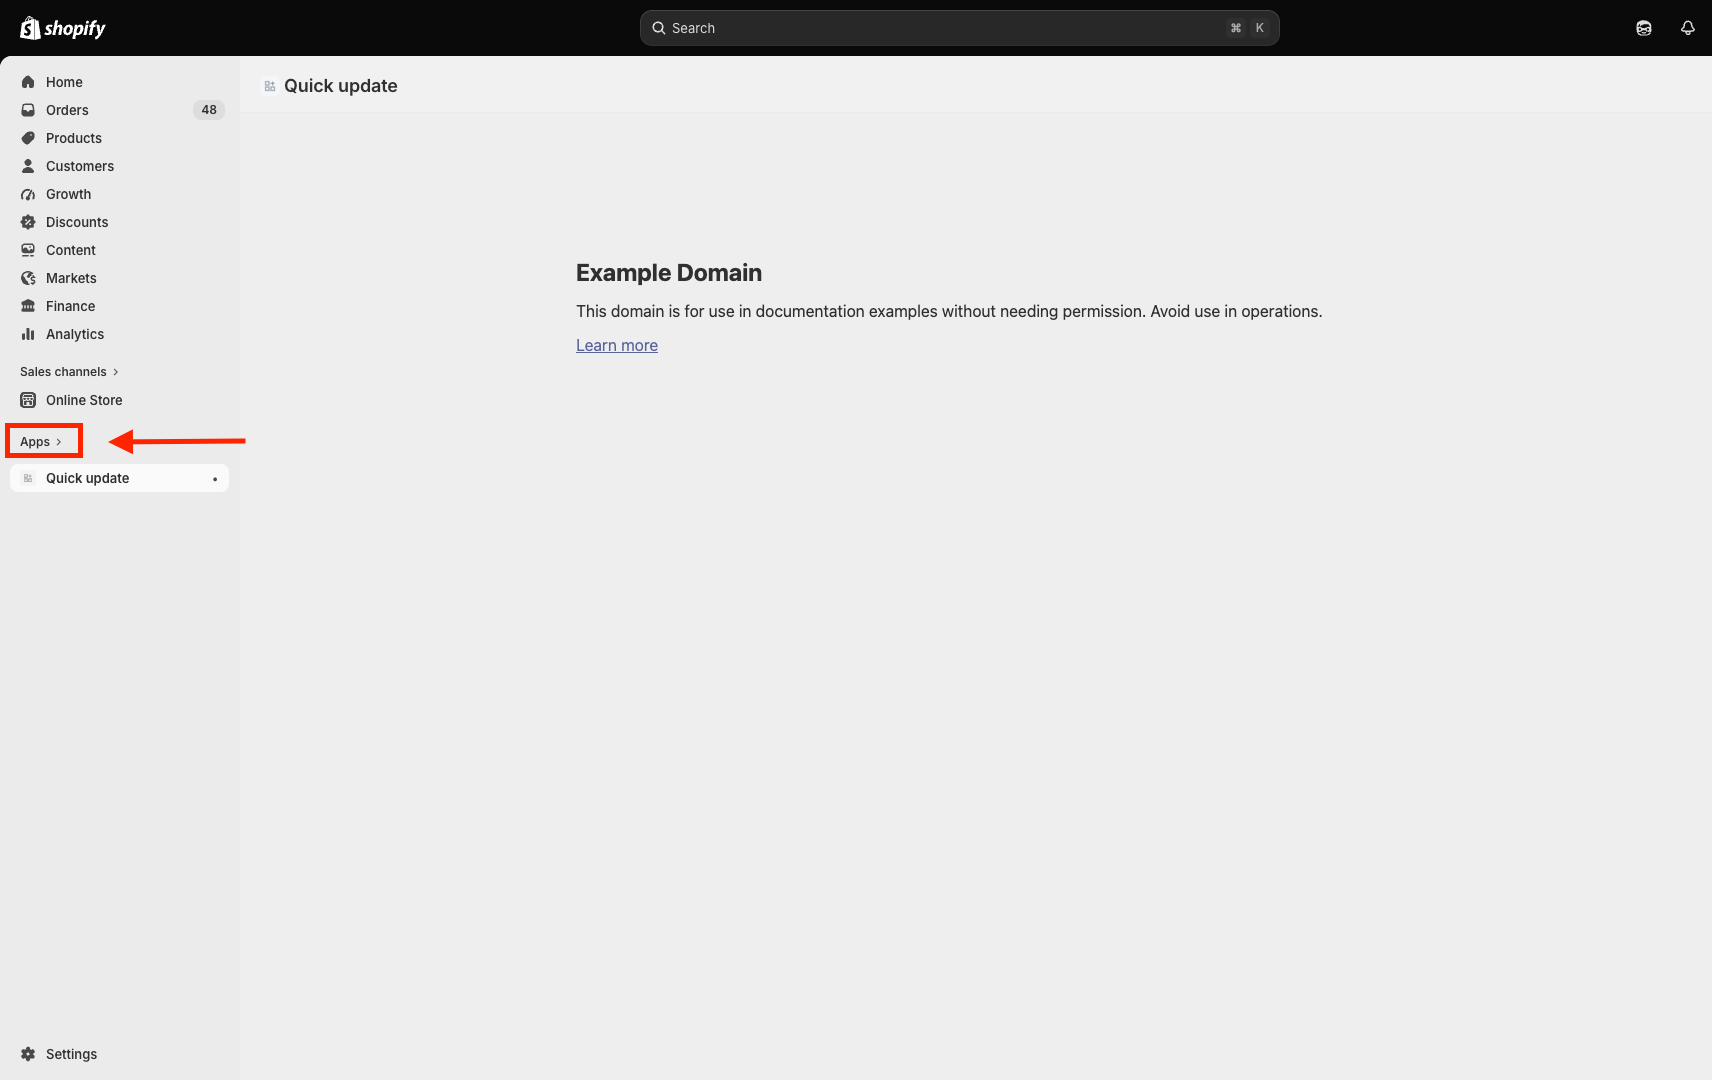
On the left side of the screen, look for the word Apps. Click it. The picture below shows where it is.
 Full size
- 1
Apps
Click Apps here. This is where you find and add apps.
Step 3: Find Custy
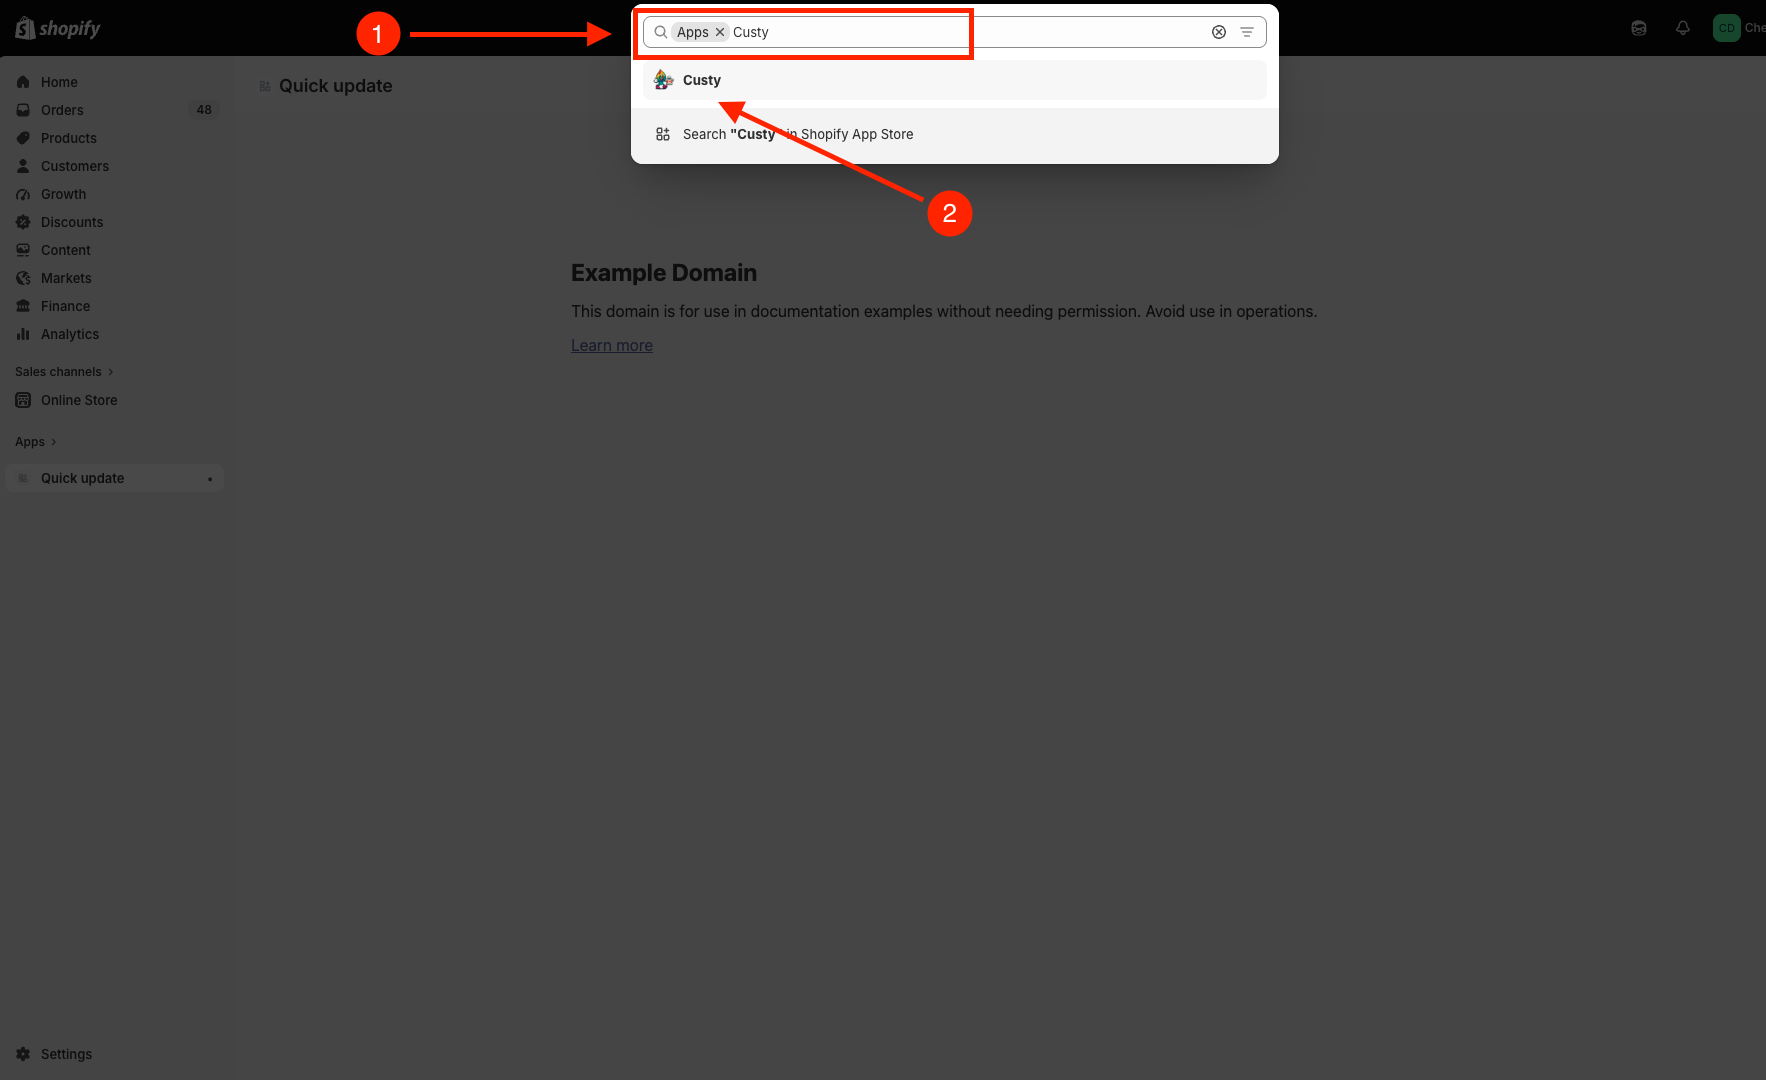
In the search box, type Custy. Click the Custy app when you see it. You can also open it from this link: apps.shopify.com/custy.
 Full size
- 1
Search
Type the word Custy in the search box.
- 2
Custy
Click the official Custy app in the list.
Step 4: Click Install
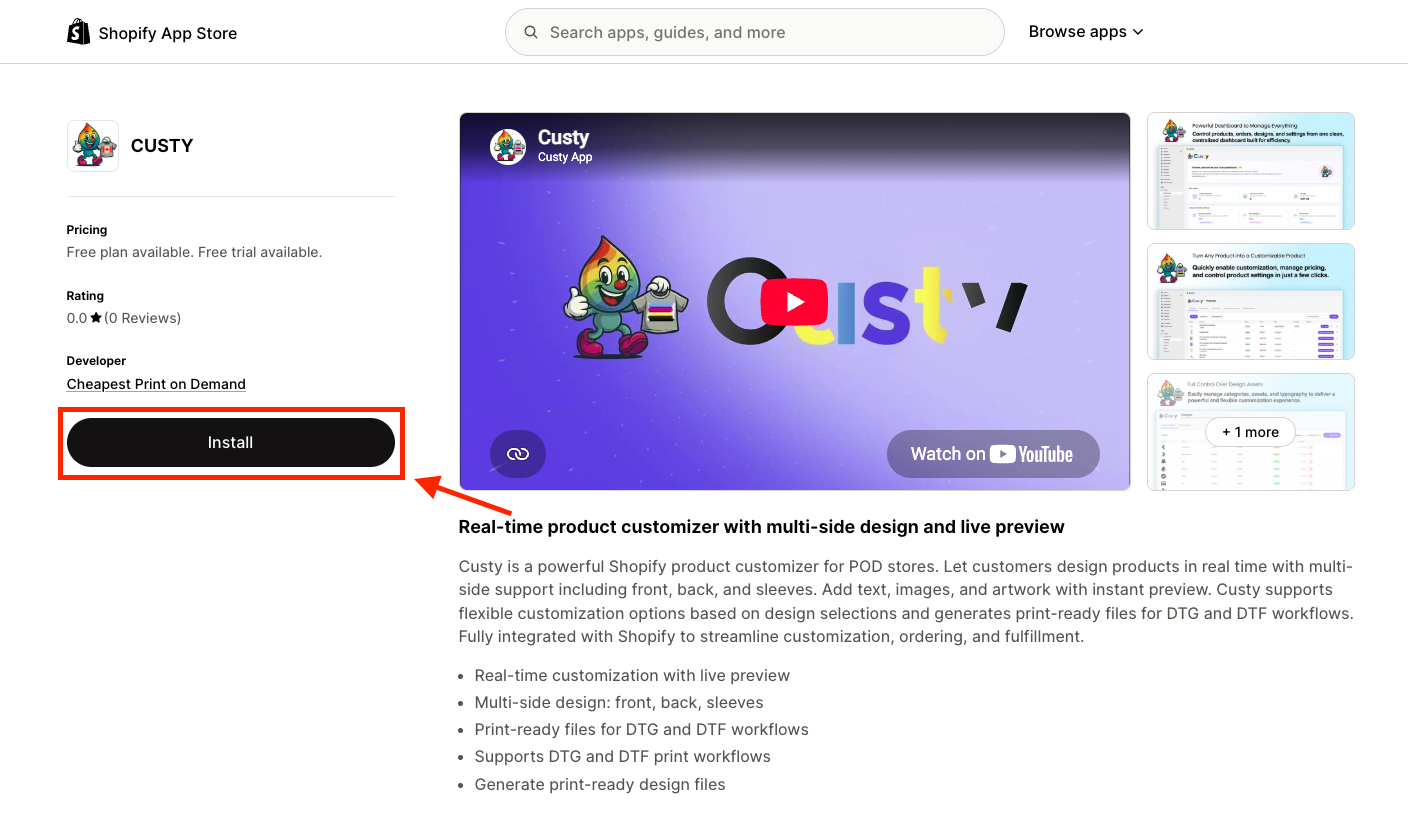
You will see a page about Custy. Find the button that says Install. Click it.
 Full size
- 1
Install
Click Install to add Custy to your store.
Step 5: Read what Shopify asks you to allow
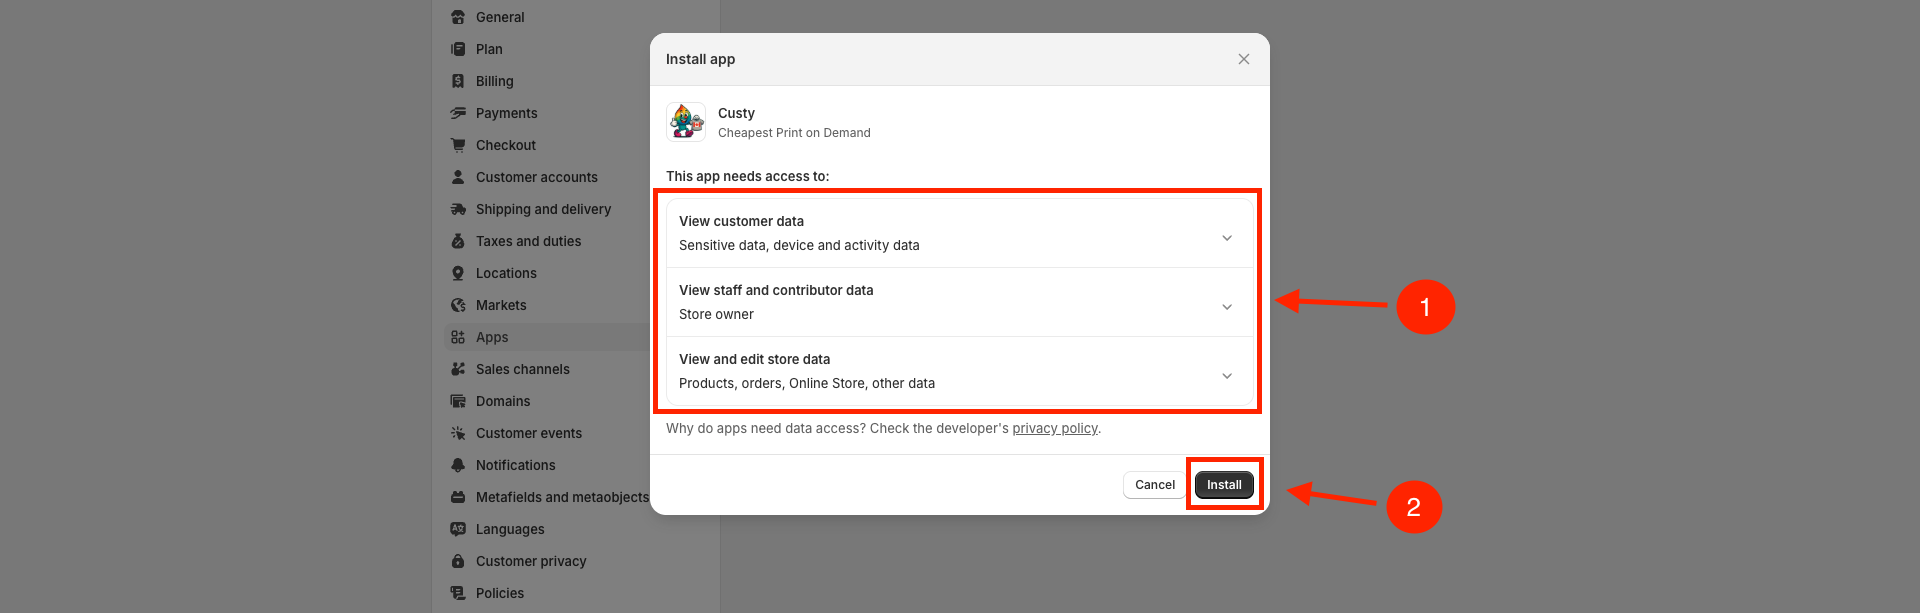
Shopify will show a list of things Custy needs to work (like products and orders). This is normal for every app. Read it if you want. You are not giving away your store. You are letting Custy help with custom products.
Step 6: Click Install again to finish
Click Install one more time on that screen. Shopify will open Custy for you. You did it.
What Custy sets up for you
Custy makes a design page for shoppers and connects a few settings in the background. You do not need to do that by hand. If the design page ever goes missing, open Settings in Custy and click Sync Shopify Resources.
 Full size
- 1
What Custy can use
This list is what Custy needs to work with your products and orders.
- 2
Install
Click Install to finish.
Step 7: Pick a plan
Custy will usually open a page of plans. Pick one so you can keep going. Click Start Free for the free plan. Or on Starter or Pro, click Start free trial or Subscribe. If Shopify asks you to approve a charge, click to approve it.
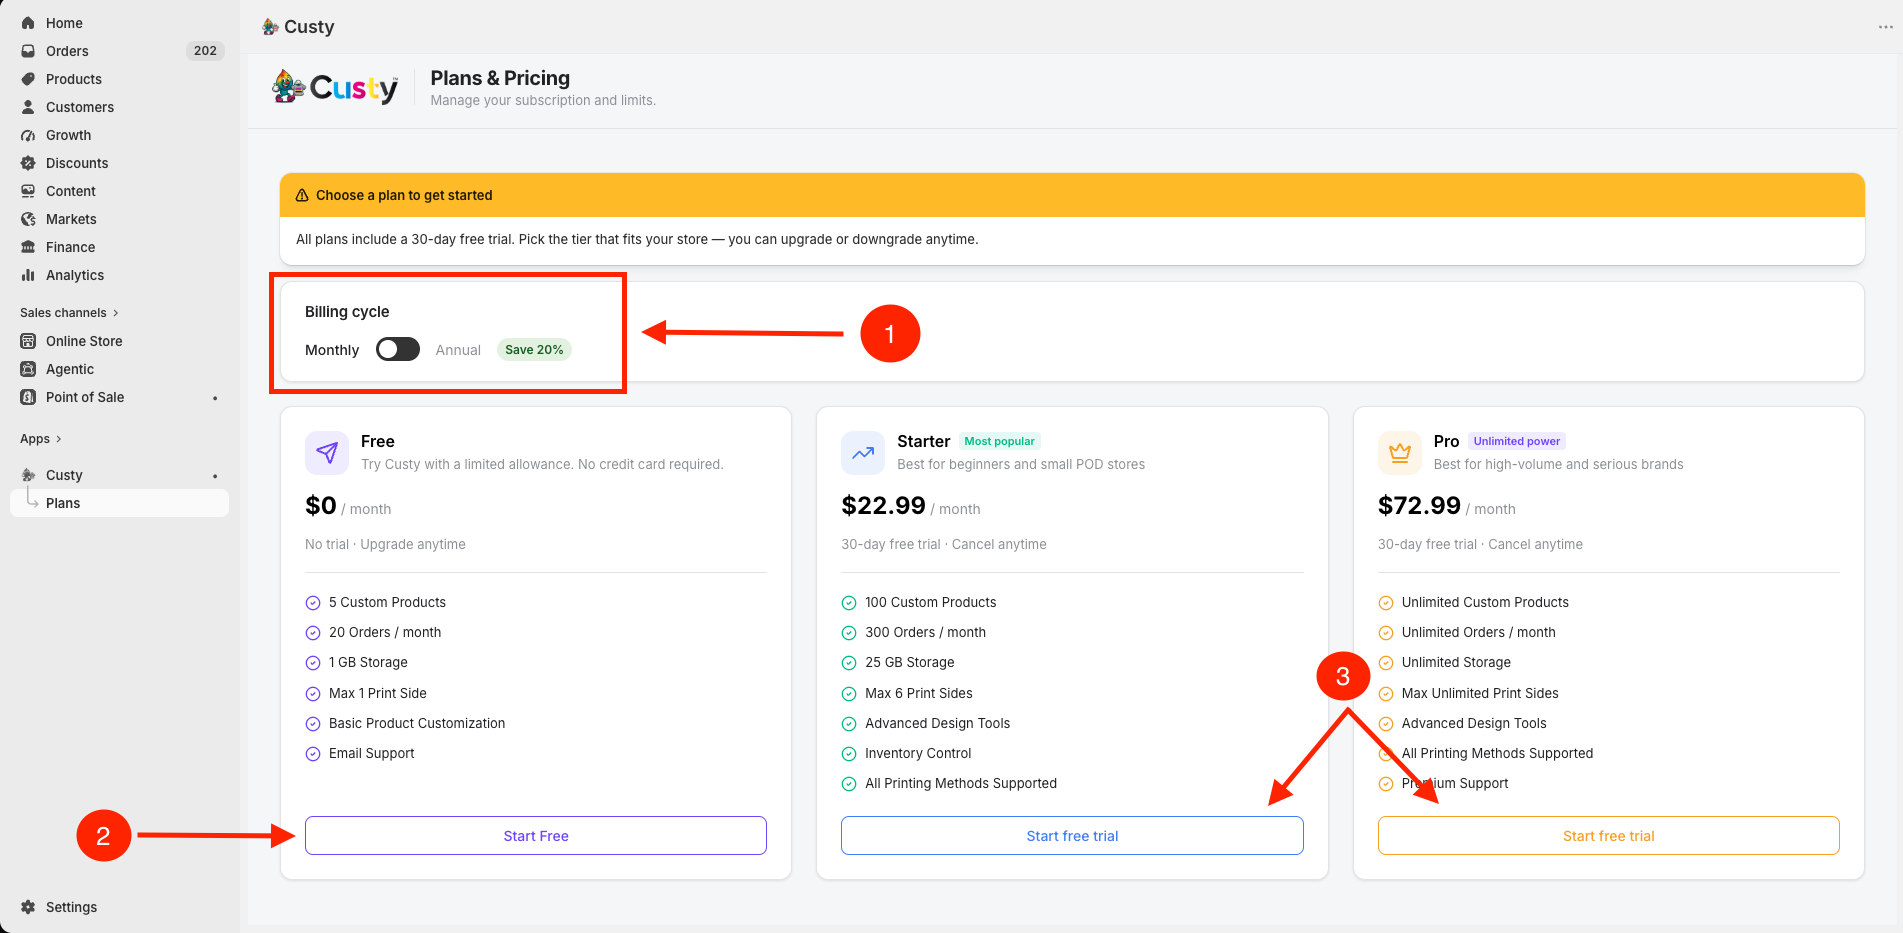 Full size
- 1
Monthly or Annual
Choose how often you want to be billed. Annual shows Save 20%.
- 2
Free
Click Start Free if you want the free plan. There is no trial on Free.
- 3
Starter or Pro
Click Start free trial (one time per store) or Subscribe.
You are done with install
Custy is on your store. Nice work. Next: start the free trial if you want a paid plan, turn Custy on in your theme, then set up your first product so shoppers can design.
Which browser to use
Use a normal, up-to-date browser such as Chrome, Safari, Firefox, or Edge. Setting things up is easiest on a computer. Shoppers can design on a phone or a computer.
If something looks wrong, email info@CheapestPOD.ca or use Contact in this Help Centre. We are happy to help.